Wider suspension arms
-
fredswain
- Approved Member
- Posts: 1166
- Joined: Fri Mar 11, 2011 4:20 pm
- Location: Houston
- Been thanked: 4 times
Re: Wider suspension arms
I'm more inclined to do a B5 front compatible arm with the truck nose length arms only. I think the overall arm lengths front to rear would be a better match than the standard arms since they'd have to get shorter than I have them.
Raborn Racing Originals Shapeways store
-
JK Racing

- Approved Member
- Posts: 4619
- Joined: Thu Jul 19, 2007 2:32 pm
- Location: Placentia, CA
- Has thanked: 139 times
- Been thanked: 246 times
Re: Wider suspension arms
No need to resize, drop them into photo bucketBeau S wrote:I posted some quick pics on Rc10 Vintage Mania group, on FB. They need to be resized before I can post them here, but I will take some better pics & get the here soon.


--Joey --
Vintage A&L and Factory Works
Old School Racer & Vintage RC Car nut
JKRacingRC.com
Vintage A&L and Factory Works
Old School Racer & Vintage RC Car nut
JKRacingRC.com
-
fredswain
- Approved Member
- Posts: 1166
- Joined: Fri Mar 11, 2011 4:20 pm
- Location: Houston
- Been thanked: 4 times
Re: Wider suspension arms
That's going to be an interesting way to cut down the aluminum tub.
Raborn Racing Originals Shapeways store
-
JK Racing
- Approved Member
- Posts: 4619
- Joined: Thu Jul 19, 2007 2:32 pm
- Location: Placentia, CA
- Has thanked: 139 times
- Been thanked: 246 times
Re: Wider suspension arms
I'd like a thread on that started to look over it closer 
--Joey --
Vintage A&L and Factory Works
Old School Racer & Vintage RC Car nut
JKRacingRC.com
Vintage A&L and Factory Works
Old School Racer & Vintage RC Car nut
JKRacingRC.com
Re: Wider suspension arms
Fred.. the sharpie in the pic is just for the nose-plate for trimming the extra holes. With my servo setup, if I used the long nose option, it would throw steering angles out of whack.
I have more sharpie on the rest of the chassis also, but I wont be able to cut it till the wknd
Thanks for adding the pics Joey! I'll start a build thread when I get all my materials. lol.. I'm not a fan of posting lil by lil bcz it keeps reminding that I'm not done with it yet.. bcz im slacking lol
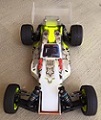
Here are a few better shots of the arms mounted! Don't pay attn to the poor dye job. They will be solid black before the end of the night. There was a learning curve with dying these arms... they are super hydrophilic.. almost sponge-like. I learned a lot of cool things about how the arms work with water. Thats a separate post though.
A few things about mounting the rear-arms..
1) they do need the longer original inner pin
2) reaming the holes out as Fred said to do was perfect instruction
3) They fit perfectly with original rear pivot mounts. The re-re mounts have a slight angle by the outer screw holes that lightly rub the arm. minor sanding will fix it. Also, the re-re mounts seem to move the hinge pin 0.5-1mm closer to the chassis.
4) shocks mounting to them was a breeze.. They line up very nice with the newer shock eyelet ball. Absolutely no need for for the ball w/dove-tail shock end.
And Fred.. I like the chassis stops bcz they let me know where I need to limit my down-drop. When they hit the chassis, my the ball-pin of the B4 driveshaft is close to the edge but still fully enganged through the whole rotation. I also think the shock mount holes are perfectly placed. Great job, sir! Your time and thought show!
I have more sharpie on the rest of the chassis also, but I wont be able to cut it till the wknd
Thanks for adding the pics Joey! I'll start a build thread when I get all my materials. lol.. I'm not a fan of posting lil by lil bcz it keeps reminding that I'm not done with it yet.. bcz im slacking lol
Here are a few better shots of the arms mounted! Don't pay attn to the poor dye job. They will be solid black before the end of the night. There was a learning curve with dying these arms... they are super hydrophilic.. almost sponge-like. I learned a lot of cool things about how the arms work with water. Thats a separate post though.
A few things about mounting the rear-arms..
1) they do need the longer original inner pin
2) reaming the holes out as Fred said to do was perfect instruction
3) They fit perfectly with original rear pivot mounts. The re-re mounts have a slight angle by the outer screw holes that lightly rub the arm. minor sanding will fix it. Also, the re-re mounts seem to move the hinge pin 0.5-1mm closer to the chassis.
4) shocks mounting to them was a breeze.. They line up very nice with the newer shock eyelet ball. Absolutely no need for for the ball w/dove-tail shock end.
And Fred.. I like the chassis stops bcz they let me know where I need to limit my down-drop. When they hit the chassis, my the ball-pin of the B4 driveshaft is close to the edge but still fully enganged through the whole rotation. I also think the shock mount holes are perfectly placed. Great job, sir! Your time and thought show!
- Attachments
-
-
-
-
-
fredswain
- Approved Member
- Posts: 1166
- Joined: Fri Mar 11, 2011 4:20 pm
- Location: Houston
- Been thanked: 4 times
Re: Wider suspension arms
It looks like you need to leave them in the dye longer. I go heavy on the dye to water and bring it to a rolling boil with the parts in it. I let it roll about a minute and then kill the heat. I let it naturally cool down over an hour or more before removing the parts. Sometimes I'll just leave it overnight.
Raborn Racing Originals Shapeways store
Re: Wider suspension arms
My mistake with dying was thinking they might turn black instantly, and I was going to see if I could just tint them - smokey color. So, I was light on the amount of dye I originally added to the boiling water. Keeping the story short, I kept adding more and more dye over 2hrs, and the arms basically stopped taking anymore color. Thats when I broke at a really small sauce pan, poured a 1/4cup of black Rit Dye in the boiling water, mixed well, then took the arms out of the other sauce pan and added to the new heavy brew. ~2hrs..
The shaded they are is as dark as they got, but other items are solid black.
What I noticed:
These are soak up water like a sponge. You can actually see the arm change color as the water evaporates or soaks into it. That being said, bcz I had already saturated the arms with lightly tinted water before throwing them in to the New Brew, the more concentrated dye wasnt taken in much. Now that I've let the arms completely dryout.. im about to throw the dry arms into the boiling Heavy Dye Brew. Im hoping im right and they'll dye soild.. and im going to let them cool in there too! lol
They do take dye super quick. So guys posted pics of there tea/coffee dip 3D printed arms.. just fun crazy stuff!
-
fredswain
- Approved Member
- Posts: 1166
- Joined: Fri Mar 11, 2011 4:20 pm
- Location: Houston
- Been thanked: 4 times
Re: Wider suspension arms
You can strengthen the arms by coating them with CA glue. It'll soak it right up. In addition to strengthening them, it'll also seal them.
Raborn Racing Originals Shapeways store
Re: Wider suspension arms
sweet!!! Wow.. that opens up the idea you can selectively strengthen areas of the arm with CA..
I had wondered about sealing them. Not bcz they need to be, but just curious. I had even wondered about adding a lil oil or WD40 into the hinge pin holes, self-lubricating arms.
Coolstuff!
I had wondered about sealing them. Not bcz they need to be, but just curious. I had even wondered about adding a lil oil or WD40 into the hinge pin holes, self-lubricating arms.
Coolstuff!
-
fredswain
- Approved Member
- Posts: 1166
- Joined: Fri Mar 11, 2011 4:20 pm
- Location: Houston
- Been thanked: 4 times
Re: Wider suspension arms
Is the back end at the correct width in relation to your other car? Do I need to slightly shorten the rear arms so there is more room for the cvd's in the outdrive? I don't know how many axle shims you used in what places but I used the B2 shim set on the mockup which had 3 skinny shims behind the hub and 3 in front behind the hinge pin. I'm assuming that by shimming differently you could push the axle back in a little more if necessary.
Raborn Racing Originals Shapeways store
Re: Wider suspension arms
This evening,
I'll take a couple of pics to show the pin placement.
Your mock up was on the money.
There is a lot flexibility with moving the axle to adjust outdrive position per amount of drop-down - if wanted.
I'll take a couple of measurements too, since I noticed the difference b/t the Original Mounts & Re-re Mounts. I think the re-re mounts automaticly set the drives slightly more in the outdrive.
-
fredswain
- Approved Member
- Posts: 1166
- Joined: Fri Mar 11, 2011 4:20 pm
- Location: Houston
- Been thanked: 4 times
Re: Wider suspension arms
I didn't think they needed any changing but I wanted to be sure.
Raborn Racing Originals Shapeways store
Re: Wider suspension arms
no changes needed.. I haven't been able to put any time in to it in a while. Will try to get some track measurements and tips posted soon. tips for the re-re vs original mounts..
-
fredswain
- Approved Member
- Posts: 1166
- Joined: Fri Mar 11, 2011 4:20 pm
- Location: Houston
- Been thanked: 4 times
Re: Wider suspension arms
It looks like the B4 and B5 outdrives are a little wider than the old stealth. The B4 cvd's are too short for the long wheelbase. Fortunately X Factory has two sets of longer cvd's . The X6^3 shafts might be perfect. I'm going to buy a set to try out.
Raborn Racing Originals Shapeways store
Create an account or sign in to join the discussion
You need to be a member in order to post a reply
Create an account
Not a member? register to join our community
Members can start their own topics & subscribe to topics
It’s free and only takes a minute
Sign in
-
- Similar Topics
- Replies
- Views
- Last post
-
- 14 Replies
- 3121 Views
-
Last post by Chewbacca
-
- 2 Replies
- 806 Views
-
Last post by reign79
-
- 5 Replies
- 1238 Views
-
Last post by dbs179
-
- 1 Replies
- 662 Views
-
Last post by Cplus
-
- 0 Replies
- 917 Views
-
Last post by mikea96
-
- 2 Replies
- 711 Views
-
Last post by RC104ever
-
- 5 Replies
- 1268 Views
-
Last post by TheSpeedway
-
- 3 Replies
- 1121 Views
-
Last post by mikea96
Who is online
Users browsing this forum: No registered users and 1 guest