Winter Budget Beater RC10EGT
-
Toaster

- Approved Member
- Posts: 422
- Joined: Thu Jul 26, 2007 10:55 pm
- Location: Toronto, ON
- Has thanked: 473 times
- Been thanked: 136 times
Re: Winter Budget Beater RC10EGT
Completed a hardware swap to the correct front tower. Gave everything a good scrub and although the tower was a used one laying around, it is the correct ‘thick’ version and appears to have cleaned up pretty well.
- Attachments
-
I come for the RC10's but stay for the Yokomo's 
Current projects:
1993 WCS Faux-komo
1994 Yokomo Box-Art
RC10GT Restoration
Current projects:
1993 WCS Faux-komo
1994 Yokomo Box-Art
RC10GT Restoration
-
Toaster
- Approved Member
- Posts: 422
- Joined: Thu Jul 26, 2007 10:55 pm
- Location: Toronto, ON
- Has thanked: 473 times
- Been thanked: 136 times
Re: Winter Budget Beater RC10EGT
Some parts I left in the peroxide bath but these were white enough at least in my humble opinion for this project to start throwing the front together.
- Attachments
-
-
I come for the RC10's but stay for the Yokomo's
Current projects:
1993 WCS Faux-komo
1994 Yokomo Box-Art
RC10GT Restoration
Current projects:
1993 WCS Faux-komo
1994 Yokomo Box-Art
RC10GT Restoration
-
Toaster
- Approved Member
- Posts: 422
- Joined: Thu Jul 26, 2007 10:55 pm
- Location: Toronto, ON
- Has thanked: 473 times
- Been thanked: 136 times
Re: Winter Budget Beater RC10EGT
The peroxide bath seems to have done the trick. Not mint but way better than how they started out. Cleaned in warm water with a toothbrush and dish soap before dunking in hi-test 40 volume peroxide.
- Attachments
-
-
-
I come for the RC10's but stay for the Yokomo's
Current projects:
1993 WCS Faux-komo
1994 Yokomo Box-Art
RC10GT Restoration
Current projects:
1993 WCS Faux-komo
1994 Yokomo Box-Art
RC10GT Restoration
-
Toaster
- Approved Member
- Posts: 422
- Joined: Thu Jul 26, 2007 10:55 pm
- Location: Toronto, ON
- Has thanked: 473 times
- Been thanked: 136 times
Re: Winter Budget Beater RC10EGT
Started on the stealth assembly, I won’t apply any lube until I figure out if this thing is going to run or just hit the shelf. The gearbox was also missing some pieces around the slipper assembly so I am digging through bins of screws, washers etc
- Attachments
-
-
-
I come for the RC10's but stay for the Yokomo's
Current projects:
1993 WCS Faux-komo
1994 Yokomo Box-Art
RC10GT Restoration
Current projects:
1993 WCS Faux-komo
1994 Yokomo Box-Art
RC10GT Restoration
-
Toaster
- Approved Member
- Posts: 422
- Joined: Thu Jul 26, 2007 10:55 pm
- Location: Toronto, ON
- Has thanked: 473 times
- Been thanked: 136 times
Re: Winter Budget Beater RC10EGT
Just a note for myself but the diff assembly is missing some pieces, thrust bearing and the correct torque control spring.
- Attachments
-
I come for the RC10's but stay for the Yokomo's
Current projects:
1993 WCS Faux-komo
1994 Yokomo Box-Art
RC10GT Restoration
Current projects:
1993 WCS Faux-komo
1994 Yokomo Box-Art
RC10GT Restoration
-
Toaster
- Approved Member
- Posts: 422
- Joined: Thu Jul 26, 2007 10:55 pm
- Location: Toronto, ON
- Has thanked: 473 times
- Been thanked: 136 times
Re: Winter Budget Beater RC10EGT
Well this is as far as I can make it for the most part and now I start the process of securing missing parts but pretty pleased how it cleaned up. I think the front shock pistons are the wrong length but have some research to do.
- Attachments
-
-
-
I come for the RC10's but stay for the Yokomo's
Current projects:
1993 WCS Faux-komo
1994 Yokomo Box-Art
RC10GT Restoration
Current projects:
1993 WCS Faux-komo
1994 Yokomo Box-Art
RC10GT Restoration
-
Frankentruck
- Super Member
- Posts: 3648
- Joined: Fri Feb 19, 2021 9:59 am
- Location: Texas, USA
- Has thanked: 2486 times
- Been thanked: 2793 times
Re: Winter Budget Beater RC10EGT
This one doesn't look like it's going to be an EGT beater. It looks pretty nice with all the bright clean nylon parts.
Frankensteined RC10T3 / Franky Jr RC10GT-e (x2) / A+ stamp / Toy Story RC / Graphite replica / B1.5 BFG 5LTi / Clonewald / Hyper Hornet
"I love the effort, but it sure looks like you took the long way around to a tub again"
"I love the effort, but it sure looks like you took the long way around to a tub again"
-
romulus22

- Approved Member
- Posts: 2545
- Joined: Wed May 19, 2010 7:30 pm
- Location: KY
- Has thanked: 885 times
- Been thanked: 769 times
Re: Winter Budget Beater RC10EGT
I agree. Pretty nice truck to turn into a beater. Would be a shame to do all that cleaning on a white parts truck just to beat it up again.
-
Toaster
- Approved Member
- Posts: 422
- Joined: Thu Jul 26, 2007 10:55 pm
- Location: Toronto, ON
- Has thanked: 473 times
- Been thanked: 136 times
Re: Winter Budget Beater RC10EGT
Apologies for the delayed response sir, was away on a much needed vacation to the middle of the pacific
Not sure if this helps at all, but a game console restorer I found on YouTube actually not only submerged really yellow parts in peroxide but also instead of sunlight he used strings of UV LED lights around his clear container and the results were pretty spectacular. Hope this helps.
I come for the RC10's but stay for the Yokomo's
Current projects:
1993 WCS Faux-komo
1994 Yokomo Box-Art
RC10GT Restoration
Current projects:
1993 WCS Faux-komo
1994 Yokomo Box-Art
RC10GT Restoration
-
Bgisbad
- Regular Member
- Posts: 26
- Joined: Fri Dec 14, 2018 3:27 pm
- Location: (Maryland)
- Has thanked: 6 times
- Been thanked: 9 times
Re: Winter Budget Beater RC10EGT
I appreciate the response and hope the vacation was enjoyable. I've restored shoe soles in the past using the same technique except on the shoes you apply the product directly and then saran wrap them to keep it wet. You can sit them in the sun or UV lights to speed up the process. The concern I had was length of time and if it was harmful to the parts, Which I believe you addressed. As a test I broke down the 10T and soaked the parts for a week in a bath consisting of 1 tablespoon 40 developer to 4 cups hot water give or take. The parts did clean up well. With the 10T back together it was run in the backyard for a good hour with a couple bumps and hits so far so good.
For the 10 parts I added about a teaspoon more developer and they have been sitting for about a week. was going to take them out today rinse and see where they stand.
Again thank you for the response
For the 10 parts I added about a teaspoon more developer and they have been sitting for about a week. was going to take them out today rinse and see where they stand.
Again thank you for the response
-
1911Colt
- Approved Member
- Posts: 1234
- Joined: Fri May 06, 2022 9:11 am
- Has thanked: 1674 times
- Been thanked: 799 times
Re: Winter Budget Beater RC10EGT
My understanding is that the yellowing we see in old parts is actually the bromine (flame retardant) separating and rising to the service of the plastic or nylon. The UV effectively "vibrates" the molecules to allow the bromine and oxygen (from the peroxide) to remix as originally intended. At least that is how it works with ABS.
UV is present in sunlight, so the sun and the lamp are doing the same thing. Using a UV lamp is faster because of the concentration- sort of like a cigarette lighter vs a flame thrower
-
Bgisbad
- Regular Member
- Posts: 26
- Joined: Fri Dec 14, 2018 3:27 pm
- Location: (Maryland)
- Has thanked: 6 times
- Been thanked: 9 times
Re: Winter Budget Beater RC10EGT
SCIENCE!1911Colt wrote: ↑Tue Mar 19, 2024 1:12 pmMy understanding is that the yellowing we see in old parts is actually the bromine (flame retardant) separating and rising to the service of the plastic or nylon. The UV effectively "vibrates" the molecules to allow the bromine and oxygen (from the peroxide) to remix as originally intended. At least that is how it works with ABS.
UV is present in sunlight, so the sun and the lamp are doing the same thing. Using a UV lamp is faster because of the concentration- sort of like a cigarette lighter vs a flame thrower
-
Toaster
- Approved Member
- Posts: 422
- Joined: Thu Jul 26, 2007 10:55 pm
- Location: Toronto, ON
- Has thanked: 473 times
- Been thanked: 136 times
Re: Winter Budget Beater RC10EGT
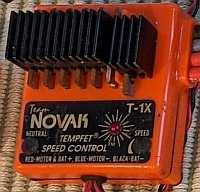
Managed to score a small parts lot off the flea bay that was poorly listed/described that will help push this one another step forward.
- Attachments
-
I come for the RC10's but stay for the Yokomo's
Current projects:
1993 WCS Faux-komo
1994 Yokomo Box-Art
RC10GT Restoration
Current projects:
1993 WCS Faux-komo
1994 Yokomo Box-Art
RC10GT Restoration
-
Toaster
- Approved Member
- Posts: 422
- Joined: Thu Jul 26, 2007 10:55 pm
- Location: Toronto, ON
- Has thanked: 473 times
- Been thanked: 136 times
Re: Winter Budget Beater RC10EGT
Making some small progress, realize that I am not doing this in any kind of order but as things come my way…servos mounted and CVD’s BUT I might take out the CVD’s to attempt a ‘blue’ gun black redo of the finish as there is some rust spots.
- Attachments
-
I come for the RC10's but stay for the Yokomo's
Current projects:
1993 WCS Faux-komo
1994 Yokomo Box-Art
RC10GT Restoration
Current projects:
1993 WCS Faux-komo
1994 Yokomo Box-Art
RC10GT Restoration
Create an account or sign in to join the discussion
You need to be a member in order to post a reply
Create an account
Not a member? register to join our community
Members can start their own topics & subscribe to topics
It’s free and only takes a minute
Sign in
-
- Similar Topics
- Replies
- Views
- Last post
-
- 15 Replies
- 2041 Views
-
Last post by AJ DRAGON
-
- 28 Replies
- 4195 Views
-
Last post by scr8p
-
- 5 Replies
- 1593 Views
-
Last post by Harvey Wood
-
- 11 Replies
- 2167 Views
-
Last post by R Cane
-
- 3 Replies
- 1007 Views
-
Last post by Asso_man!
-
- 35 Replies
- 5668 Views
-
Last post by nvxwax
-
- 10 Replies
- 1036 Views
-
Last post by vwjuice
-
- 1 Replies
- 1341 Views
-
Last post by scr8p
Who is online
Users browsing this forum: No registered users and 11 guests