RC10 Supermodified project (BME chassis).
-
LouCicconi
- Regular Member
- Posts: 14
- Joined: Fri Apr 08, 2011 5:18 pm
- Been thanked: 1 time
Re: RC10 Supermodified project (BME chassis).
Yep, that's me. I have a couple of really cool RC Supers. I'll post them soon. Talk to you later, Lou
-
Johnboy72
- Approved Member
- Posts: 712
- Joined: Wed Sep 15, 2010 11:08 pm
- Location: Waynesville, MO
- Been thanked: 8 times
Re: RC10 Supermodified project (BME chassis).
Looking good and looking forward to seeing Lou's cars. I'm a dirt oval fan but being somewhat close to Oswego, the supers are cool.
-
PlastiZapCA+

- Approved Member
- Posts: 746
- Joined: Mon Jun 11, 2012 1:41 am
- Location: Watauga,TX
Re: RC10 Supermodified project (BME chassis).
LouCicconi wrote:Yep, that's me. I have a couple of really cool RC Supers. I'll post them soon. Talk to you later, Lou
Awesome! Looking forward to seeing your cars.
-
PlastiZapCA+
- Approved Member
- Posts: 746
- Joined: Mon Jun 11, 2012 1:41 am
- Location: Watauga,TX
Re: RC10 Supermodified project (BME chassis).
I finished up my nose wing/bumper and built up the right hand nerf bar on the car today. Wasted a lot of time trying to figure out the nose wing design. I need to learn to keep it simple as that was the way that got it done. I also went with with the same plastic I use for my RC12E bumpers instead of carbon fiber. This way I can easily make replacements for cheap. Sadly my hobby time is up until the weekend. Hopefully I can keep up the momentum on this project and get it done.
Here are a few of the tools and techniques I use for soldering brass. It's really simple stuff and doesn't require many special tools.
Basic tools: You will probably have most of this stuff already. The tubing benders are by Dubro and are a must have item. The little chop saw from Harbor Freight is super handy for cutting tubing although you can just use a razor saw.

Use a good solder for metal work. You also need a good flux and it's mandatory. I use StayBrite since it's liquid and has a high acid content. Just don't get it on plastic or your clothing as it will remove the color and cause damage.

I had ordered a torch with a hose but it was out of stock. I'm actually glad because the Burnzeomatic torch from Home Depot turned out to be perfect and it was far cheaper. I got map gas but propane should do it too. The map is only $9.99 a cylinder and burns hotter than propane.

You'll need some clamps too. You could also use nails in a piece of scrap wood to hold your parts. I just used my vise and even tape to hold most of the parts until soldered. Most of the stuff I did was really simple.

To bend hard brass tubing it must be heated first. If you try to bend cold tubing it will kink even with the tubing bender. Don't heat it until it glows just get it hot. You will figure this out once you give it a try. You have about one minute to feed the tubing into the bender and get it to the shape you want. The Dubro tubing bender is partially plastic but it's held up with no problem for me. Here I've just bent a piece of heated tubing for my nerf bar. You can do all kinds of shapes and multiple bends with the tubing bender.

To make a crimped tube end for a bolt to pass through just clamp the end in a vise. Solder the open end of the tubing and your ready to drill a hole for mounting. I tapped and threaded all the tubing on my build 4-40 to eliminate the use of locking nuts. You can fill the end of your tubing with solder and then tap and thread for different size screws.


Keep going until your happy with it. If something is wrong then just heat up that part until the solder melts and correct it. It's really easy. I didn't show the soldering process since it's the same as soldering wire and we've all done that. Just clean the tubing with sandpaper and squirt on some flux. Heat the tubing and then lay down some solder. Again don't heat the tubing until it glows or the solder will just run off. Clean up any messy solder blobs with sandpaper.

Still need to solder the crimps shut and sand them to shape. Just ran out of time.


The wing uses RC10L front suspension spacers for height adjustment. Winglets are hardened aluminum sheet. It will be dyed black and the top surface will get a chrome wrap.

I should be able to knock the crap out of someone with that nerf bar.

I think it's starting to look the part.

Until next time!

Here are a few of the tools and techniques I use for soldering brass. It's really simple stuff and doesn't require many special tools.
Basic tools: You will probably have most of this stuff already. The tubing benders are by Dubro and are a must have item. The little chop saw from Harbor Freight is super handy for cutting tubing although you can just use a razor saw.
Use a good solder for metal work. You also need a good flux and it's mandatory. I use StayBrite since it's liquid and has a high acid content. Just don't get it on plastic or your clothing as it will remove the color and cause damage.
I had ordered a torch with a hose but it was out of stock. I'm actually glad because the Burnzeomatic torch from Home Depot turned out to be perfect and it was far cheaper. I got map gas but propane should do it too. The map is only $9.99 a cylinder and burns hotter than propane.
You'll need some clamps too. You could also use nails in a piece of scrap wood to hold your parts. I just used my vise and even tape to hold most of the parts until soldered. Most of the stuff I did was really simple.
To bend hard brass tubing it must be heated first. If you try to bend cold tubing it will kink even with the tubing bender. Don't heat it until it glows just get it hot. You will figure this out once you give it a try. You have about one minute to feed the tubing into the bender and get it to the shape you want. The Dubro tubing bender is partially plastic but it's held up with no problem for me. Here I've just bent a piece of heated tubing for my nerf bar. You can do all kinds of shapes and multiple bends with the tubing bender.
To make a crimped tube end for a bolt to pass through just clamp the end in a vise. Solder the open end of the tubing and your ready to drill a hole for mounting. I tapped and threaded all the tubing on my build 4-40 to eliminate the use of locking nuts. You can fill the end of your tubing with solder and then tap and thread for different size screws.
Keep going until your happy with it. If something is wrong then just heat up that part until the solder melts and correct it. It's really easy. I didn't show the soldering process since it's the same as soldering wire and we've all done that. Just clean the tubing with sandpaper and squirt on some flux. Heat the tubing and then lay down some solder. Again don't heat the tubing until it glows or the solder will just run off. Clean up any messy solder blobs with sandpaper.
Still need to solder the crimps shut and sand them to shape. Just ran out of time.
The wing uses RC10L front suspension spacers for height adjustment. Winglets are hardened aluminum sheet. It will be dyed black and the top surface will get a chrome wrap.
I should be able to knock the crap out of someone with that nerf bar.
I think it's starting to look the part.
Until next time!
-
Asso_man!

- Approved Member
- Posts: 3960
- Joined: Thu Aug 03, 2006 7:49 am
- Location: EU
- Has thanked: 40 times
- Been thanked: 81 times
Re: RC10 Supermodified project (BME chassis).
Good work and thanks for the tips. That car will look insane when finished. You plan to run it right?
_____________________________________________
_____________________________________________
Come and visit the stable
_____________________________________________
Come and visit the stable
-
scr8p

- Administrator
- Posts: 16733
- Joined: Tue Feb 07, 2006 9:46 pm
- Location: Northampton, PA
- Has thanked: 33 times
- Been thanked: 1190 times
-
THEYTOOKMYTHUMB
- Super Member
- Posts: 7070
- Joined: Wed Oct 22, 2008 5:15 pm
- Location: Evansville, IN
- Has thanked: 3428 times
- Been thanked: 1880 times
Re: RC10 Supermodified project (BME chassis).
That thing is going to be awesome! Great work so far! 
"The world looks so much better through beer goggles: Enjoy today, you never know what tomorrow may bring."
Ken
Ken
-
PlastiZapCA+
- Approved Member
- Posts: 746
- Joined: Mon Jun 11, 2012 1:41 am
- Location: Watauga,TX
Re: RC10 Supermodified project (BME chassis).
Thanks guys!
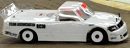
I can't wait to build a set of headers for it! Thinking about having the right side header come out like this. I'll have mine coming straight out though and not canted forward.

I can't wait to build a set of headers for it! Thinking about having the right side header come out like this. I'll have mine coming straight out though and not canted forward.
-
PlastiZapCA+
- Approved Member
- Posts: 746
- Joined: Mon Jun 11, 2012 1:41 am
- Location: Watauga,TX
Re: RC10 Supermodified project (BME chassis).
Asso_man! wrote:Good work and thanks for the tips. That car will look insane when finished. You plan to run it right?
You're welcome! I indeed plan on running this car although gently and for fun. I'm going brushless and will probably choose one of the HobbyWing Xerun systems. It will be interesting to see how it performs with all the wings. I'm guessing no one has a setup for this car?
-
RC10th
- Approved Member
- Posts: 4698
- Joined: Sat Feb 16, 2013 9:51 am
- Location: Australia
- Has thanked: 50 times
- Been thanked: 1492 times
Re: RC10 Supermodified project (BME chassis).
Lots of boost timing, turbo timing and traction compound.PlastiZapCA+ wrote:I'm guessing no one has a setup for this car?
I was old school - when old school wasn't cool !
-
PlastiZapCA+
- Approved Member
- Posts: 746
- Joined: Mon Jun 11, 2012 1:41 am
- Location: Watauga,TX
Re: RC10 Supermodified project (BME chassis).
RC10th wrote:Lots of boost timing, turbo timing and traction compound.PlastiZapCA+ wrote:I'm guessing no one has a setup for this car?
I actually want to see wheelies from this car.
-
PlastiZapCA+
- Approved Member
- Posts: 746
- Joined: Mon Jun 11, 2012 1:41 am
- Location: Watauga,TX
Re: RC10 Supermodified project (BME chassis).
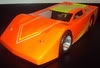
Took your advice and ordered a set of 1/18 GPM threaded shocks for the RC18. The anno matches the color I've chosen for the car too.Phin wrote:The BME chassis is supposed to have support rails that run from the rear bulkhead all the way to the front kick-up (they replace the nose tubes). Since you're already welding some brass tube for the sides why not use brass tubes for the chassis rails then at the front (where the nose tubes usually are) weld on some uprights to act the front shock tower.
Something like this: http://upload.wikimedia.org/wikipedia/commons/a/ac/ISMA_Supermodified9.jpg
Also I'd use smaller bore shocks like Deltas, pan car micro shocks, or even 1/18 scale shocks for a more realistic look.

-
PlastiZapCA+
- Approved Member
- Posts: 746
- Joined: Mon Jun 11, 2012 1:41 am
- Location: Watauga,TX
Re: RC10 Supermodified project (BME chassis).
Got the cage on finally! This was the hard but I toughed it out and got it done. Now I need to build a body for it. Until I have that body I won't be able to proceed with the final nerf bar or front bumper. On the front shock tower I might have something to try. Whether or not it works will be another thing.  Anyway on to the pics!
What do you think? OK? I'll still have a few more braces to add once the body is built but it's mostly the way I want it. The rear wing is just a test piece.

I'm Stealth equipped!


I copied the brace points from full scale machines.


Thinking about using Plastruct to make the body out of. It will be more resistant to damage than the aluminum I was testing and also lighter.


I'm not worried about the bulkhead I accidently torched.

Chassis will be sanded smooth and painted GM autumn gold metallic. Cage will be metal flake black and the arms will be dyed black with a gloss overcoat.

What do you think? OK? I'll still have a few more braces to add once the body is built but it's mostly the way I want it. The rear wing is just a test piece.
I'm Stealth equipped!
I copied the brace points from full scale machines.
Thinking about using Plastruct to make the body out of. It will be more resistant to damage than the aluminum I was testing and also lighter.
I'm not worried about the bulkhead I accidently torched.
Chassis will be sanded smooth and painted GM autumn gold metallic. Cage will be metal flake black and the arms will be dyed black with a gloss overcoat.
-
j-sou

- Approved Member
- Posts: 653
- Joined: Sun Feb 06, 2011 2:47 am
- Location: Fresno, CA
- Has thanked: 1 time
- Been thanked: 3 times
Re: RC10 Supermodified project (BME chassis).
Awesome build! The brass tube work reminds me of 60s-70s slot car building.
-I never said I knew what I was doing, I just said I was gonna do it!"
-
Asso_man!
- Approved Member
- Posts: 3960
- Joined: Thu Aug 03, 2006 7:49 am
- Location: EU
- Has thanked: 40 times
- Been thanked: 81 times
Re: RC10 Supermodified project (BME chassis).
looking better every time! Keep up the good job.
_____________________________________________
_____________________________________________
Come and visit the stable
_____________________________________________
Come and visit the stable
Create an account or sign in to join the discussion
You need to be a member in order to post a reply
Create an account
Not a member? register to join our community
Members can start their own topics & subscribe to topics
It’s free and only takes a minute
Sign in
-
- Similar Topics
- Replies
- Views
- Last post
-
- 4 Replies
- 617 Views
-
Last post by noony
-
- 22 Replies
- 3326 Views
-
Last post by wyldbill
-
- 16 Replies
- 1799 Views
-
Last post by treehugger
-
- 9 Replies
- 1756 Views
-
Last post by kaiser
-
- 17 Replies
- 1730 Views
-
Last post by Prince Steve
-
- 19 Replies
- 2779 Views
-
Last post by rctenracer
-
- 1 Replies
- 383 Views
-
Last post by klavy69
-
- 28 Replies
- 3187 Views
-
Last post by allaircooled
Who is online
Users browsing this forum: ![]() Amazon [Bot],
Amazon [Bot], ![]() DotNetDotCom.org [Bot] and 15 guests
DotNetDotCom.org [Bot] and 15 guests