i picked up a well used tq10 chassis on ebay for like $4.00. it's definatly seen better days. i dyed all the new red parts from my 6010 kit black. i thought i had enough parts to finish it tonight, but i guess not. i need to make a bearing run tomorrow.
Scr8p, are the shock towers dyed black too? I've never dyed the fiberglass shock towers and I wonder if they come out ok when they're dyed and if you use the same stuff eg. Rit to do it.
ya they're dyed, too. these didn't seem to take the dye very good, though. they are a little transparent. i have others that i did that are as black as night. i just figured for this car, they were good enough. next time i dye something, i might throw them in again.
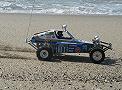
i got it pretty much complete now. i got to do the servo linkage and install the rest of the electronics yet. oh, and i got to pick up a sidewinder body. hopefully, i'll get it to the track before long.
i threw an esc and a receiver in it today, and took it out for a blast. everything seems to work pretty good. now i just got to get to the off road track to launch it off some jumps. it's got to get dirty sometime, right?
ya, that was a motor plate that i had cut the mount off years ago. i had some of the heatsinks laying around, so i welded a piece on to it so i could attach the heatsink.
i picked up these aluminun rods just so i could do little stuff in my basement. you just use a standard torch that you would use to solder plumbing. just v out both sides, puddle it in there, and grind it smooth. this was the first thing i tried it on, and it seemed to work really good.
Got ahold of this chassis and now it's time to make something with it. The plan here is to use up a bunch of extra parts I've picked up in some larger lots on E-bay and not a true restoration. Not to mention I just don't have the cash to buy any...
Last post
That is looking great. The TQ cars are one of the most interesting variants, I think.
Hey gang! Lots of great info here...thanks for all the knowledge dropped. a couple years back a friend gave me a box of his old rc stuff, and i knew there was some older version of a rc10 in there but didn't have the time to mess with it. Well, now...
Last post
Great score, what did you pay for it, if you don't mind saying :mrgreen:
Got this from a good mate. It started life as a Ferrari on road racer. A Optima Mid Custom chassis that Kyosho slapped on a nice shell with the cool 5 spoke star chrome wheels. My mate converted it to...
Last post
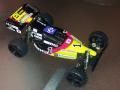
Spent the last couple days on this now.
I installed a new digital servo, Brushless speedie with a 8.5 sensored motor.
The gearing is around the right mark. The platinum shocks aren't that good and too stiff . The rear springs are modded Losi...
I found a TQ10 Today. I don't know much about the TQ10 other than it was designed By Associated and distributed by Horizion. This one is in very nice conditon with only minor scuffs and slight chipping on the bottom of the chassis. Missing the Body...
Here's the build start after the disassembly, cleaning process and chassis prep :D I know it isn't much at the moment, but the new graphite towers will replace the originals along with anything that needs the some attention. Stay tuned, much thanks...
Last post
Thanks Reggie, very interesting information. You don't really see it when the tower and mounts are bolted up so out of sight out of mind :wink: I'm happy with it and it's nice to look at :D
I drew up the masks, cut and applied them. Hoping to...
My brother alerted me to this TQ10 for sale locally and I couldn't pass it up. First time I've ever seen one in person. Here's some pics of the TQ10 as it looked when I picked it up, along with a pic of it next to my RC10 Graphite that I bought back...
Last post
My brother alerted me to this TQ10 for sale locally and I couldn't pass it up. First time I've ever seen one in person. Here's some pics of the TQ10 as it looked when I picked it up, along with a pic of it next to my RC10 Graphite that I bought back...