Mugen BULLDOG mods.

The place for all things Mugen.

Moderators: scr8p, klavy69

User avatar
Bormac
Approved Member
Posts: 3112
Joined: Wed Sep 05, 2007 3:52 pm
Location: CENTRAL COAST, NSW AUSTRALIA
Has thanked: 21 times
Been thanked: 3 times

Mugen BULLDOG mods.

Post by Bormac »

With 3 Mugen Bulldog builds on the go I thought i'd try and post some pics and idea's to help anyone else that wants to make some simple yet effective mods to their car/s.
While I dont claim to have 'invented' any of these idea's as such I have found by sharing thoughts with other vintage racer's and implemented what works best for me.

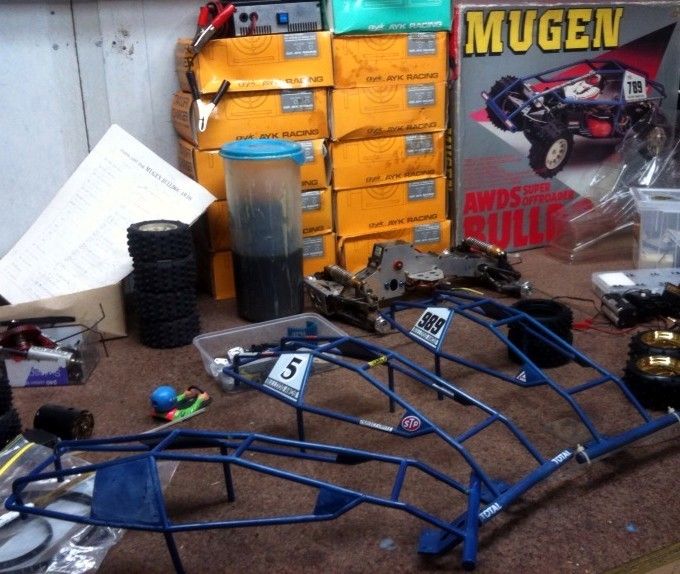
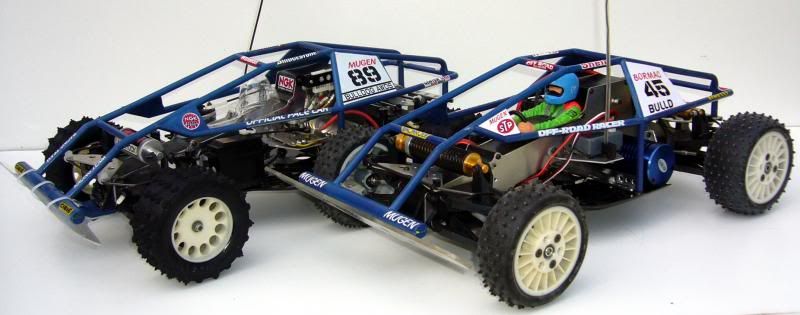
The Bulldog while it may not be everybody's 'cup of tea' was a very good car on Australian race tracks back in the 80's. While the standard car doesn't do much for me, with a handful of simple mods I think this car can be a lot more reliable resulting in a better racer.

Image

Image
-Jason.

Still known as- bormac

My collection-http://www.tamiyaclub.com/showroom.asp?id=10980

tiger1
Approved Member
Posts: 777
Joined: Sun Sep 07, 2008 12:38 pm
Location: Singapore
Been thanked: 2 times

Re: Mugen BULLDOG mods.

Post by tiger1 »

Nice mod. :D

How did you decide the position of the tensioner? :roll:

User avatar
Bormac
Approved Member
Posts: 3112
Joined: Wed Sep 05, 2007 3:52 pm
Location: CENTRAL COAST, NSW AUSTRALIA
Has thanked: 21 times
Been thanked: 3 times

Re: Mugen BULLDOG mods.

Post by Bormac »

Ball diffs.
Without a doubt the Bulldog's ball diffs are a problem for me. Not because of the diff centre but more so the thrust race which is exposed to the elements plus there is no spring tensioning system like that found in most other ball diffs. This means very little adjustment (if any). I'm yet to work out a better solution for this problem.
What I have done though, is drill the diff centre out to accomodate 4mm tungsten balls (I had these spare).
The standard diff is on the left and my drilled version on the right.
Image
-Jason.

Still known as- bormac

My collection-http://www.tamiyaclub.com/showroom.asp?id=10980

User avatar
Bormac
Approved Member
Posts: 3112
Joined: Wed Sep 05, 2007 3:52 pm
Location: CENTRAL COAST, NSW AUSTRALIA
Has thanked: 21 times
Been thanked: 3 times

Re: Mugen BULLDOG mods.

Post by Bormac »

Steering rack mod.
Years ago a well known Racer in Sydney (Bob Burbage) handed me this home made brass steering rack. I was told this was a common mod racers back in the day did and boy does it work well. Its a simple yet effective means of some very solid and direct steering for the Bulldog. This concept has served me well and can't recommend it enough.
I drilled a hole then a square section is filed through both of the alloy chassis side plates. A centre section fits neatly inside the housing.
I will get some more detailed pics and measurements up here shortly for you guys to duplicate this system if you like.

Image
-Jason.

Still known as- bormac

My collection-http://www.tamiyaclub.com/showroom.asp?id=10980

User avatar
Bormac
Approved Member
Posts: 3112
Joined: Wed Sep 05, 2007 3:52 pm
Location: CENTRAL COAST, NSW AUSTRALIA
Has thanked: 21 times
Been thanked: 3 times

Re: Mugen BULLDOG mods.

Post by Bormac »

Locking out the rear steering.
Again this was not my idea but a system designed and used back in the race days with these cars. It would seem not many racers liked the 4 wheel steering and I could not blame them. The factory set up was shocking!
Quite simply a peice of alloy angle is trimmed down much like seen below. Set up right you can even get most of the bump steer eliminated.

Image

I have found that relying on the old self tapping screws not to my liking. I now pass M2.6 screws though the angle and chassis to lock tighted nuts on the inside. No chance of the angle being pulled from the alloy plate in a colision.

Image
-Jason.

Still known as- bormac

My collection-http://www.tamiyaclub.com/showroom.asp?id=10980

User avatar
Bormac
Approved Member
Posts: 3112
Joined: Wed Sep 05, 2007 3:52 pm
Location: CENTRAL COAST, NSW AUSTRALIA
Has thanked: 21 times
Been thanked: 3 times

Re: Mugen BULLDOG mods.

Post by Bormac »

Kyosho Optima hubs/uprights.
Whilst there might be other manufacturers out there who make a hub that will work it seems the Optima series of cast hubs were very popular amongst racers back in the day.
I found the threads of the Mugen ball studs to be a courser pitch compared to the M3 threads found in the Kyosho items. I also removed some of the length of the ball stud as once wound right in they tend to protrude on the inside and fowl the drive shaft. I'd recommend thread locking these in place.

Image
-Jason.

Still known as- bormac

My collection-http://www.tamiyaclub.com/showroom.asp?id=10980

User avatar
besty22
Approved Member
Posts: 346
Joined: Tue Sep 02, 2008 8:21 am
Location: Central Coast NSW Australia

Re: Mugen BULLDOG mods.

Post by besty22 »

Great write up Jason. Nice clear pics too. Some measurements for the tensioner mounting points would be cool too.
Respect - Hard Earned but Easily Lost

tiger1
Approved Member
Posts: 777
Joined: Sun Sep 07, 2008 12:38 pm
Location: Singapore
Been thanked: 2 times

Re: Mugen BULLDOG mods.

Post by tiger1 »

besty22 wrote:Great write up Jason. Nice clear pics too. Some measurements for the tensioner mounting points would be cool too.
Thanks Bormac :)

Which CVD did you use in the front? What is the length measurement like? :D

User avatar
Bormac
Approved Member
Posts: 3112
Joined: Wed Sep 05, 2007 3:52 pm
Location: CENTRAL COAST, NSW AUSTRALIA
Has thanked: 21 times
Been thanked: 3 times

Re: Mugen BULLDOG mods.

Post by Bormac »

I have been making up another steering rack and here are some of the dimensions of the peices and also how it goes together. I hope this helps someone out.

Image

You'll notice I have cut a slot in the outermost sleeve. This was done so that a solder joint could lock the two outer sleeves together so the inner track rod can slide freely inside without the middle sleeve coming loose and making its way out of the trans housing.

Image

Image
-Jason.

Still known as- bormac

My collection-http://www.tamiyaclub.com/showroom.asp?id=10980

tiger1
Approved Member
Posts: 777
Joined: Sun Sep 07, 2008 12:38 pm
Location: Singapore
Been thanked: 2 times

Re: Mugen BULLDOG mods.

Post by tiger1 »

Thanks, this is very helpful :)

tiger1
Approved Member
Posts: 777
Joined: Sun Sep 07, 2008 12:38 pm
Location: Singapore
Been thanked: 2 times

Re: Mugen BULLDOG mods.

Post by tiger1 »

BTW, how far apart should the 2 screw holes (for the steering links) be on the 78mm piece? :D

User avatar
Bormac
Approved Member
Posts: 3112
Joined: Wed Sep 05, 2007 3:52 pm
Location: CENTRAL COAST, NSW AUSTRALIA
Has thanked: 21 times
Been thanked: 3 times

Re: Mugen BULLDOG mods.

Post by Bormac »

tiger1 wrote:BTW, how far apart should the 2 screw holes (for the steering links) be on the 78mm piece? :D
Possibly 74mm. Atleast thats what my original length has. This may not be the most correct measurement though. Whats your thoughts?
-Jason.

Still known as- bormac

My collection-http://www.tamiyaclub.com/showroom.asp?id=10980

tiger1
Approved Member
Posts: 777
Joined: Sun Sep 07, 2008 12:38 pm
Location: Singapore
Been thanked: 2 times

Re: Mugen BULLDOG mods.

Post by tiger1 »

Well, if 74mm is what has been working well them I would be very reluctant to re-invent the wheel :lol:

I know those brass tubes are relatively easy to find in hobby shops, just wish we could get some silver colored one to match the color of the chassis :mrgreen:

Thanks indeed :P

User avatar
HotRodJosh
Approved Member
Posts: 322
Joined: Fri May 15, 2009 1:55 pm
Location: Spanaway, Wa
Has thanked: 3 times

Re: Mugen BULLDOG mods.

Post by HotRodJosh »

Thanks for posting this...
It'll be helpful, as I just found one of these rigs.... :D
"I've got a fever, and the only prescription.....is more cowbell."
Pinstriping by Josh

User avatar
prp
Approved Member
Posts: 665
Joined: Sun Dec 10, 2006 4:27 pm
Location: Lyon FRANCE
Been thanked: 11 times

Re: Mugen BULLDOG mods.

Post by prp »

Hi, nice mods, I received a Bulldog 2 this week :D , and start to clean the plastic parts with Cooking degreaser,
and I have a bad surprise :( , I loose the color on the arms and Arm support , they coming in grey color (black before),
I try to died them, and hope they keep the black color :) ?

Any body, know how work the Air Shock, because i found they're a bit hard, maybe a mod for a soft use :mrgreen: !

Bye PRP

Post Reply

Create an account or sign in to join the discussion

You need to be a member in order to post a reply

Create an account

Not a member? register to join our community
Members can start their own topics & subscribe to topics
It’s free and only takes a minute

Register

Sign in

  • Similar Topics
    Replies
    Views
    Last post
  • Difference between the Mugen Bulldog and Mugen Bulldog II
    by urban hype » » in Mugen Forum
    2 Replies
    1182 Views
    Last post by urban hype
  • Mugen Bulldog II
    by railey72 » » in Mugen Forum
    52 Replies
    8850 Views
    Last post by Mr. ED
  • MUGEN Bulldog
    by saga101 » » in Mugen Forum
    2 Replies
    1321 Views
    Last post by saga101
  • Another MUGEN Bulldog.
    by Bormac » » in Mugen Forum
    12 Replies
    1213 Views
    Last post by Bormac
  • Mugen Bulldog
    by Bormac » » in Mugen Forum
    9 Replies
    1351 Views
    Last post by Mr. ED
  • Mugen Bulldog
    by Rattlesnaker » » in Mugen Forum
    10 Replies
    1504 Views
    Last post by HotRodJosh
  • Mugen Bulldog at last !
    by Dadio » » in Mugen Forum
    11 Replies
    1615 Views
    Last post by Dadio
  • Reincarnation of a Mugen bulldog
    by tiger1 » » in Mugen Forum
    14 Replies
    3353 Views
    Last post by emerson_shih

Return to “Mugen Forum”

Who is online

Users browsing this forum: No registered users and 4 guests