I have always loved the Coyote since I first saw it in the October 1987 issue of RCCA.
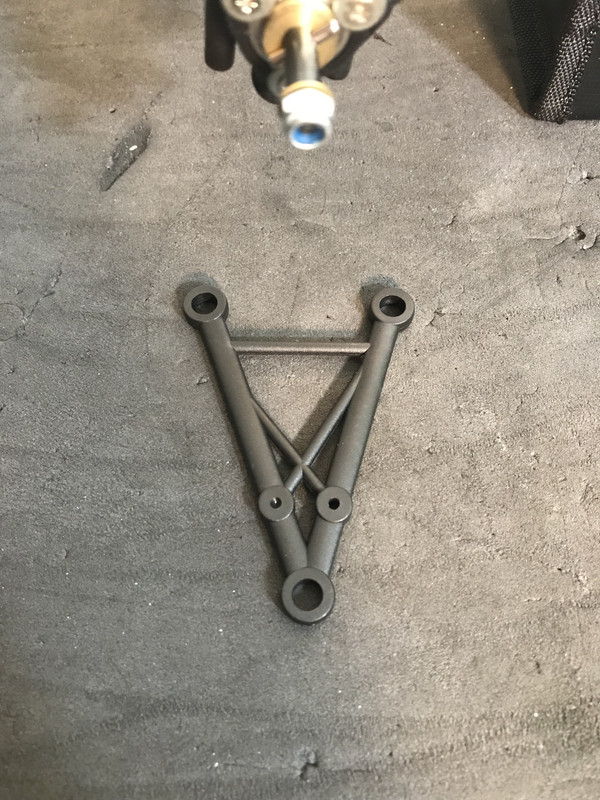
Fast forward 30+ years..I bought some incomplete kits, a used car and various parts to finally build one..or two. I quickly ran into the problem of brand new suspension arms cracking around the pivot balls and that’s where this has sat for the past two years. Thankfully Dadio Designs made some 3D printed ones and now it’s on again!
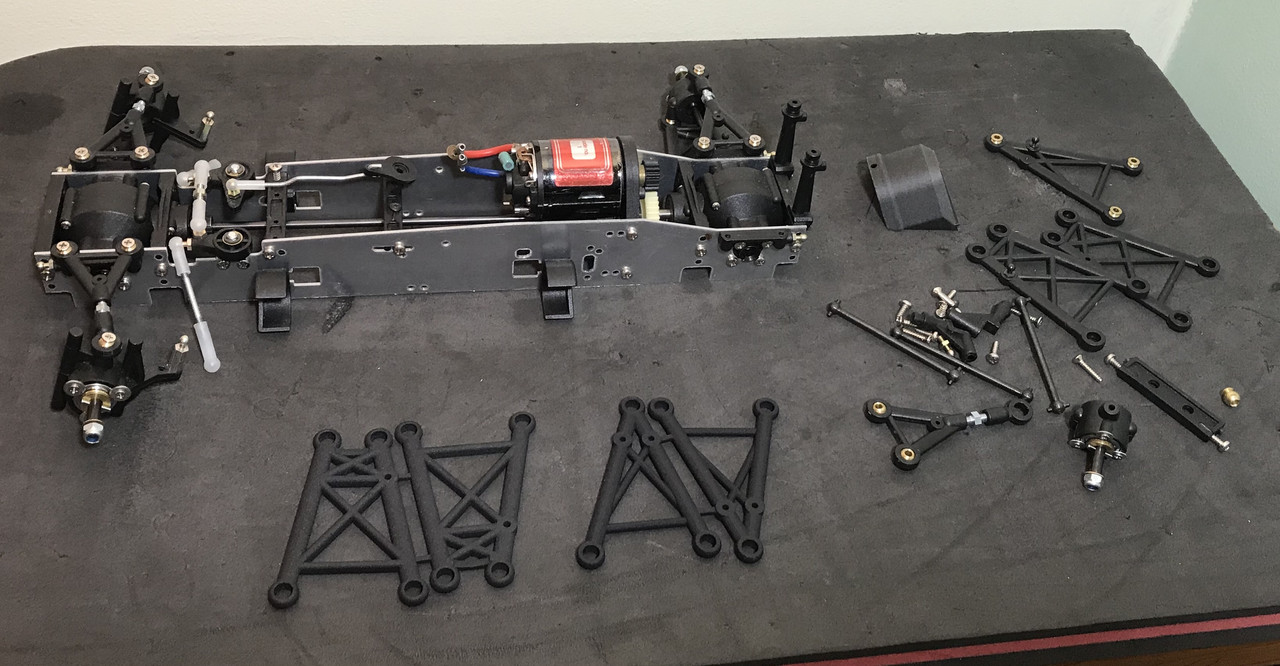
Here is where it currently sits, stalled for 2 years..
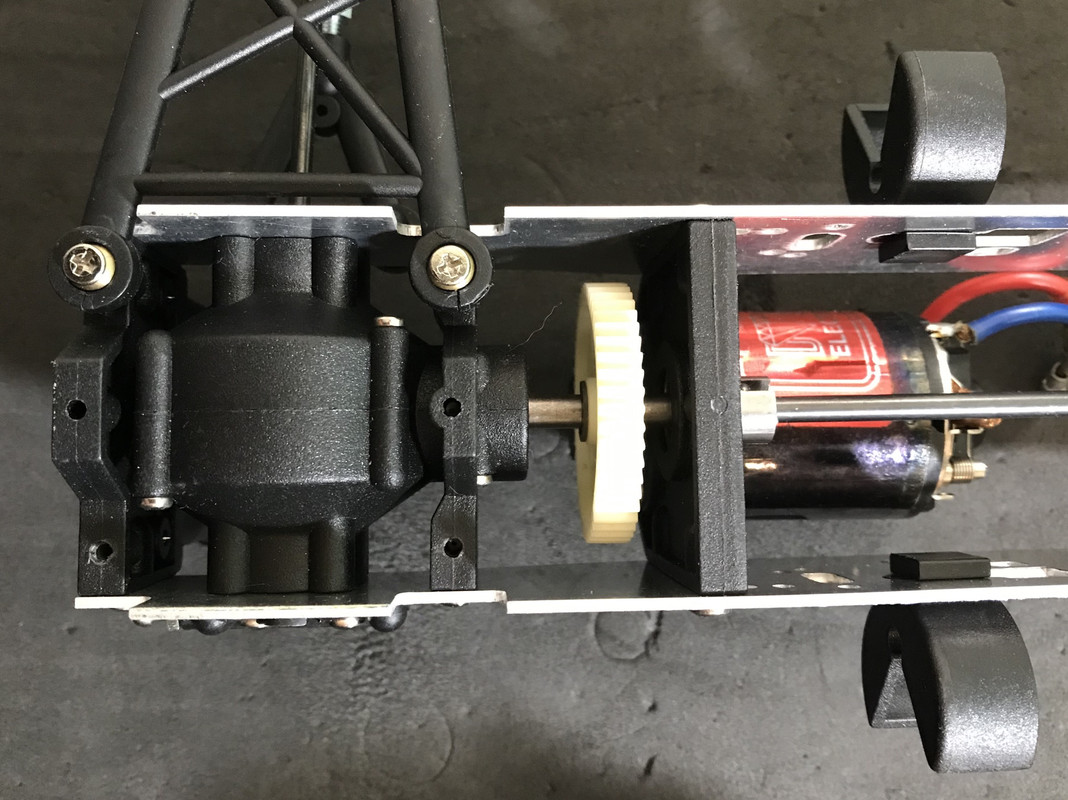
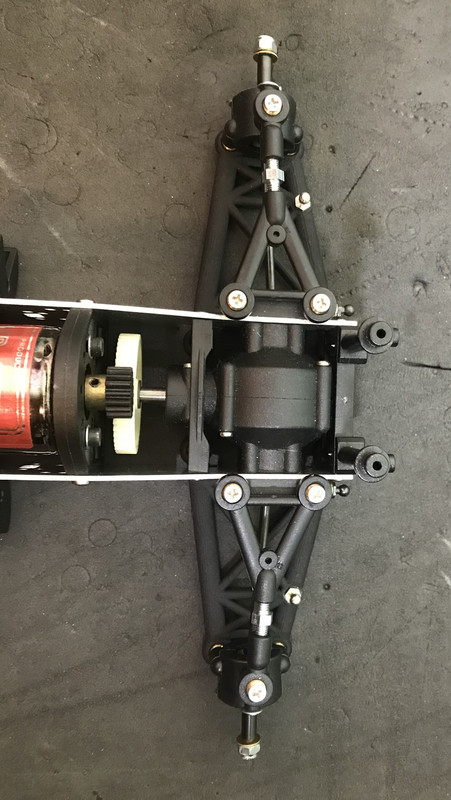
Notice the cracked arm.. also note that I used an extra front differential case in the rear so that the pinion/spur shaft is supported by 3 bearings instead of 2, which makes a big difference in setting up and smoothness of the rear diff.
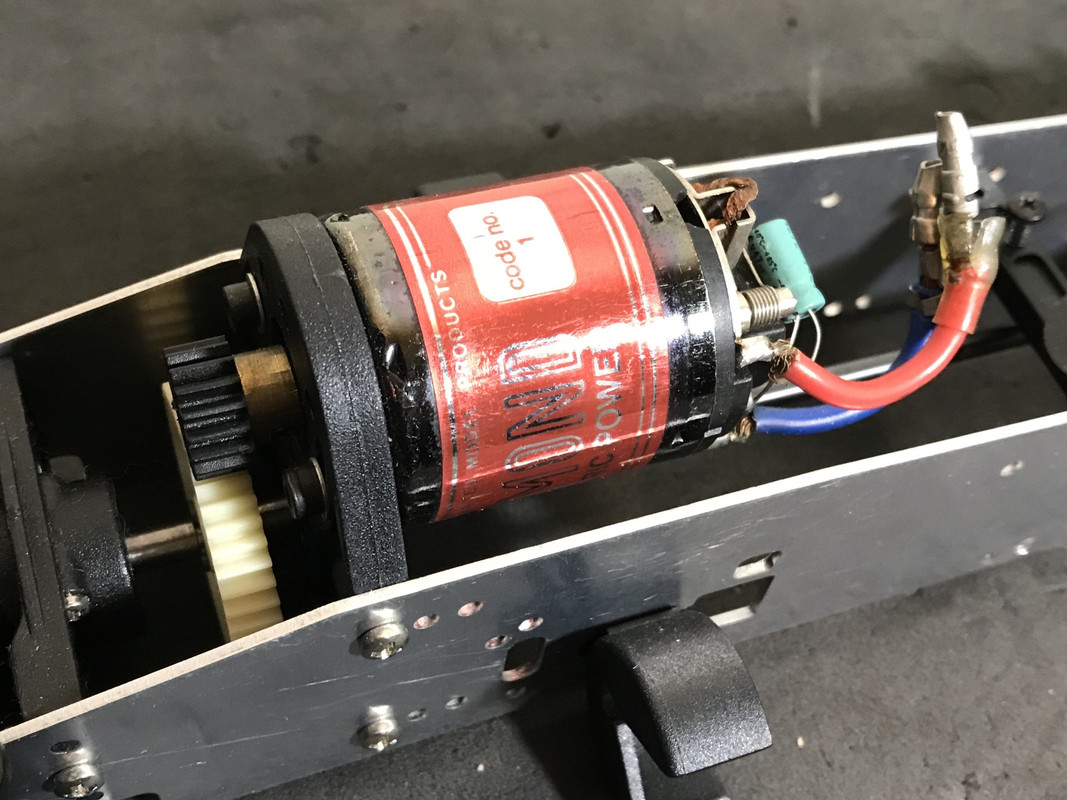
Some serious Dymond horsepower!
Re: Coyote time!
Posted: Tue Dec 21, 2021 9:22 pm
by 1300GT
Interesting idea using a front diff housing on the rear.
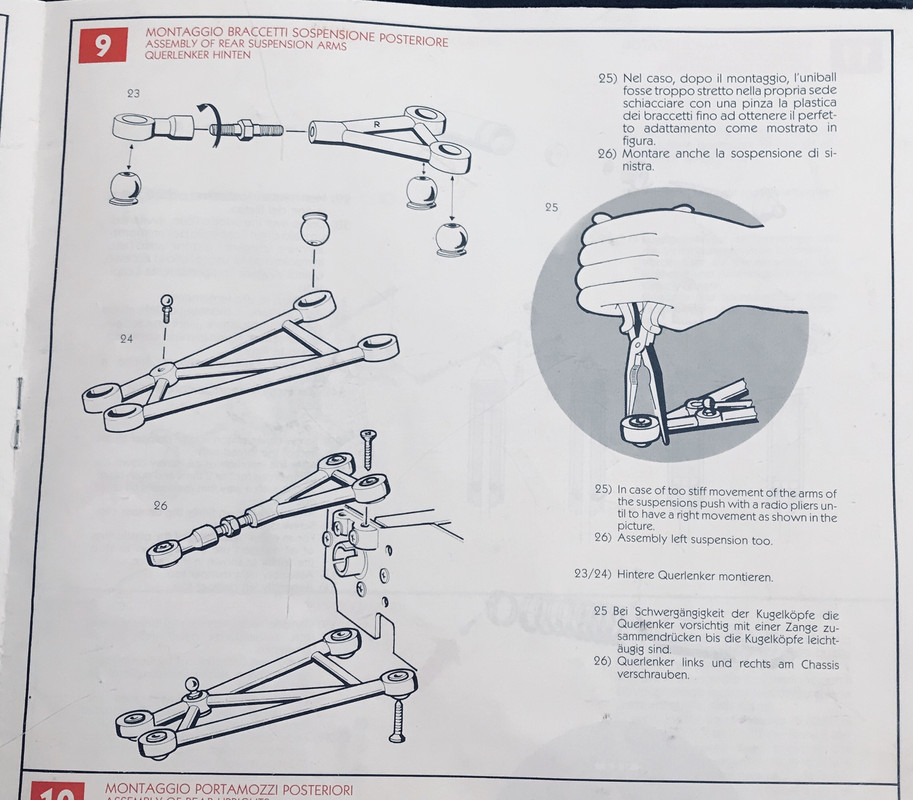
Dadio certainly is a Godsend for Coyote owners. I see you've bought one of his gear covers.
Re: Coyote time!
Posted: Tue Dec 21, 2021 11:09 pm
by THEYTOOKMYTHUMB
I always loved the way the motor mounts in this one. Unrelated, but a great album.
Re: Coyote time!
Posted: Wed Dec 22, 2021 12:50 am
by BattleTrak
Re: Coyote time!
Posted: Wed Dec 22, 2021 3:28 am
by Dadio
She's looking fine totally minty, do you have the metal diff gears? If you're running it I'd soak the spur gear in water to rehydrate for a day or two. Mine looked good but turned to powder after a few runs.
Re: Coyote time!
Posted: Wed Dec 22, 2021 9:15 pm
by BattleTrak
Dadio wrote: ↑Wed Dec 22, 2021 3:28 am
She's looking fine totally minty, do you have the metal diff gears? If you're running it I'd soak the spur gear in water to rehydrate for a day or two. Mine looked good but turned to powder after a few runs.
Thanks for making this possible again, Dadio! The rear diff has all hardened steel gears. The front has hardened steel ring & pinion with plastic spider gears.
I am not going to run this one, but have parts to built a second runner and will definitely hydrate the gears!
Re: Coyote time!
Posted: Thu Dec 30, 2021 1:22 pm
by BattleTrak
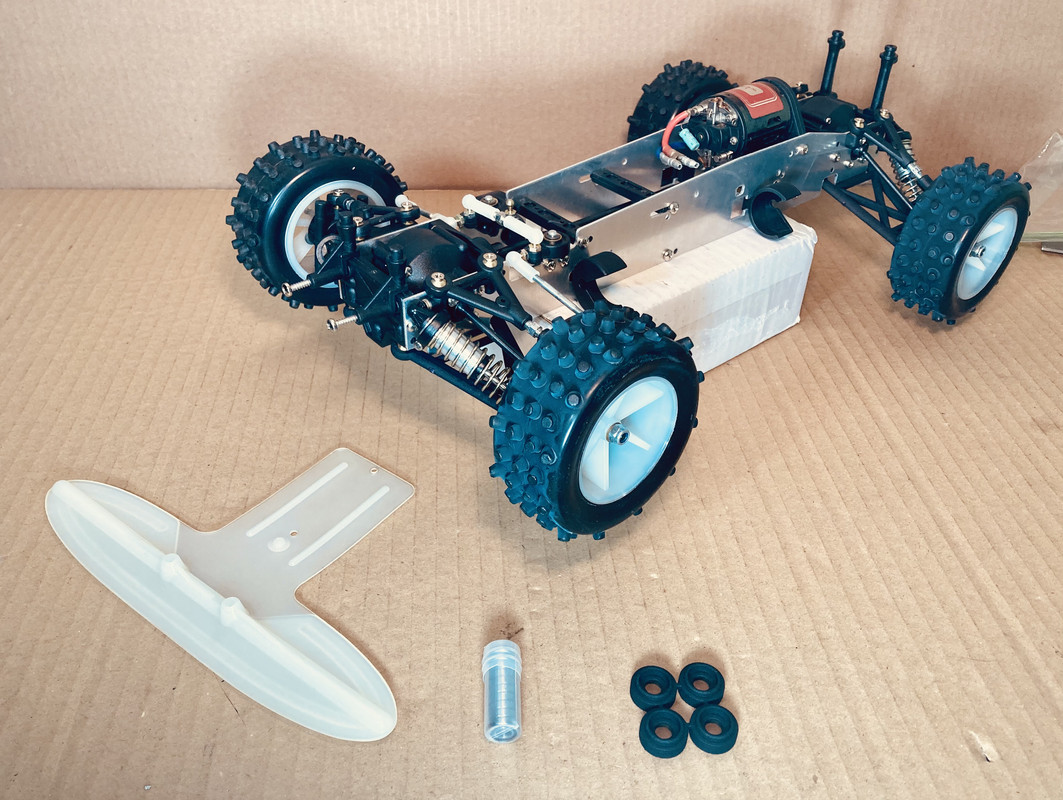
Sorting out the suspension..
Anyone who has tried to build the Coyote knows how terrible and confusing the instructions are! And looking at other builds online may not help because you see a lot of different setups. I have built this every conceivable way to try and figure out what is going on and hopefully I can help some future builders.
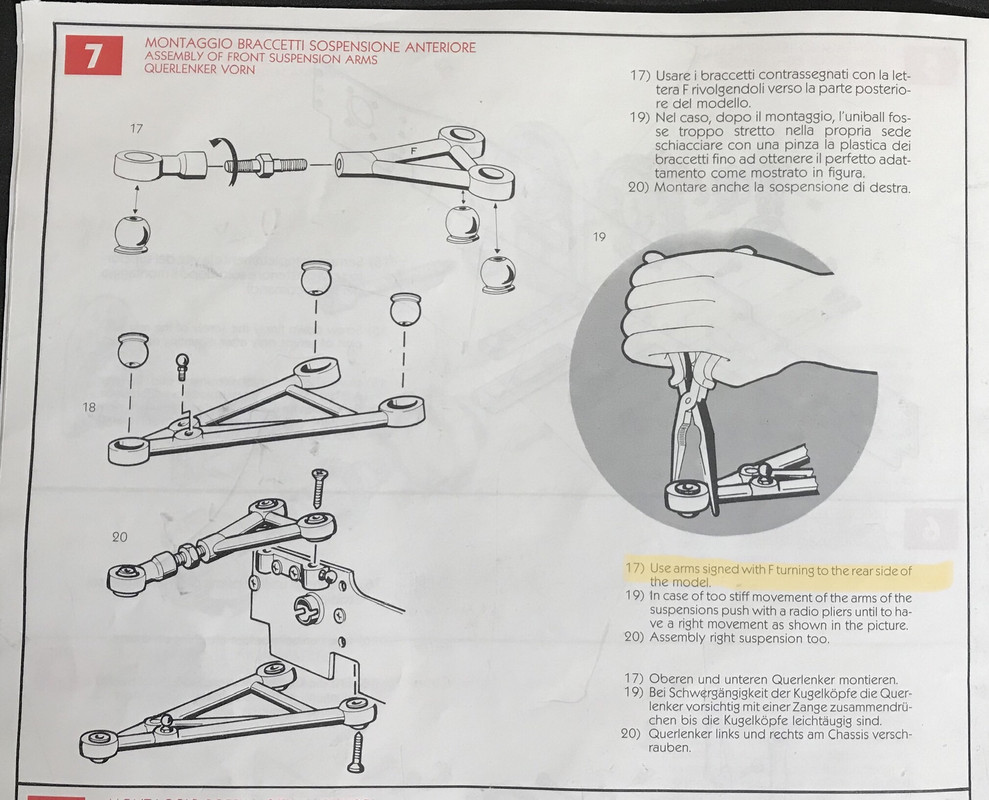
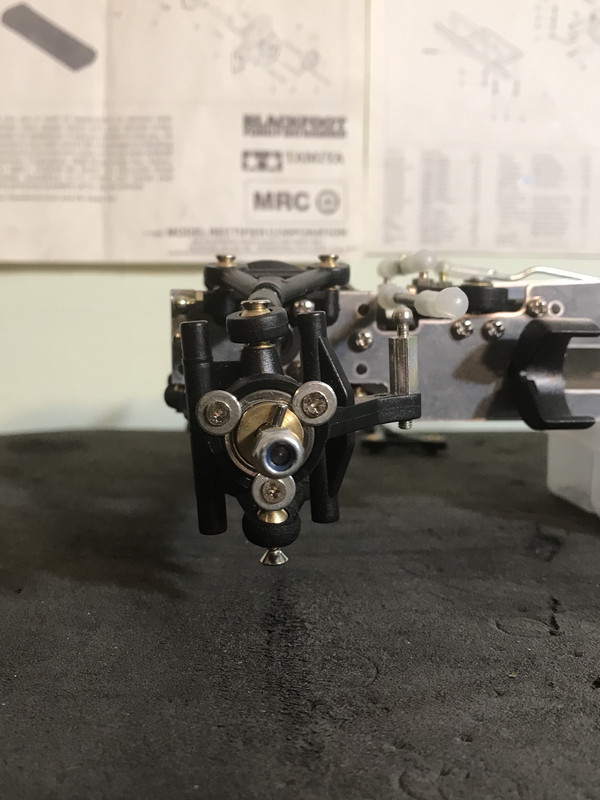
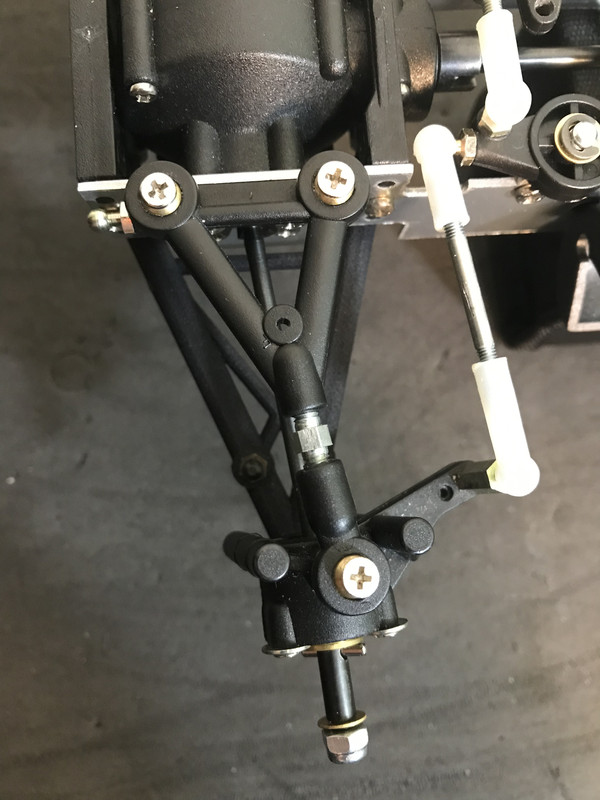
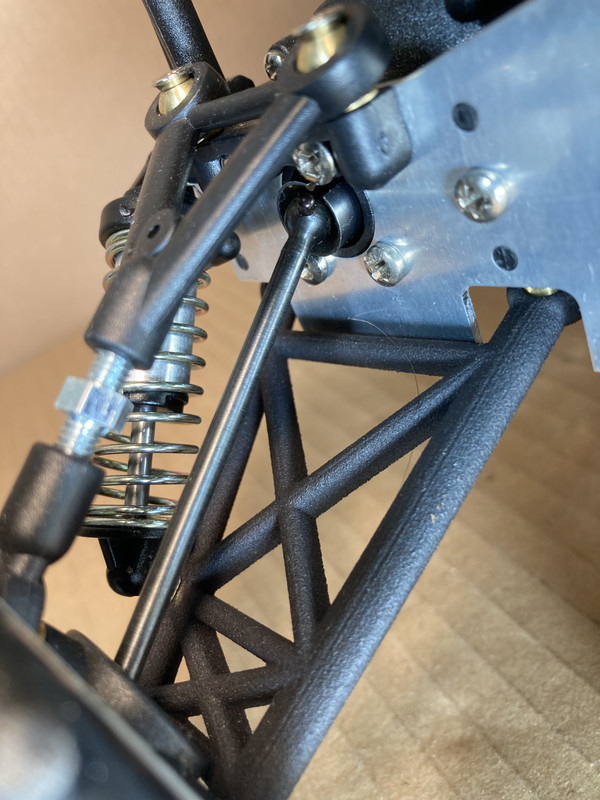
The front suspension. This is where the confusion begins because of a huge mistake in the instructions. It tells you to install the upper arms with the “F” towards the rear..which is wrong! If you install it this way, you end up with negative caster angles, that is not desirable in any vehicle. Interesting though is if you ignore the text and follow the pics..it is correct.
The wrong way..
The correct way is to install the upper arms is with the “F” towards the front..makes sense, right? Then the lower arm is installed with the shorter/straighter leg towards the middle of the vehicle. This creates a nice positive caster angle and full suspension movement.
If you flip the lower arm, it makes an extreme positive caster angle and restricts suspension movement.
Another confusing aspect is that the shocks can be mounted in front of or behind the suspension arms. This is more of a tuning and aesthetic issue after the arms are correctly installed. I will show this later.
Re: Coyote time!
Posted: Mon Jan 03, 2022 4:23 am
by BattleTrak
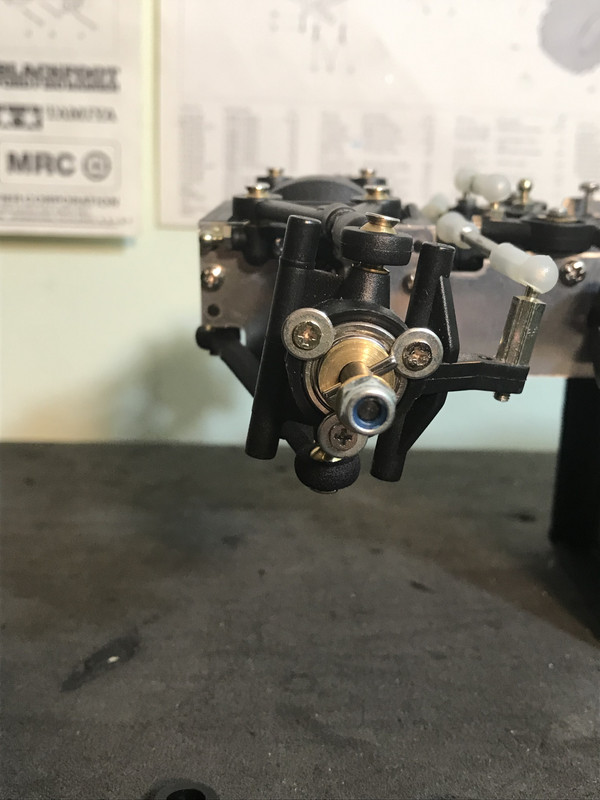
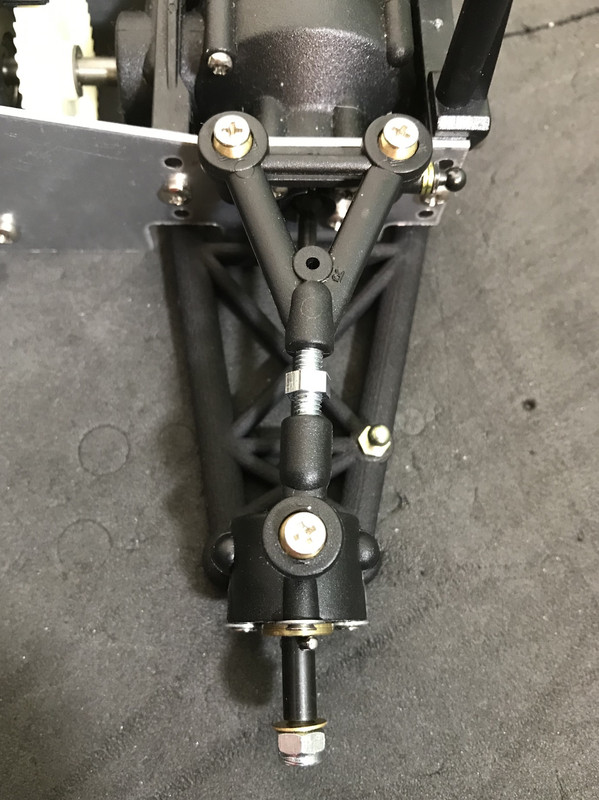
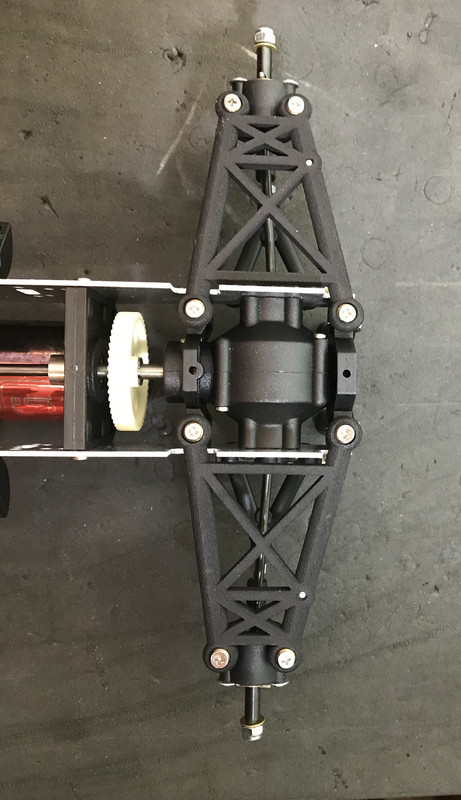
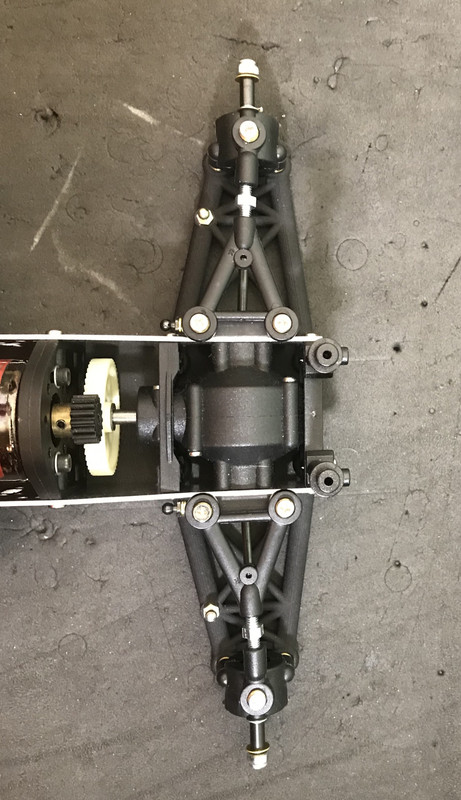
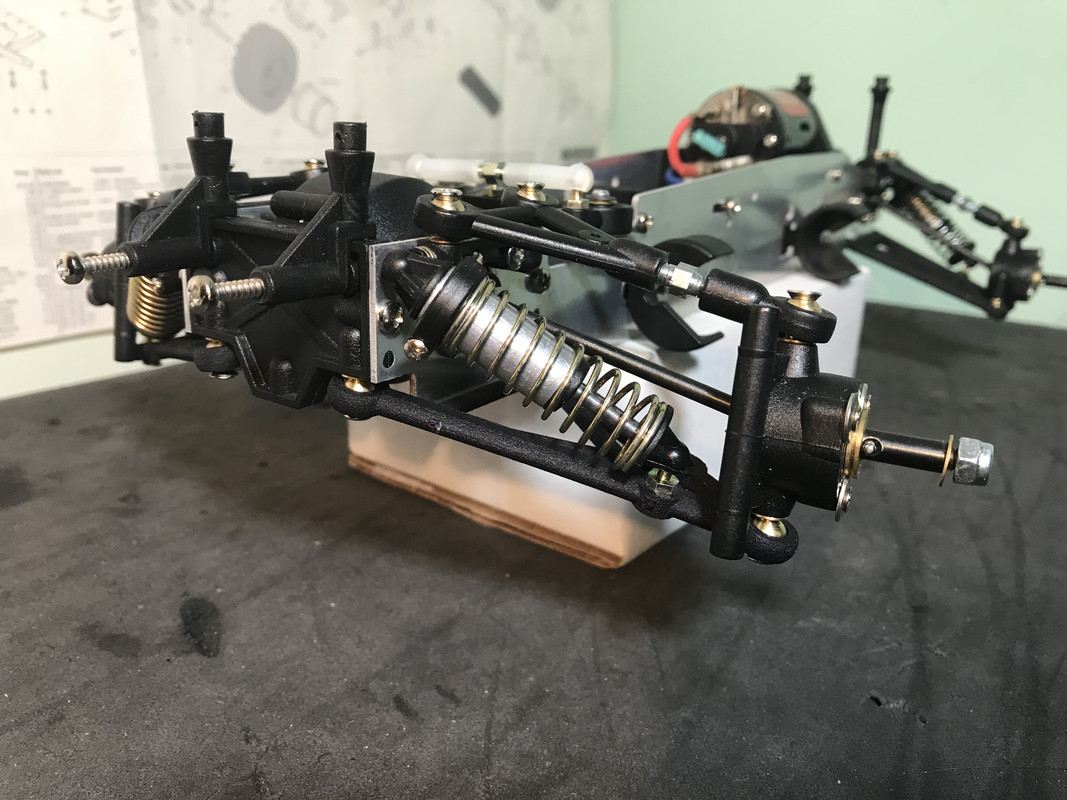
Rear suspension..
Compared to the front..the rear suspension is straight forward. The instructions show putting the “R” of the upper arms towards the rear and lower arms with the shock ball stud towards the rear. This is the standard, short wheelbase setup.
There is an alternate, long wheelbase version you can also build by simply switching the rear arms & upper mounts side to side. This is not mentioned in the instructions but the box specs give us a clue. The rear shocks also get moved to the front of the arms..Here is what that looks like.
Re: Coyote time!
Posted: Sat Feb 05, 2022 3:08 pm
by BattleTrak
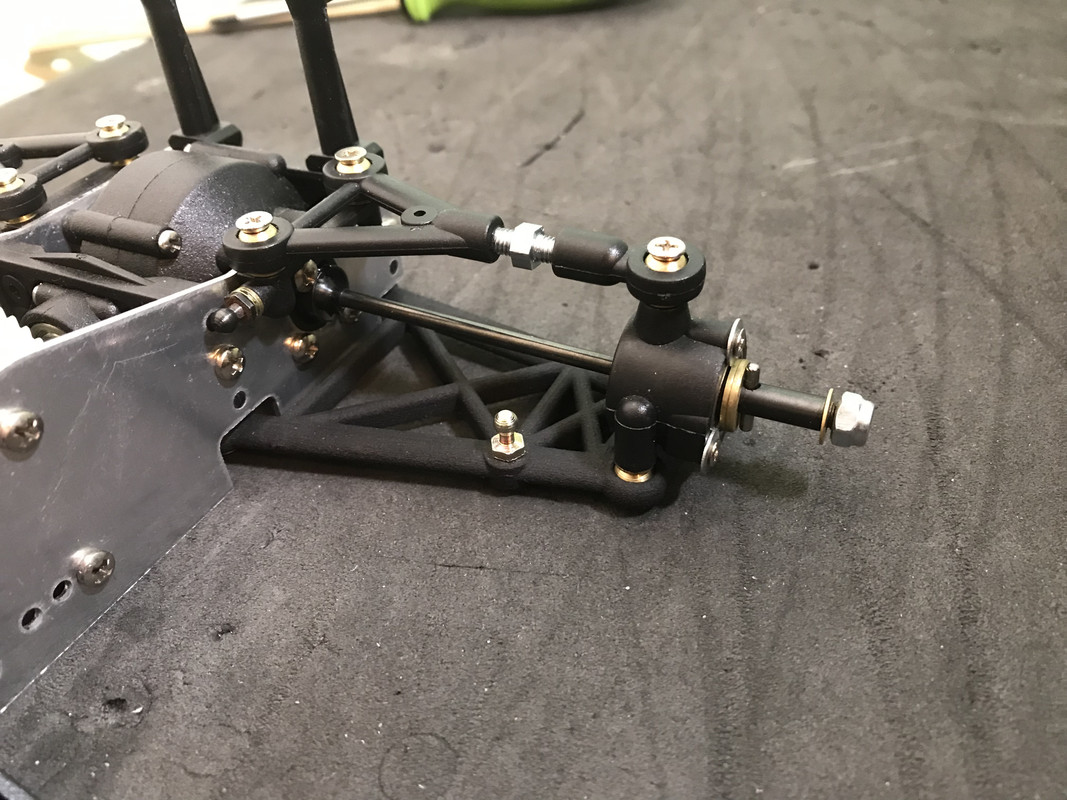
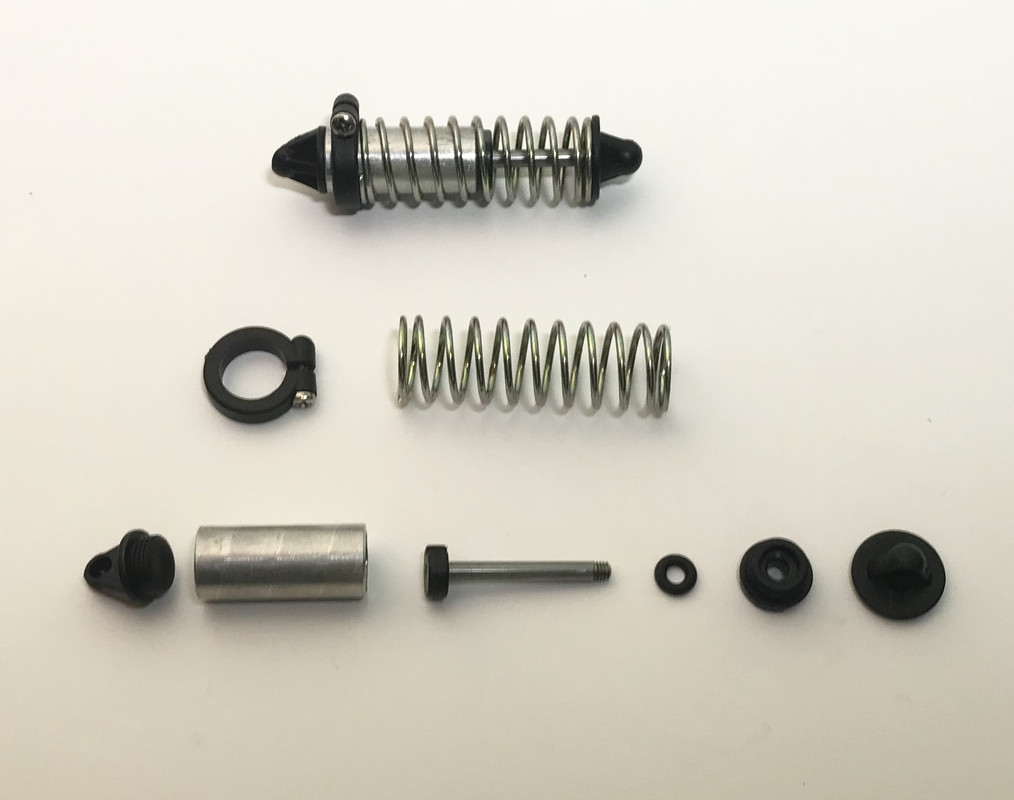
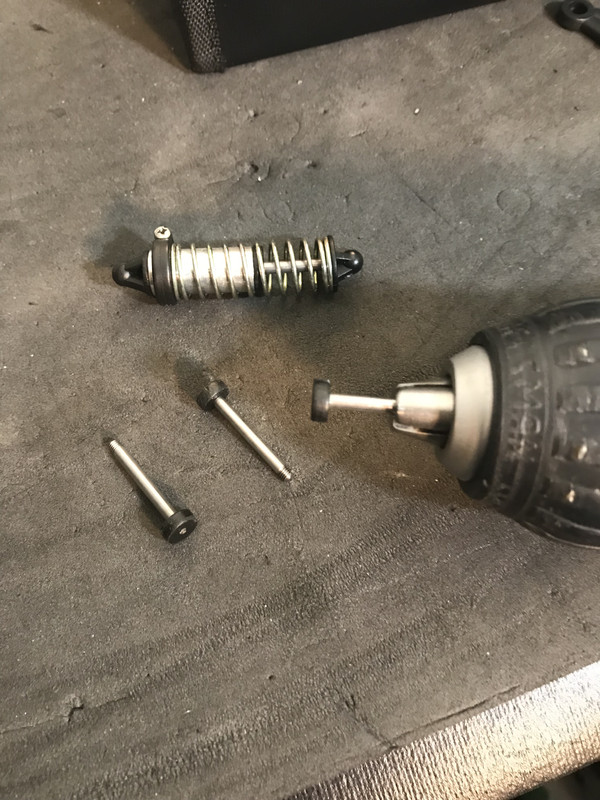
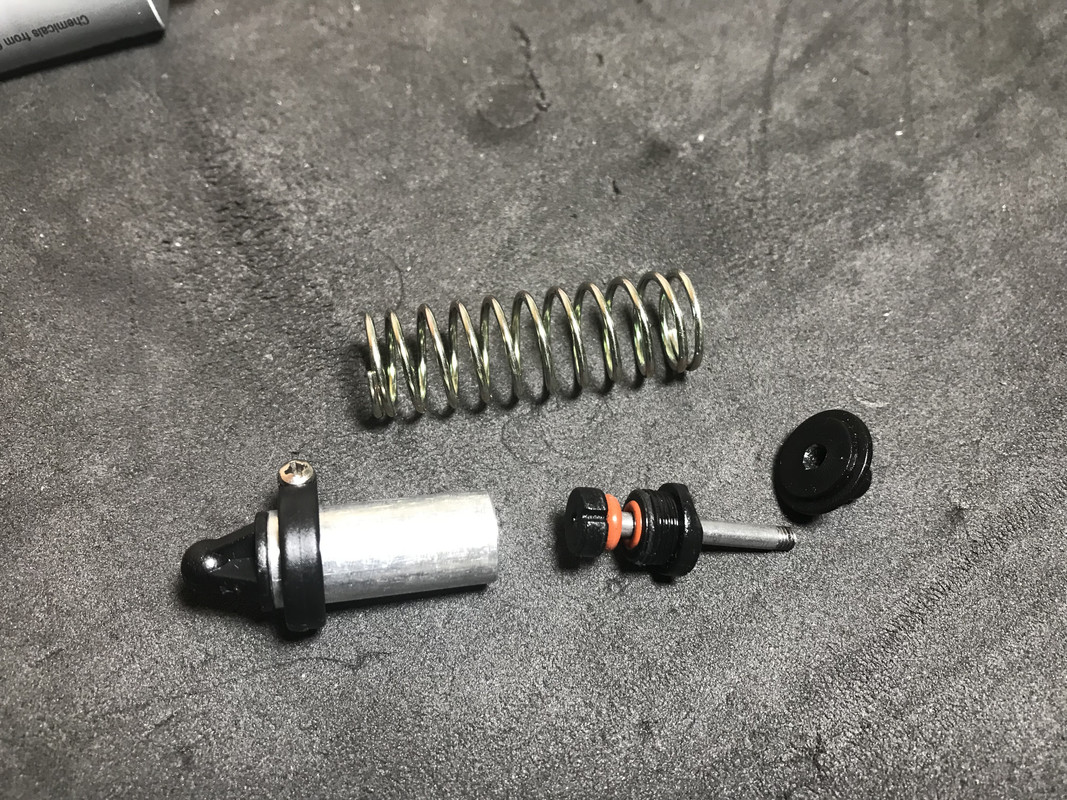
Shocks..
These Coyote shocks are basically a pogo stick with one o-ring that you ‘could’ put oil in..if you dare.
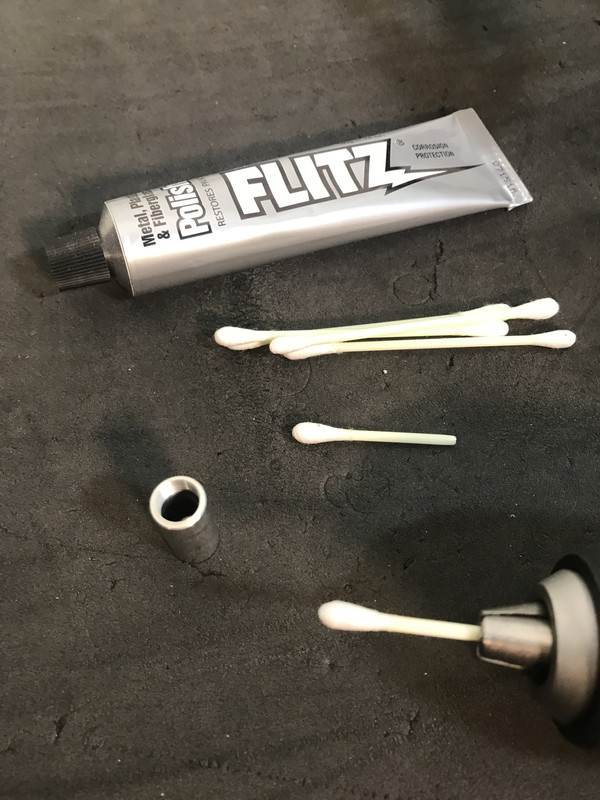
The first thing I did is polish the shock shafts, then smoothed and contoured the pistons.
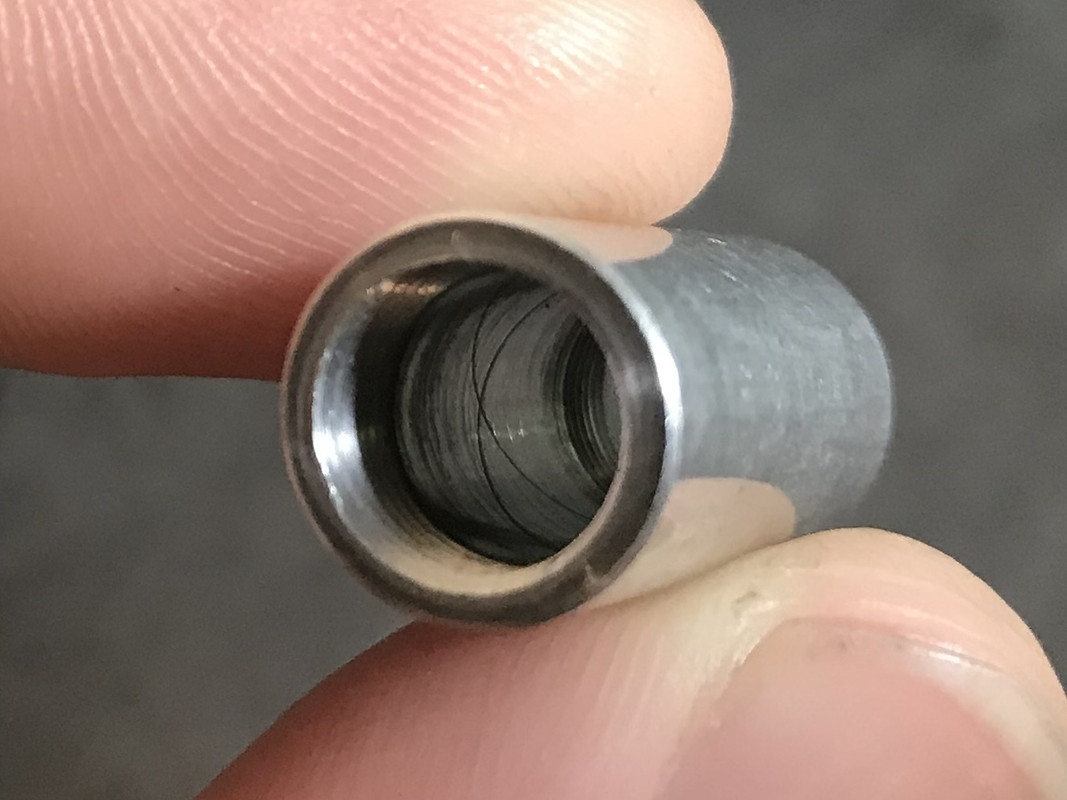
Next was polishing the inside of the shock bodies to remove a rough finish and some scoring from manufacture.
Assembled using red Tamiya o-rings with an extra under the piston to shorten the shock slightly and maybe help with sealing.
They operate smoothly now but won’t be getting filled.
Re: Coyote time!
Posted: Sat Feb 05, 2022 4:44 pm
by Dadio
It's not just the shocks leaking , the angle at the top ball joint is acute and once you get just a little wear in the ball socket in the shock cap then they just pop off , I designed a slight angle into the top ball stud mount point and it works but it also moves the shock down slightly and put stress on the bottom arm , lovely car but the whole shock setup is under developed .
Re: Coyote time!
Posted: Tue Feb 08, 2022 8:38 am
by BattleTrak
Dadio wrote: ↑Sat Feb 05, 2022 4:44 pm
It's not just the shocks leaking , the angle at the top ball joint is acute and once you get just a little wear in the ball socket in the shock cap then they just pop off , I designed a slight angle into the top ball stud mount point and it works but it also moves the shock down slightly and put stress on the bottom arm , lovely car but the whole shock setup is under developed .
Yeah the ball stud shock mounting is odd.. I switched the ball studs around, putting the gold long neck ones on the arms due to the lower spring cup hitting the arm.
Re: Coyote time!
Posted: Wed Nov 23, 2022 10:30 pm
by BattleTrak
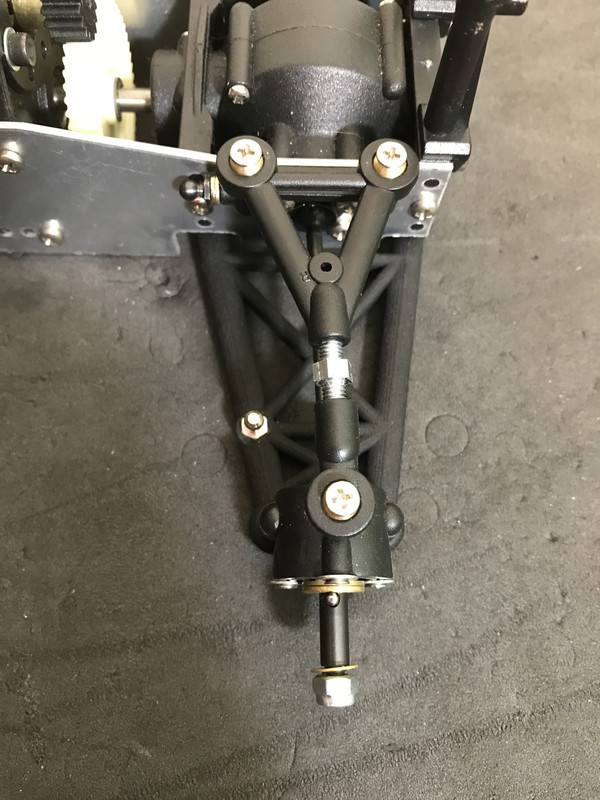
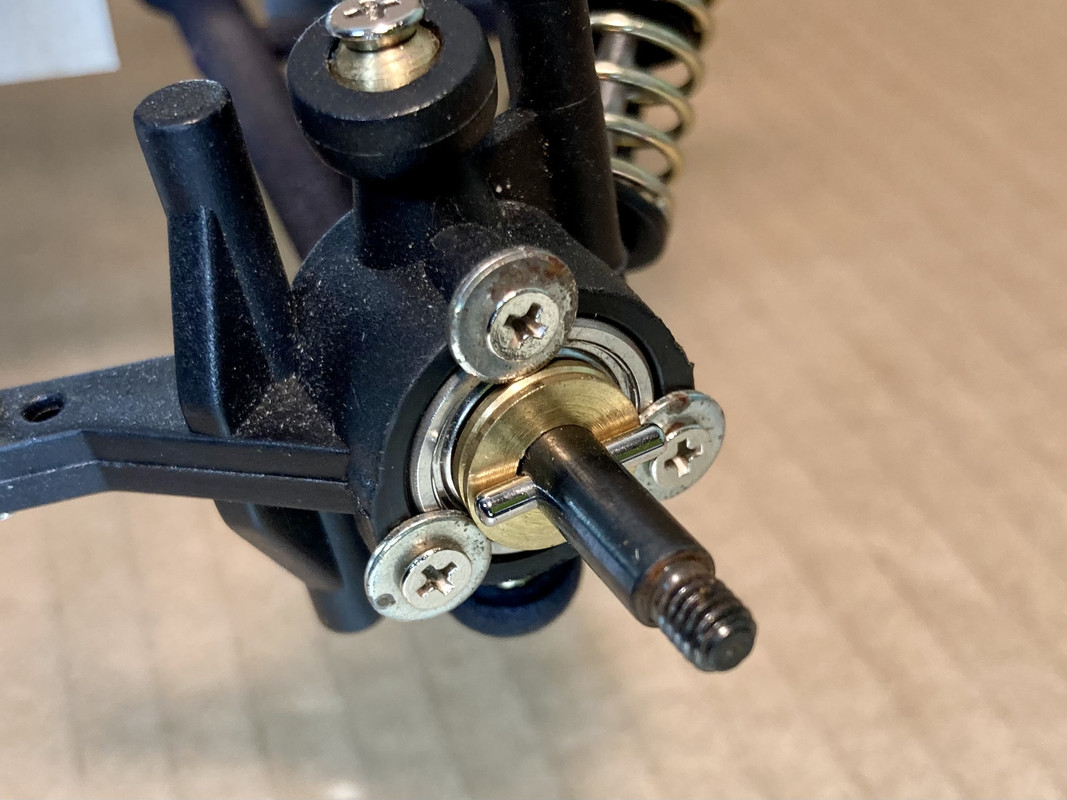
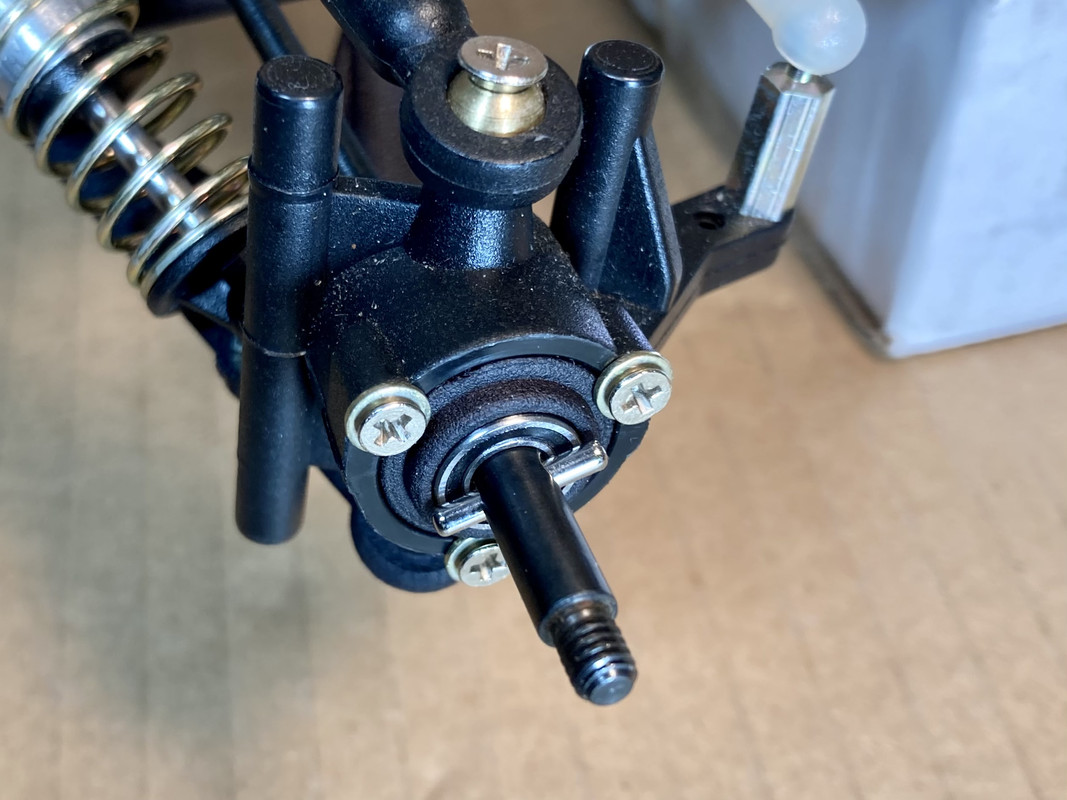
Finally getting this back on the workbench to install @Dadio’s double wheel bearing adapters, put on the front bumper and install a limiting spacer on the rear shocks because the dogbones are getting pulled out of the drive cups.
Stock design with the single 5x16x5mm bearing.
Double bearing mod using two 5x10x3mm bearings…and some more appropriately sized washers..love those Losi A-6215 cad plated washers.
Re: Coyote time!
Posted: Sun Nov 27, 2022 11:45 am
by BattleTrak
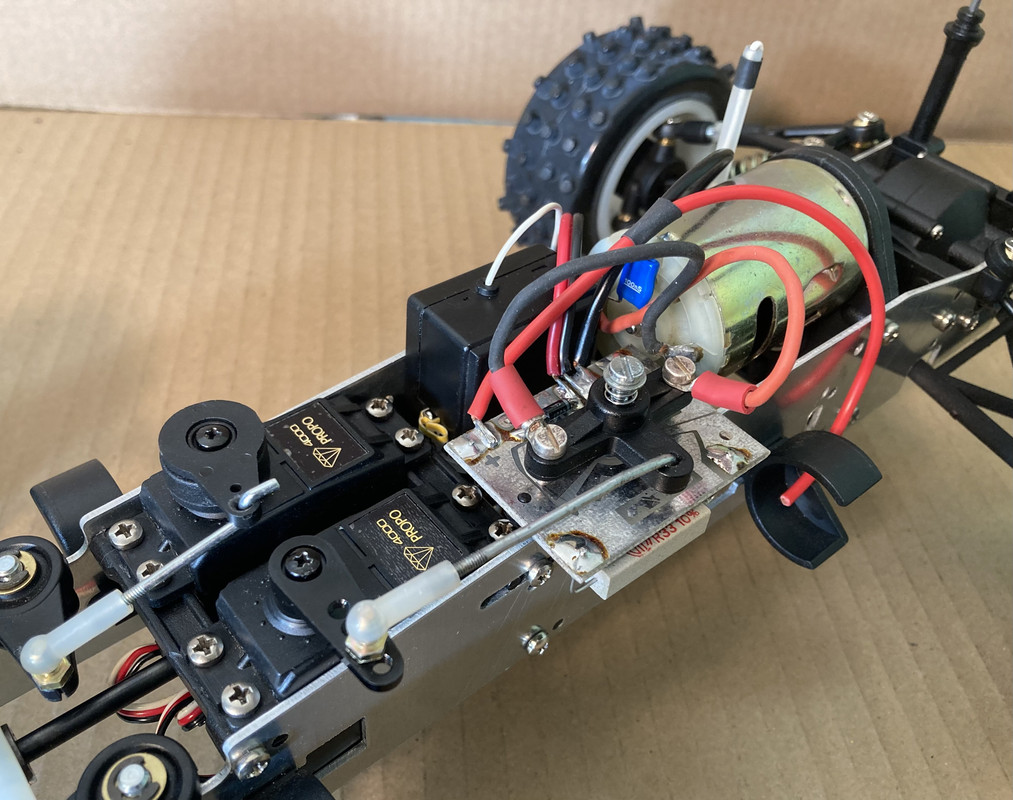
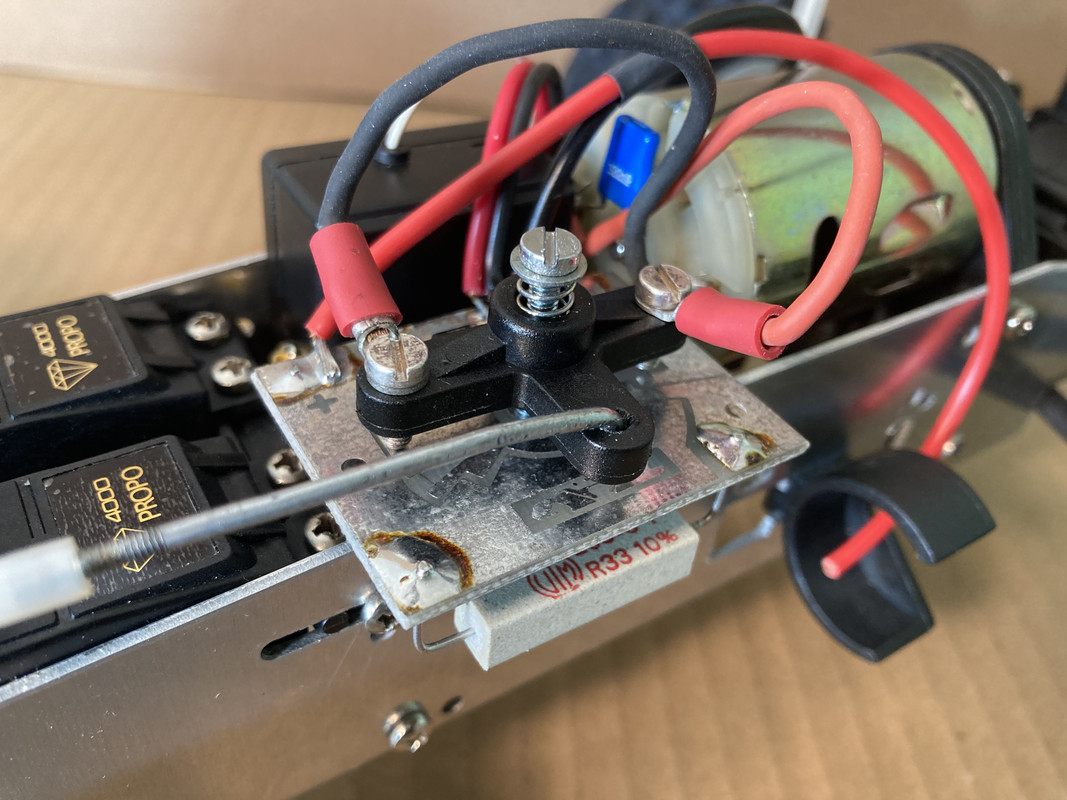
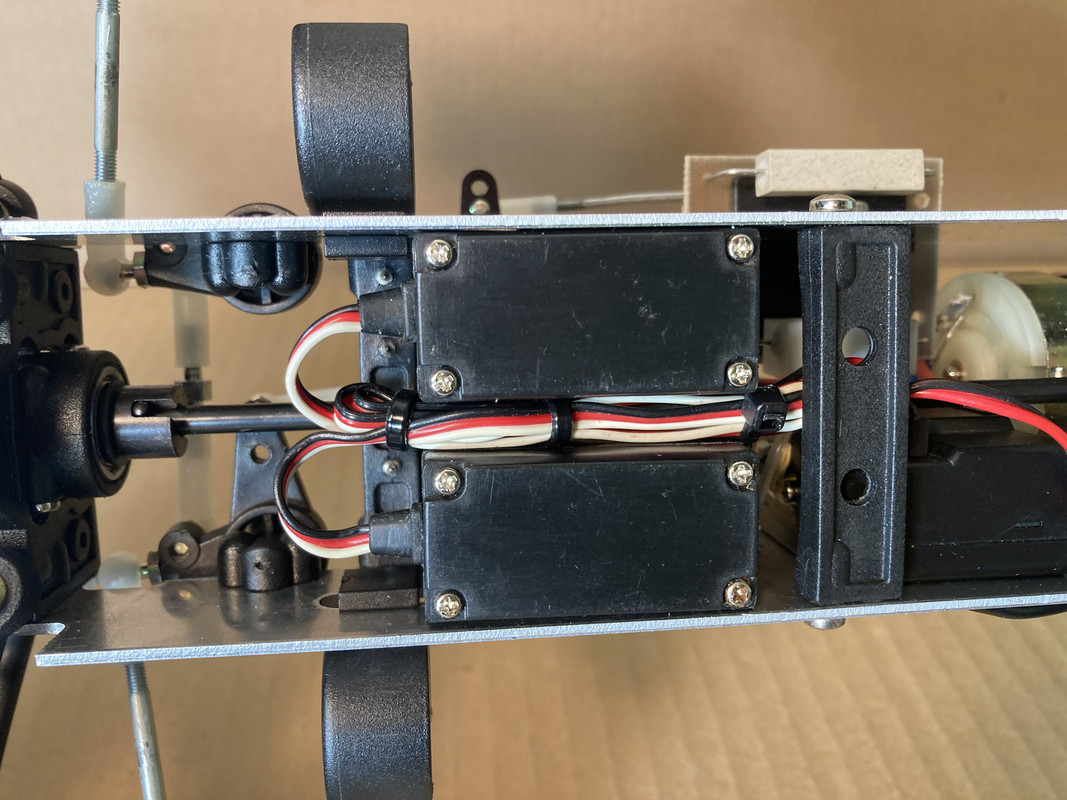
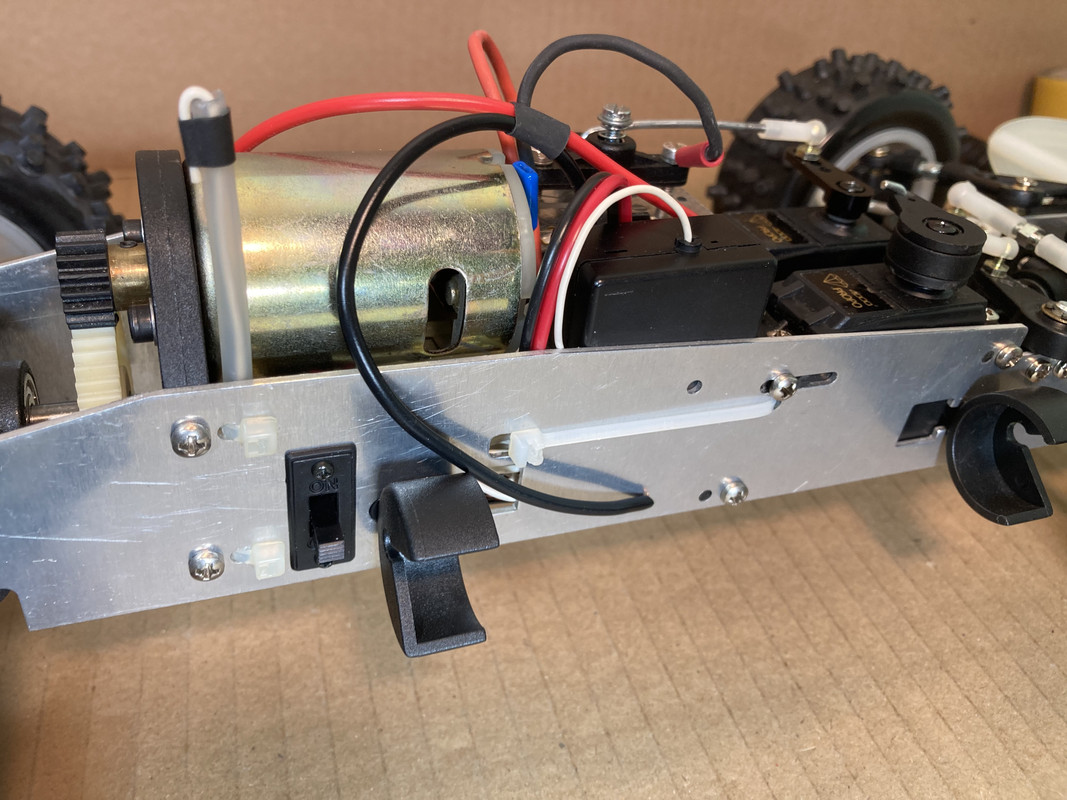
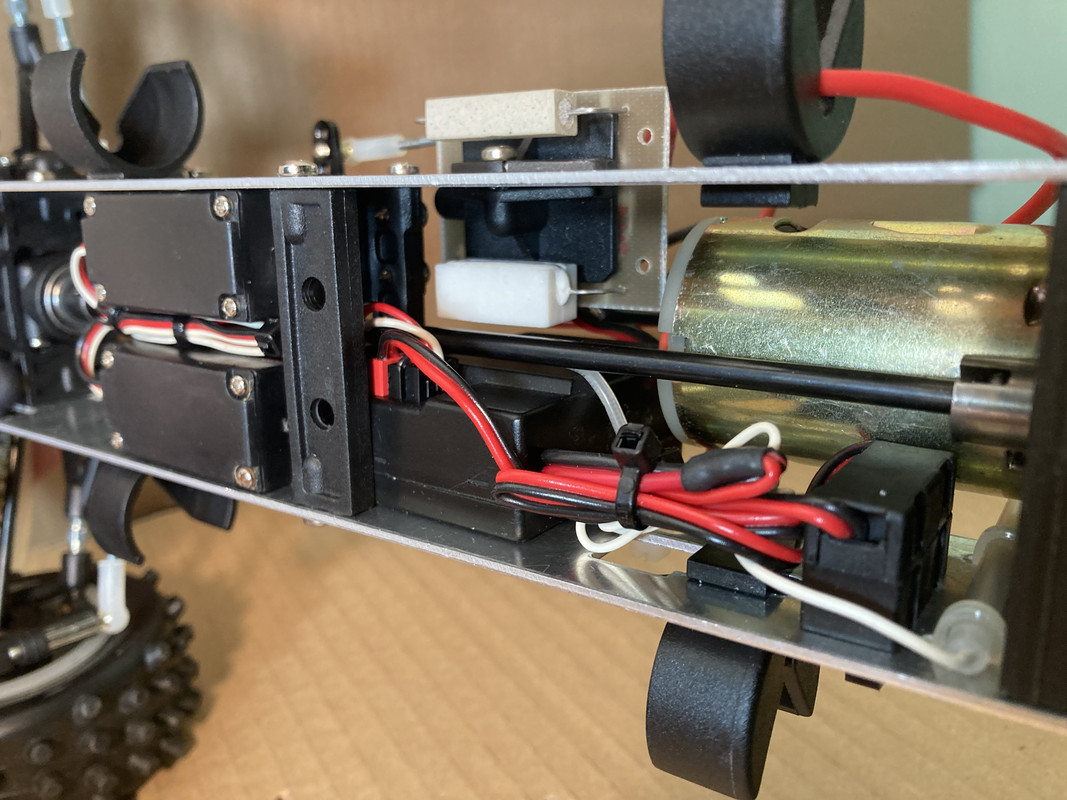
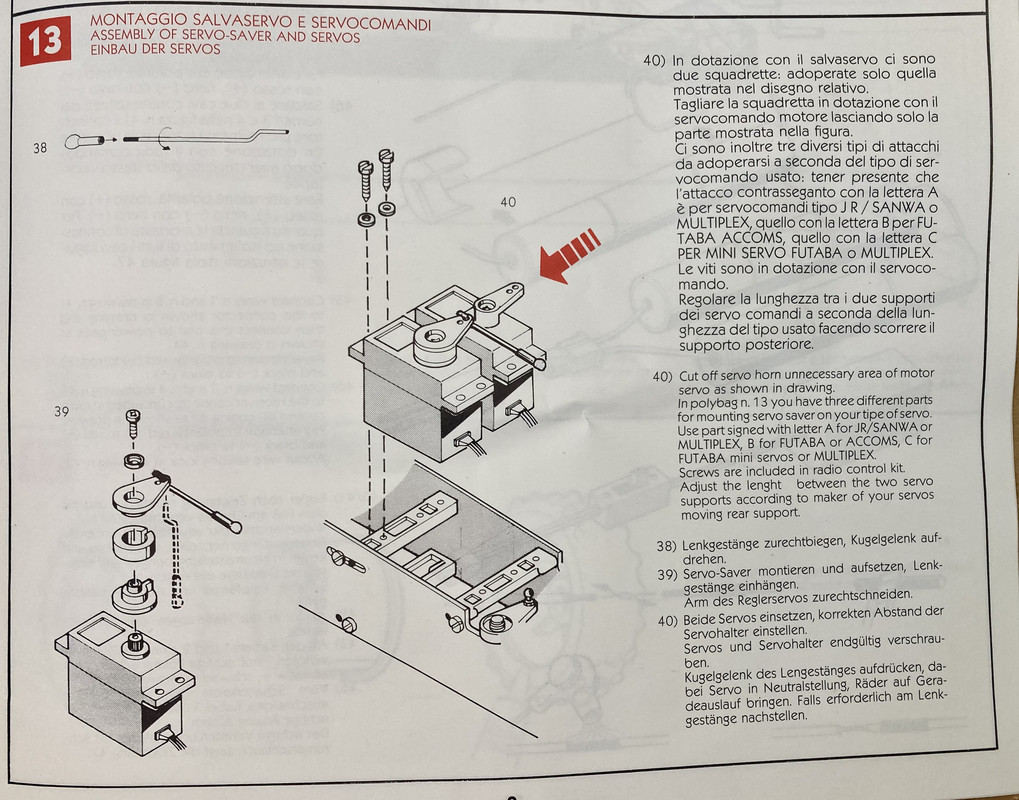
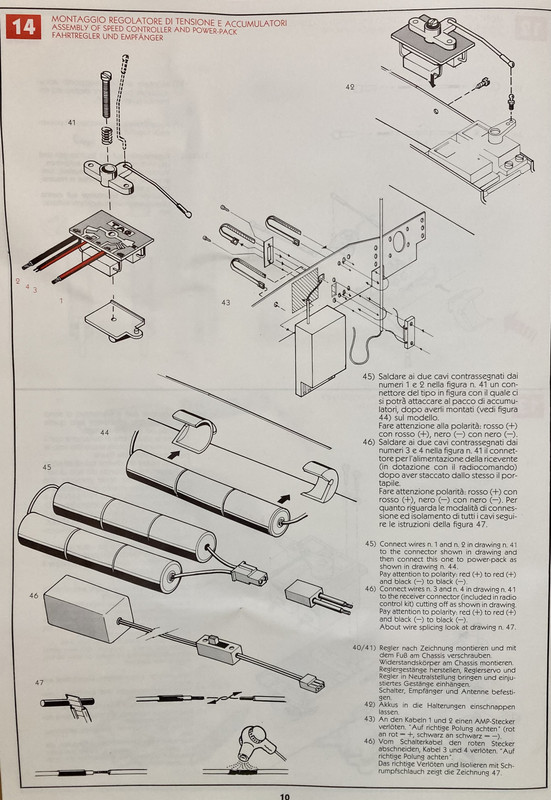
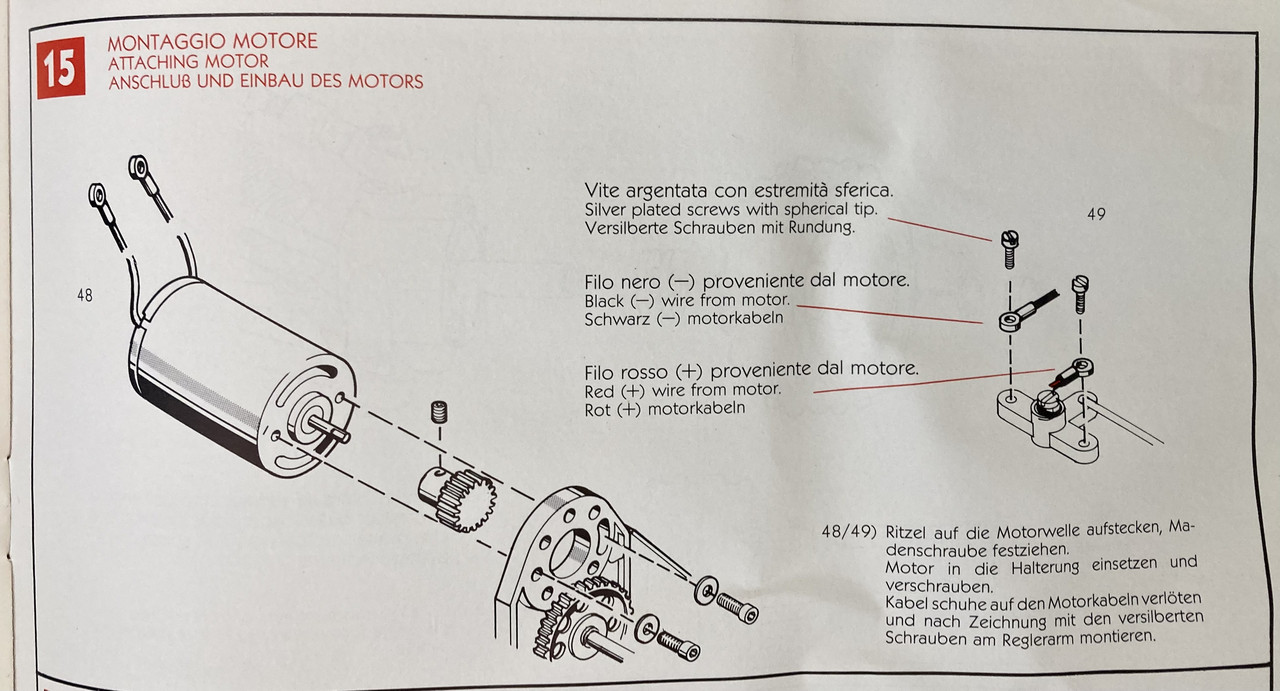
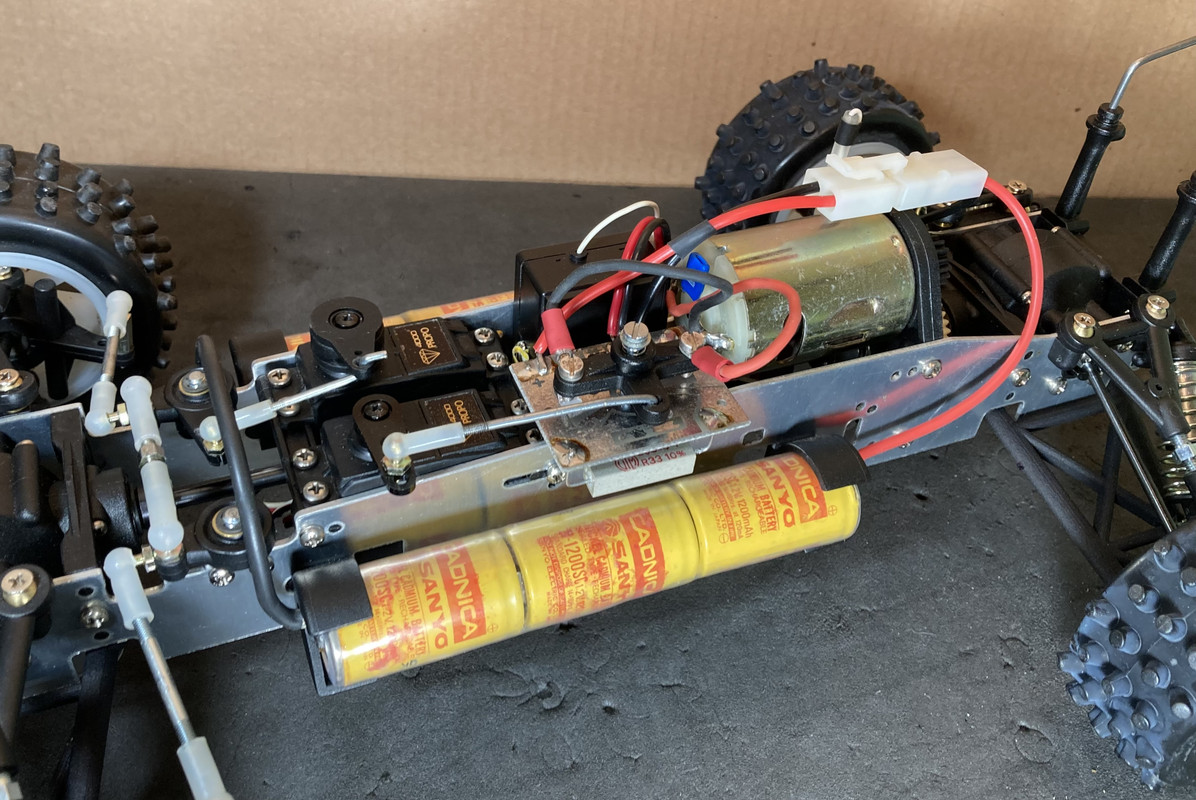
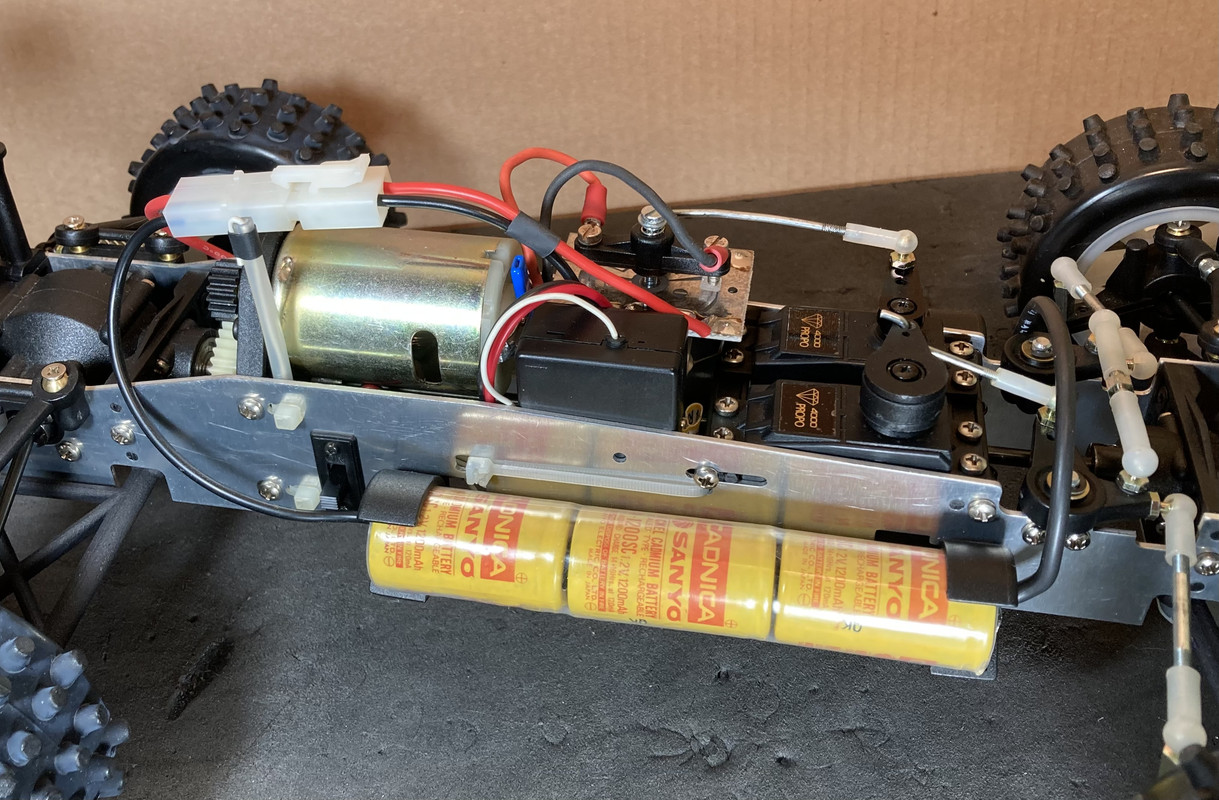
I decided to install the stock electronics and vintage radio gear in this thing. Even though I have done a few subtle mods/improvements, I still want to keep this looking like a box stock build. And when was the last time you saw a good pic of the stock mechanical speed controller properly installed in a Coyote? I couldn’t find one..
It wasn’t easy stuffing these electronics in…there’s little room and you have to be careful to keep everything away from the center driveshaft and resistors. I spliced in a switch harness to the BEC circuit to power the receiver and just did a shorty antenna that will fit under the body.
You have to follow the instructions pretty closely too because there aren’t many other options. Also to note..there are two different styles of MSCs used on the Coyote, so you have to be careful to hook the motor wires up correctly..I had to install mine reversed from what the instructions showed.
Building the battery pack is next..waiting for parts..
Re: SG Coyote time!
Posted: Thu Dec 08, 2022 5:55 pm
by BattleTrak
Got some 1” clear heat shrink tubing and separated a nice looking vintage 1200SC stick battery pack to make the Coyote nunchaku style pack.

 I quickly ran into the problem of brand new suspension arms cracking around the pivot balls and that’s where this has sat for the past two years. Thankfully Dadio Designs made some 3D printed ones and now it’s on again!