Page 1 of 2
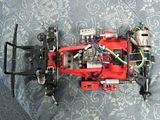
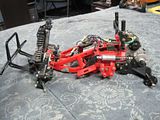
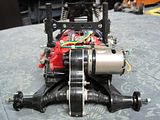
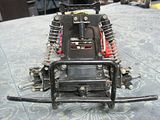
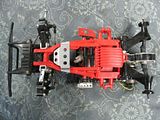
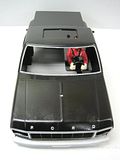
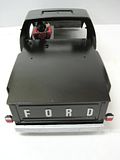
Tamiya "BLACKFOOT" build
Posted: Sat Feb 19, 2011 8:58 pm
by THE H.P FREAK
Re: Tamiya "BLACKFOOT" build
Posted: Sat Feb 19, 2011 9:40 pm
by shirochanwrx
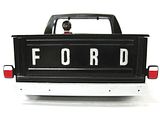
Great work ... but before you put on those new decals, why do you think that the black paint went on so powdery? I see that you sanded it down and prepped with primer, so I am wondering what happened with the last step.
Was it really cold when you were painting it, or maybe the can was too far from the body making it semi-dry by the time it hit the surface? I'm just worried that the decals are not going to lay smooth on the painted surface because of the irregularities, and after all the effort of bringing this thing back to life, it would be a shame to have air-bubbly decals...
Re: Tamiya "BLACKFOOT" build
Posted: Sat Feb 19, 2011 9:52 pm
by THE H.P FREAK
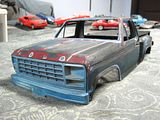
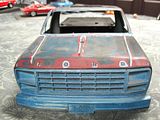
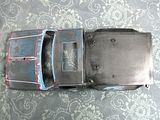
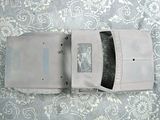
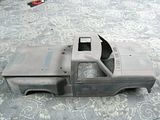
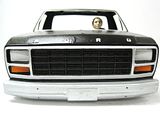
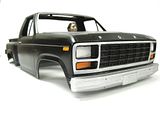
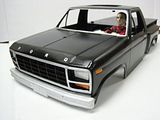
HI!... Well the previous owner of the body had like 5 layers of paint on it. The body was 100% mint so I didn't want to take the chance of wrecking it with any kind of paint stripper. They tend to eat plastic. So I put the body and it's parts in my fine glass bead cabinet. Did a great job of removing all the layers of paint but left the body slightly textured. I used TESTORS paint designed for that body. I'm no newb when it comes to using a spray can. It even has two coats of clear lacquer over all the paint. It's actually quite smooth. The camera is just making it look rough. The decals are sticking fine. No bubbles.
Re: Tamiya "BLACKFOOT" build
Posted: Sat Feb 19, 2011 10:11 pm
by THE H.P FREAK
Re: Tamiya "BLACKFOOT" build
Posted: Sat Feb 19, 2011 10:17 pm
by shirochanwrx
I agree. Those decals look great.
Nice work.
Re: Tamiya "BLACKFOOT" build
Posted: Sun Feb 20, 2011 12:14 pm
by Twin Detonator
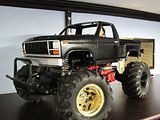
Oooh Aaahh... It looks great! That is one of my favorite trucks.
Are you going to run it, or is it a shelf queen?
Lynn
Re: Tamiya "BLACKFOOT" build
Posted: Sun Feb 20, 2011 12:26 pm
by THE H.P FREAK
HI!... Its going to be a shelf queen. I have 3 other I need to get more parts for and put together. I might turn one of the 3 into a Super Beetle. Then one of the other Blackfoots will be a runner. I have a NIP Thorp diff I need to put in something. lol!
Re: Tamiya "BLACKFOOT" build
Posted: Mon Feb 21, 2011 12:10 am
by airdreams1
Dang you have been on a Tamiya buying frenzy! got some cool cars. This thing is looking good.
I was rying to get 1 of everything (that I like) but now bills are in the way & Ihave to sell off some projects & forget that Idea for a few more years.. Maby when im 50 Ill try again.
Re: Tamiya "BLACKFOOT" build
Posted: Mon Feb 21, 2011 12:38 am
by MelvinsArmy
I wouldn't bead/glass/sand blast any plastic body. Like you said, it left you with a texture. If you dip the body in brake fluid the paint will come right off and you'll have a perfectly smooth plastic surface to work with.
Re: Tamiya "BLACKFOOT" build
Posted: Mon Feb 21, 2011 12:41 am
by victor_cathedral
i kind of like the look that gave, adds a sort of 'scale-ism' to the truck, unique
Re: Tamiya "BLACKFOOT" build
Posted: Mon Feb 21, 2011 6:47 pm
by Diggley
MelvinsArmy wrote:I wouldn't bead/glass/sand blast any plastic body. Like you said, it left you with a texture. If you dip the body in brake fluid the paint will come right off and you'll have a perfectly smooth plastic surface to work with.
I've had good results with "Easy Off" too.
Re: Tamiya "BLACKFOOT" build
Posted: Wed May 18, 2011 4:36 pm
by DougH
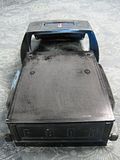
Where did you find a front windshield? I recently got a Blackfoot from Ebay that I'm also restoring. Front windshield was cracked and the sunroof missing, I'm also missing the black chasis cover and the battery compartment pin. Any idea of where to find these items without costing a fortune?
Re: Tamiya "BLACKFOOT" build
Posted: Wed May 18, 2011 5:11 pm
by THE H.P FREAK
Re: Tamiya "BLACKFOOT" build
Posted: Wed May 18, 2011 5:30 pm
by Coelacanth
shirochanwrx wrote:Great work ... but before you put on those new decals, why do you think that the black paint went on so powdery? I see that you sanded it down and prepped with primer, so I am wondering what happened with the last step.
Sanding and primering isn't even half the battle if you're trying to go for a smooth, glossy finish. The reason why the paint job ended up with the orange-peel texture (which always happens unless you do the post-paint elbow grease) is because it wasn't wet-sanded and rubbed down with rubbing and polishing compound after the paint.
A rattle-can paint-job, even with several coats of clear, will always appear like this unless you painstakingly wet-sand with progressively finer grit sandpaper, starting with 400, and then 600, 800, 1000 and 1500 grit, then follow that up with rubbing compound, and then lastly, a polishing compound. You could then apply a wax just for protection & shine after giving the paint a week to cure.
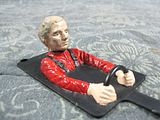
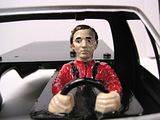
I attached a few pics of a mouse I modded 6 or 7 years ago. It started out with a fine-textured finish very similar to what you get after a rattle-can paint-job. After I wet-sanded and rubbed it down/polished it, you can see the difference--but it's several hours more work, for sure.
Re: Tamiya "BLACKFOOT" build
Posted: Wed May 18, 2011 6:00 pm
by THE H.P FREAK
HI!... Actually if you would of read the entire thread you would of seen that the truck body was glass beaded due to it had several coats of paint on it from the previous owner. I didn't want to take the chance of ruining the body by using a paint stripper. Some strippers soften or melt plastic.