New Optima Build: Project CYANide - Finished!

The place for all things Kyosho.

Moderators: scr8p, klavy69

User avatar
Coelacanth
Approved Member
Posts: 7361
Joined: Thu Jul 29, 2010 6:20 pm
Location: Alberta, Canada
Has thanked: 16 times
Been thanked: 280 times

Sucking in the rear wheels

Post by Coelacanth »

Getting an on-road body to fit the Optima chassis half-decent presents a big challenge. I was able to pull in the fronts enough to look okay by installing short control arms & CVDs, shorter shocks, custom shock tower, 3mm thick hexes...but I was more limited with what I could do to bring in the rears. I moved to 60.5mm CVDs instead of 62.5mm, but the tires were still sticking quite a ways out from the wheel-wells. I knew I was never going to bring them in like the fronts, but every millimeter counts. I saw some 12mm hexes on eBay that looked promising--belonging to the 1/16-scale E-Revo, of all things. The info on Tower Hobbies stated they were 4mm thick, but they sure didn't look that thick in the pictures. I took a chance and bought them, and I was lucky--they're only 3mm thick, and are used with cross-pins! Perfect! (The LA245 CVDs have cross-pins, not tapered friction-fit axles, so I couldn't simply install a pair of 3mm Kyosho hexes as they are press-fit and not machined for cross-pins.)

Well, this presented a bit of a challenge. I learned the 1/16 E-Revo hex holes were 4mm instead of 5mm, and the machining for the cross-pins was only about 1.5mm thick and 8.5mm long. I'd have to modify them to make 10mm x 2mm cross-pins work. So, I used the ol' rotary tool to grind down 2 cross-pins to about 8.5mm long, then used a 2mm drill bit to widen the depressions in the hexes enough to allow the shortened cross-pins to press inside. I drilled out the axle holes to 5mm. It doesn't look pretty on the inside, but nobody's gonna see that anyway. :oops:

I narrowed the rear track width about 4 - 5mm with this mod. It ain't much but every bit counts.
Attachments
E-RevoHexes1.JPG
E-RevoHexes2.JPG
E-RevoHexes3.JPG
Completed projects: CYANide Onroad Optima | Zebra Gold Optima | Barney Optima | OptiMutt RWD Mid
Gallery - Coel's Stalls: Marui Galaxy & Shogun Resto-Mods | FrankenBuff AYK Buffalo | 1987 Buick GNX RC12L3

User avatar
Mindwarp
Approved Member
Posts: 515
Joined: Mon Mar 14, 2011 6:14 pm
Location: Kingston, Ontario, Canada

Re: New Optima Build: Project CYANide

Post by Mindwarp »

I'm really curious to see the body mounted! That looks amazing!

User avatar
Coelacanth
Approved Member
Posts: 7361
Joined: Thu Jul 29, 2010 6:20 pm
Location: Alberta, Canada
Has thanked: 16 times
Been thanked: 280 times

Some "Body On" Pictures

Post by Coelacanth »

Here's how she looks with the body on, after sticking on some adhesive body protector pads and tweaking the body height in the rear. Raising it up more makes it look too weird, and lowering it will cause rear tire rubbing with the slightest shock travel. The front tires can go inside the body with full shock travel, but will rub the wheel-wells if turning full left/right with the shocks compressed, so I had to raise the front of the body a bit.

It's not perfect but what can I say...mounting an on-road body intended for a touring car onto a 4WD off-roader with such a wide track is no easy business! I'm pretty happy with the results, all things considered. :)
Attachments
BodyOn1.JPG
BodyOn2.JPG
BodyOn3.JPG
BodyOn4.JPG
BodyOn5.JPG
Completed projects: CYANide Onroad Optima | Zebra Gold Optima | Barney Optima | OptiMutt RWD Mid
Gallery - Coel's Stalls: Marui Galaxy & Shogun Resto-Mods | FrankenBuff AYK Buffalo | 1987 Buick GNX RC12L3

User avatar
Mindwarp
Approved Member
Posts: 515
Joined: Mon Mar 14, 2011 6:14 pm
Location: Kingston, Ontario, Canada

Re: New Optima Build: Project CYANide

Post by Mindwarp »

It's a beautiful build, well done!

User avatar
Coelacanth
Approved Member
Posts: 7361
Joined: Thu Jul 29, 2010 6:20 pm
Location: Alberta, Canada
Has thanked: 16 times
Been thanked: 280 times

Re: New Optima Build: Project CYANide

Post by Coelacanth »

Thank you, still have a few minor details to take care of...it's all about the details. :) And waiting for a 2500 kV motor--and all the bloody snow to melt--so I can actually take it for a spin and record a vid. 8)
Completed projects: CYANide Onroad Optima | Zebra Gold Optima | Barney Optima | OptiMutt RWD Mid
Gallery - Coel's Stalls: Marui Galaxy & Shogun Resto-Mods | FrankenBuff AYK Buffalo | 1987 Buick GNX RC12L3

User avatar
Hcp22
Approved Member
Posts: 1858
Joined: Sat Jun 19, 2010 6:31 am
Location: Gothenburg Sweden
Has thanked: 33 times
Been thanked: 16 times

Re: New Optima Build: Project CYANide

Post by Hcp22 »

You are the man! 8)
Cheers
Lars

My Feedback

User avatar
Coelacanth
Approved Member
Posts: 7361
Joined: Thu Jul 29, 2010 6:20 pm
Location: Alberta, Canada
Has thanked: 16 times
Been thanked: 280 times

What's in a shock?

Post by Coelacanth »

I thought I'd share a pic of a rear shock, it took me a while to source the parts to make shocks that looked the way I wanted. You'd think it would be an easy thing to build a set of shocks that match and look nice, and also function well. These are 3Racing shocks with 3Racing spring bottom caps for the Kyosho V One RRR and Associated #25544 MMGT blue shock springs. It literally took me months to find blue alloy spring perches and metallic blue springs to fit each other and match the specs of the 3Racing shocks themselves.

The rear suspension detail pic shows some of the parts needed to complete the rear end: Tamiya #53644 blue aluminum stabilizer ends, Tamiya blue alloy turnbuckle shafts, Duratrax DTXC8100 chrome outdrive joints, Yeah Racing 4.8mm Delrin open-ended ball-ends and Tamiya blue alloy 3mm spacers on the shock tower bolts.

So, if you're looking to build your own blue-themed Optima, there's your recipe that works. :)
Attachments
RearShock.jpg
RearSuspension_Detail.JPG
Completed projects: CYANide Onroad Optima | Zebra Gold Optima | Barney Optima | OptiMutt RWD Mid
Gallery - Coel's Stalls: Marui Galaxy & Shogun Resto-Mods | FrankenBuff AYK Buffalo | 1987 Buick GNX RC12L3

User avatar
EvolutionRevolution
Approved Member
Posts: 1495
Joined: Tue Feb 01, 2011 3:24 pm
Location: Netherlands
Has thanked: 20 times
Been thanked: 36 times

Re: New Optima Build: Project CYANide

Post by EvolutionRevolution »

That's...dedication! :D

Are you going to add any blue screws and nuts? I think light blue chromed knock-offs for the wheels would be a nice touch...

Some suggestions:

Team Atlas make the 5.8 mm balls used on Kyosho cars in blue: http://www.miwahobby.co.jp/atlasa/item/mh8/mh8522.htm.

Furthermore, if you can track them down, a Japanese company called Starex made various alloy parts for the Kyosho Spider series in blue, including rear hubs (same as Optima) and a-arms.

Tamiya has sets of swing bars that include a blue, a red, and a yellow one...maybe there's a car of which the swing bars also fit the Optima so you can have a blue swing bar?

User avatar
Coelacanth
Approved Member
Posts: 7361
Joined: Thu Jul 29, 2010 6:20 pm
Location: Alberta, Canada
Has thanked: 16 times
Been thanked: 280 times

Re: New Optima Build: Project CYANide

Post by Coelacanth »

Thanks for the tips, I'll look into those rear hubs! Those sound awesome, if you can find a link, please share. :)

No, I didn't give blue screws serious thought, I wanted stainless steel. I have 4mm blue alloy lock-nuts for the wheels already, just haven't installed them yet--with all the wheel removing/replacing, I would've worn out the nylon by now. :mrgreen: I also didn't want to use 5.8mm balls anywhere, even though that's the stock sizing for many components, because they require open-ended ball-ends which wear out much faster than full ball-cups. 5.8mm ball cups also have a much higher profile and would cause a lot of rubbing or binding or wouldn't even move freely for the steering components. ;)

4.8mm Delrin open ball-ends allow you to use 4.8mm alloy ball studs, which are easy to find, and have a lower profile than 4.8mm ball-cups. I needed those for the steering servo ball stud and the stabilizer.
Completed projects: CYANide Onroad Optima | Zebra Gold Optima | Barney Optima | OptiMutt RWD Mid
Gallery - Coel's Stalls: Marui Galaxy & Shogun Resto-Mods | FrankenBuff AYK Buffalo | 1987 Buick GNX RC12L3

User avatar
Coelacanth
Approved Member
Posts: 7361
Joined: Thu Jul 29, 2010 6:20 pm
Location: Alberta, Canada
Has thanked: 16 times
Been thanked: 280 times

Front alloy control arms located!

Post by Coelacanth »

I made a nice eBay score on these front & rear Kyosho TF3 billet control arms for $10 that are an almost perfect match to the nylon Spider GP-10 arms I installed previously. The seller had them advertised as "Tamiya TF3" so nobody else bid but me. :mrgreen:

They were just a tad wider at the C-carrier end than the plastic ones, so I used a 1mm thick Tamiya alloy spacer before snapping on the e-clip.

I also received a nice set of Starex front alloy control arms from EvolutionRevolution which have more or less the same shape as the plastic arms and are a bit thicker, but I actually prefer the funky design of these Top Racing Performance arms. It doesn't look like I'll be using the rears--they're a perfect fit to replace the stock Optima arms at the frame side, but they're too short.

This project is getting close to being finished.
Attachments
BlueControlArms1.jpg
BlueControlArms2.jpg
BlueControlArms3.jpg
BlueControlArms4.jpg
BlueControlArms5.jpg
Completed projects: CYANide Onroad Optima | Zebra Gold Optima | Barney Optima | OptiMutt RWD Mid
Gallery - Coel's Stalls: Marui Galaxy & Shogun Resto-Mods | FrankenBuff AYK Buffalo | 1987 Buick GNX RC12L3

User avatar
Hcp22
Approved Member
Posts: 1858
Joined: Sat Jun 19, 2010 6:31 am
Location: Gothenburg Sweden
Has thanked: 33 times
Been thanked: 16 times

Re: New Optima Build: Project CYANide

Post by Hcp22 »

Nice score :D
Cheers
Lars

My Feedback

User avatar
EvolutionRevolution
Approved Member
Posts: 1495
Joined: Tue Feb 01, 2011 3:24 pm
Location: Netherlands
Has thanked: 20 times
Been thanked: 36 times

Re: New Optima Build: Project CYANide

Post by EvolutionRevolution »

So are you going to add the rear hubs too?

User avatar
Coelacanth
Approved Member
Posts: 7361
Joined: Thu Jul 29, 2010 6:20 pm
Location: Alberta, Canada
Has thanked: 16 times
Been thanked: 280 times

Re: New Optima Build: Project CYANide

Post by Coelacanth »

EvolutionRevolution wrote:So are you going to add the rear hubs too?
Already done--just waiting on a few details before taking more pics. :) They look fantastic but the CVD cups are a tighter fit inside the alloy hubs than the stock nylon hubs, which required a bit of tweaking to make everything silky-smooth.
Completed projects: CYANide Onroad Optima | Zebra Gold Optima | Barney Optima | OptiMutt RWD Mid
Gallery - Coel's Stalls: Marui Galaxy & Shogun Resto-Mods | FrankenBuff AYK Buffalo | 1987 Buick GNX RC12L3

User avatar
Coelacanth
Approved Member
Posts: 7361
Joined: Thu Jul 29, 2010 6:20 pm
Location: Alberta, Canada
Has thanked: 16 times
Been thanked: 280 times

There's light at the end of the tunnel!!

Post by Coelacanth »

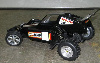
One of my biggest challenges with this build turned out to be narrowing the track front & rear. Ironically, I would've thought bringing in the fronts more difficult than the rears, but the opposite was true. Simply changing to Kyosho Spider/TF3 front arms & CVDs (and camber links/tie rods/shocks/shock towers, hehe!) was all it took to narrow the front track.

Pulling in the rears turned out to be a more frustrating task, but I think I finally acquired all the parts needed to do it! I must've spent at least 4 hours last night messing around with various components and FINALLY managed to pull in the rear tires flush with the 'Cuda's wheel-wells.

It took a combination of Lazer ZX-5 hub/carriers, GPM alloy arms, MIP shiny CVD bones for the HPI RS4 that were installed in place of existing Kyosho CVD bones (and needed a bit of grinding on the inside to improve smoothness), more shock travel adjustments, adding longer ball-cups to increase the camber link lengths, and various spacers to make this work. Whew!

Pics to follow this weekend...I was too tired last night to take pics. :P This project is nearly complete! I just need to CA the tires, drill some 3mm holes for the rear stabilizer link ball-studs (the GPM arms lack mounting holes there) and give it a final wipe-down...that should just about wrap things up. 8)
Completed projects: CYANide Onroad Optima | Zebra Gold Optima | Barney Optima | OptiMutt RWD Mid
Gallery - Coel's Stalls: Marui Galaxy & Shogun Resto-Mods | FrankenBuff AYK Buffalo | 1987 Buick GNX RC12L3

User avatar
Coelacanth
Approved Member
Posts: 7361
Joined: Thu Jul 29, 2010 6:20 pm
Location: Alberta, Canada
Has thanked: 16 times
Been thanked: 280 times

Rear Suspension Mods

Post by Coelacanth »

Here's a couple pics of the rear suspension, using the $5 GPM alloy arms--a direct fit but are about 4.5mm longer than the stock arms and require some spacers to eliminate the play on either side of the hub carriers. The $12 Lazer ZX-5 hubs have much less offset than the stock hubs, bringing in the outer bearing by about 17mm. I had to mix-'n'-match to make a CVD to fit properly, using some MIP shiny CVD bones for an HPI RS4 (about 52.5mm as opposed to the 60.5mm CVD bones I was using previously) with the Kyosho CVD axles. I had to do some grinding on the inside of the shiny bone cups to make things move smoothly, but now they spin silky-smooth. I also had to make some smaller 1.6mm crosspins because the holes in the MIP bones were too small to fit standard 2mm crosspins. I used wing wire for that. After all that, the net change in track width was about 7 or 8mm shorter on either side.

As the alloy GPM arms are 5mm longer than stock, I had to lengthen the turnbuckles by attaching longer ball-cups. I also had to shorten the shock travel by about 5mm as the holes to mount the shocks were inboard about 15mm from the stock arm holes. Lastly, I drilled some 3mm holes in the rear surface of the GPM arms so I could reinstall the stabilizer link assembly.

The best part of these mods is how the body fits the rear tires now! It looks great now but my main motivation was to reduce the stagger between front and rear track. I figured that the bigger the difference was between front & rear track, the more unstable and likely to flip the car would be. With rear tires significantly wider apart than the fronts, I imagine the cornering capabilities would be closer to a shopping cart or trike, the greater the amount of stagger gets. Reducing the stagger will probably help with cornering performance. I hope, anyway. :)
Attachments
RearMods1.jpg
RearMods2.jpg
Completed projects: CYANide Onroad Optima | Zebra Gold Optima | Barney Optima | OptiMutt RWD Mid
Gallery - Coel's Stalls: Marui Galaxy & Shogun Resto-Mods | FrankenBuff AYK Buffalo | 1987 Buick GNX RC12L3

Post Reply

Create an account or sign in to join the discussion

You need to be a member in order to post a reply

Create an account

Not a member? register to join our community
Members can start their own topics & subscribe to topics
It’s free and only takes a minute

Register

Sign in

  • Similar Topics
    Replies
    Views
    Last post
  • Turbo Optima build - Project Barney: Finished
    by Coelacanth » » in Kyosho Forum
    175 Replies
    29230 Views
    Last post by Coelacanth
  • Optima mid mega build project started
    by rccars4sal » » in Kyosho Forum
    29 Replies
    3467 Views
    Last post by rccars4sal
  • My First Vintage Tamiya Blackfoot Restoration Project project Finally Finished!
    by TycoTamiya4eva » » in Tamiya Forum
    9 Replies
    178 Views
    Last post by TycoTamiya4eva
  • My Optima finally finished
    by Rizzo » » in Kyosho Forum
    9 Replies
    1191 Views
    Last post by HotRodJosh
  • I finally finished an Optima! Well almost...
    by RedScampi » » in Kyosho Forum
    15 Replies
    1535 Views
    Last post by RedScampi
  • Finished my Optima Mid Runner
    by Percymon » » in Kyosho Forum
    9 Replies
    1286 Views
    Last post by mtbkym01
  • Finished A&L project
    by ra272 » » in RC10 Buggy Forum
    41 Replies
    3851 Views
    Last post by railey72
  • project RC12e4 take II, now finished!
    by GoMachV » » in Associated On-Road Forum
    22 Replies
    3942 Views
    Last post by moto-steve

Return to “Kyosho Forum”

Who is online

Users browsing this forum: No registered users and 4 guests