New Optima Build: Project CYANide - Finished!

The place for all things Kyosho.

Moderators: scr8p, klavy69

User avatar
Coelacanth
Approved Member
Posts: 7421
Joined: Thu Jul 29, 2010 6:20 pm
Location: Alberta, Canada
Has thanked: 16 times
Been thanked: 325 times

Detailing

Post by Coelacanth »

I haven't made much progress since I'm figuring out what to do for my steering servo linkage. Because 4.8mm ball cups are too tall when used with an Integy blue alloy servo horn & the stock servo saver, the only ball-ends that would work are the stock skinny ones that thread onto 2mm rods. Those were just plain crappy, and I didn't want to use a sloppy L-angle in the horn--it wouldn't fit, anyway. I want to use a 3mm turnbuckle. I might have a solution, but we'll have to wait another week or two to see how/if it'll work.

In the meantime, I cut some dust covers from spare Lexan. I wanted something to limit dust but not be as messy-looking as a silicone caulk-job. I think this will work pretty good, and it's easily removable.

I also installed an antenna mount that's supposed to prevent the antenna tube from bending during roll-overs. It looks nice and has a blue aluminum cap on the top (more on that when I have the receiver installed).

The last thing I did was install the rear stabilizer with some nice Tamiya blue alloy balls/chrome set screws. Now back to waiting... :?
Attachments
LexanCover1.jpg
LexanCover2.jpg
AntennaMount.jpg
RearStabilizer.jpg
Completed projects: CYANide Onroad Optima | Zebra Gold Optima | Barney Optima | OptiMutt RWD Mid
Gallery - Coel's Stalls: Marui Galaxy & Shogun Resto-Mods | FrankenBuff AYK Buffalo | 1987 Buick GNX RC12L3

User avatar
madmaxx
Approved Member
Posts: 60
Joined: Thu Feb 03, 2011 8:39 pm

Re: New Optima Build: Project CYANide

Post by madmaxx »

all i have to say is.... AWESOME!!!!!!

User avatar
esaresky75
Approved Member
Posts: 332
Joined: Mon Jan 24, 2011 9:09 pm
Location: Scranton, PA

Re: Detailing

Post by esaresky75 »

Coelacanth wrote:I also installed an antenna mount that's supposed to prevent the antenna tube from bending during roll-overs.

Waiting for more info on this antenna mount....
Burn more coal - UnderGroundMiners.com

User avatar
emerson_shih
Approved Member
Posts: 121
Joined: Wed Nov 04, 2009 11:52 pm
Location: Taiwan

Re: New Optima Build: Project CYANide

Post by emerson_shih »

Wow, what a great job! 8)
Too early to know 'bormac', too late to know 'mrlexan', just in time to know 'murphy3428'.
http://www.rc-lohas.com

User avatar
Coelacanth
Approved Member
Posts: 7421
Joined: Thu Jul 29, 2010 6:20 pm
Location: Alberta, Canada
Has thanked: 16 times
Been thanked: 325 times

Re: Detailing

Post by Coelacanth »

esaresky75 wrote:
Coelacanth wrote:I also installed an antenna mount that's supposed to prevent the antenna tube from bending during roll-overs.
Waiting for more info on this antenna mount....
Thanks for the comments! Here's one on eBay exactly like the one I used:

http://cgi.ebay.ca/Blue-Spring-Antenna-Tube-/160490564698?pt=Radio_Control_Parts_Accessories&hash=item255dfbac5a

Unfortunately, the eBay picture isn't as easy-to-understand as mine. :) I basically just used the Optima's existing antenna hole to run through the antenna tube, and drilled a 3mm hole through the upper aluminum deck, stopping when it went through the aluminum plate. I then used a smaller bit and drilled into the nylon W-shaped chain guide separator piece/antenna mount. I then used a 3mm flat-head screw to bolt the spring mount into the deck/W-piece.

The opposite end has an aluminum cap that you screw onto the top of the spring after running the antenna wire through it.
Completed projects: CYANide Onroad Optima | Zebra Gold Optima | Barney Optima | OptiMutt RWD Mid
Gallery - Coel's Stalls: Marui Galaxy & Shogun Resto-Mods | FrankenBuff AYK Buffalo | 1987 Buick GNX RC12L3

User avatar
Coelacanth
Approved Member
Posts: 7421
Joined: Thu Jul 29, 2010 6:20 pm
Location: Alberta, Canada
Has thanked: 16 times
Been thanked: 325 times

Re: New Optima Build: Project CYANide

Post by Coelacanth »

No update pics today, but the last few free evenings I've spent working on the 'Cuda body and fitment. I'll say one thing, by having separate pieces to cut out and fit for the rear deck spoiler and rear bumper/valance, this sure adds to the complexity! Even when I cut exactly along the lines, the 2 extra pieces did not fit as perfectly as I'd hoped--in places, it wasn't even close! But several hours alternating between Dremel grinding, sanding, and test-fitting, I must say things are looking very nice.

I thought I'd wait until painting was finished before posting new pictures, as I've already posted clear body shots and more of the same would just be boring. 8)
Completed projects: CYANide Onroad Optima | Zebra Gold Optima | Barney Optima | OptiMutt RWD Mid
Gallery - Coel's Stalls: Marui Galaxy & Shogun Resto-Mods | FrankenBuff AYK Buffalo | 1987 Buick GNX RC12L3

User avatar
Coelacanth
Approved Member
Posts: 7421
Joined: Thu Jul 29, 2010 6:20 pm
Location: Alberta, Canada
Has thanked: 16 times
Been thanked: 325 times

Electronics installed

Post by Coelacanth »

I finally got all the electronics installed. I wanted to use an AE blue titanium turnbuckle as the steering rod but since it was 4-40 thread and therefore too big for the stock ball-ends--which I didn't want to use anyway because they're too wimpy and wear out too quickly--I had to re-think what I wanted to do. I decided to go with 4.8mm Delrin ball-ends with 3mm thread holes, that way the steering rod could mount to the 4.8mm balls installed in the servo horn & steering assembly. Those Delrin ball-ends snapped on nice and tight, they're smooth as silk, and there's no slop whatsoever...and steering adjustments should be easier with the turnbuckle. 8)

I also swapped the 4.8mm ball-cups initially installed on the tops of the sway bar links with the Delrin ball-ends so that the sway bar rod could move freely in and out of the ball-end holes and be adjustable.

I installed a Castle Sidewinder ESC, Futaba S3003 steering servo and small receiver, cutting off excess wiring. I'm anxious to power up this bad-boy and see how the steering works; perhaps because of the shorter control arms, the servo needs much less than half of it's trim range to go from full-left to full-right. Maybe not much over 45 degrees.

As far as a motor goes, I want to run something brushless but I'm not sure what power I should go with. I was thinking 13.5T at first but now I'm not so sure. I don't want it to be so fast it's uncontrollable! Maybe a 17T or so? What do you guys recommend?
Attachments
Electronics1.JPG
Electronics2.JPG
SteeringServo.JPG
Completed projects: CYANide Onroad Optima | Zebra Gold Optima | Barney Optima | OptiMutt RWD Mid
Gallery - Coel's Stalls: Marui Galaxy & Shogun Resto-Mods | FrankenBuff AYK Buffalo | 1987 Buick GNX RC12L3

User avatar
EvolutionRevolution
Approved Member
Posts: 1494
Joined: Tue Feb 01, 2011 3:24 pm
Location: Netherlands
Has thanked: 17 times
Been thanked: 34 times

Re: New Optima Build: Project CYANide

Post by EvolutionRevolution »

You should have used an LRP ESC, purely because they're blue! :lol:

13.5 or 17.5 turns should be okay.

User avatar
Coelacanth
Approved Member
Posts: 7421
Joined: Thu Jul 29, 2010 6:20 pm
Location: Alberta, Canada
Has thanked: 16 times
Been thanked: 325 times

Custom bumper mounted

Post by Coelacanth »

I took the heat gun to my custom-made bumper and gave it a few bends to better fit the on-road body. It turned out pretty good, it'll protect the bottom-front of the 'Cuda body and even seems to blend in with the 'Cuda chin spoiler. 8) Here's some pics from all angles to show the final fit of the bumper. I'll be lowering the front end of the body about an 1/8" or so from how it looks here. The ugly red fibre washers are only temporary for test fitting. :P
Attachments
Bumper_Underside.JPG
Bumper_Top.JPG
BumperFront1.jpg
BumperFront2.jpg
Completed projects: CYANide Onroad Optima | Zebra Gold Optima | Barney Optima | OptiMutt RWD Mid
Gallery - Coel's Stalls: Marui Galaxy & Shogun Resto-Mods | FrankenBuff AYK Buffalo | 1987 Buick GNX RC12L3

User avatar
Coelacanth
Approved Member
Posts: 7421
Joined: Thu Jul 29, 2010 6:20 pm
Location: Alberta, Canada
Has thanked: 16 times
Been thanked: 325 times

Re: New Optima Build: Project CYANide

Post by Coelacanth »

Teaser pic of paint progress in my home-made mini paint-booth.

I had a near-disaster happen with some Pactra rattle-cans I bought online. They don't make the color I need anymore in the rattle-cans, only the airbrush bottles, but I tracked down 3 new cans of Chezoom Teal in the rattle-cans that were probably sitting on some shelf for God-knows-how-long. The first can only spat out big drops of paint for a second or two before oozing paint beneath the nozzle and seemingly had very little air pressure. The second can was better but wasn't spraying the usual nice, fine mist that I'm used to with Pactra Lexan RC paint. It was pretty splotchy, even with lots of shaking and a good soak in hot water beforehand. The third can wasn't much better. I was getting worried and very pissed that, after all this work, I might end up with a splotchy, inconsistent paint-job (I don't own an airbrush yet).

To try to save this paint-job, I cleaned a nozzle tip from a can of paint that was working well and swapped it with the tip on can #3 and that worked noticeably better. Much thanks goes to ROH73 who offered that tip instead of oh-so-useful suggestions like "buy an airbrush". You da man, ROH73, you really got me out of a predicament! 8)

I decided to back-spray with Pactra Aqua Wave Metallic that I bought a while ago, it's a similar color but brighter and a bit greener. I'll back-spray that with Indy Silver. I think this will turn out pretty nice, after all.
Attachments
PaintBooth.jpg
Completed projects: CYANide Onroad Optima | Zebra Gold Optima | Barney Optima | OptiMutt RWD Mid
Gallery - Coel's Stalls: Marui Galaxy & Shogun Resto-Mods | FrankenBuff AYK Buffalo | 1987 Buick GNX RC12L3

User avatar
ROH73
Approved Member
Posts: 623
Joined: Sun Feb 10, 2008 12:07 am
Location: State College, PA
Has thanked: 2 times
Been thanked: 22 times

Re: New Optima Build: Project CYANide

Post by ROH73 »

You're welcome. Looks great! Now flip it over so we can see the other side! :D

User avatar
Coelacanth
Approved Member
Posts: 7421
Joined: Thu Jul 29, 2010 6:20 pm
Location: Alberta, Canada
Has thanked: 16 times
Been thanked: 325 times

Re: New Optima Build: Project CYANide

Post by Coelacanth »

The flip-over pics may come tomorrow. :) I'd like to share my experiences with Pactra Window Tint. I figured this would be the shiznit for tinted windows, but my God, what a disaster! :x They ought to call this product Pactra Window Pips!! :evil:

The first attempt, it looked good immediately after I sprayed it on...but 10 minutes later, there were spots and pips all over the windows. I immediately attributed that to dust motes that ended up on the wet paint--even though I'm doing this in my mini paint-booth with exhaust ventilation, and saw no pip-behavior with any of the previous coats of Pactra Lexan paints. I wiped it off and tried again, making sure to change the filter and wipe away any particles inside the plastic tub. Immediately after painting, I flipped the body over so the wet side would be protected. 30 minutes later, the same thing happened! I used some Pactra thinner to remove the window tint. This last time, since I figured it HAD to be dust causing the spots & pips, I stuck the damn body inside a brand new large, clear plastic bag, stuck my hand in there and taped the bloody bag around my wrist before painting it inside the sealed bag. No possibility of dust!

After 10 minutes, FFS, PIPS??!! WTF....it didn't make sense!

I had a can of VHT Nightshades plastic automotive tint (i.e. for headlight/taillight lenses) and sprayed that on a piece of test Lexan, and after 10 minutes, there were no pips, even without the extra precautions I took with the Pactra Window Tint. The conclusion? It's the Pactra paint itself somehow accumulating in dots and pips, this was *not* caused by dust at all!! :evil: Unfortunately, the Nightshades paint said it had acetone on the can...not a good thing. I tested it on a used Lexan body I received in an Optima parts lot and the Nightshades definitely attacked the paint, right through to the Lexan. No way I was gonna try that out on this 'Cuda body!

Needless to say, I was very unimpressed with Pactra Window Tint. I wouldn't recommend it. The so-called final touches of your paint-job could end up a catastrophe if you use this sh!t.

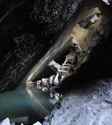
I cleaned it off a fourth time with Pactra thinner, quickly following that up with hot water on a paper towel, drying it, and cleaning the bare Lexan windows off with isopropyl alcohol before ultimately painting the side & rear windows with plain ol' Outlaw Black paint. I left the front windshield clear.

I have to remove some outside overspray before taking some pics, but I don't have any denatured alcohol...so the pics will have to wait a day or two. But I can say that this paint-job looks fantastic.
Completed projects: CYANide Onroad Optima | Zebra Gold Optima | Barney Optima | OptiMutt RWD Mid
Gallery - Coel's Stalls: Marui Galaxy & Shogun Resto-Mods | FrankenBuff AYK Buffalo | 1987 Buick GNX RC12L3

bdrmbully
Approved Member
Posts: 398
Joined: Mon Feb 18, 2008 3:54 pm
Location: toronto canada
Been thanked: 1 time

Re: New Optima Build: Project CYANide

Post by bdrmbully »

i also didnt have much luck with the pactra cans. i bought a color and it came out entirely different then what was represented on the can. X2 different colors. my buddy told me i should write them. cause they basically screwed up my new sct ten body.
2nd place is just the 1st loser

User avatar
Coelacanth
Approved Member
Posts: 7421
Joined: Thu Jul 29, 2010 6:20 pm
Location: Alberta, Canada
Has thanked: 16 times
Been thanked: 325 times

Time to do body-shots!

Post by Coelacanth »

Finally finished up the body tonight! It took me about an hour and a half to remove the overspray from the edges where the paint snuck underneath the masking tape...I couldn't find denatured alcohol anywhere, so I used some camp stove fuel (naphtha) instead. It works but it's probably a little slow-going compared to ethanol.

The sharp-eyed Mopar fans among you will notice I did the hood paint scheme differently from an AAR 'Cuda, but that was intentional, for 2 reasons: to be different, and because I prefer the hood-only flat-black treatment of the Challenger T/A's more. I just like it better this way.
Attachments
Body_FlashOff.JPG
Body_Front.JPG
Body_Side1.JPG
Body_Side2.JPG
Body_Rear.JPG
Completed projects: CYANide Onroad Optima | Zebra Gold Optima | Barney Optima | OptiMutt RWD Mid
Gallery - Coel's Stalls: Marui Galaxy & Shogun Resto-Mods | FrankenBuff AYK Buffalo | 1987 Buick GNX RC12L3

CNA75
Approved Member
Posts: 567
Joined: Mon Jun 01, 2009 2:20 pm
Location: UK

Re: New Optima Build: Project CYANide

Post by CNA75 »

What an impressive job you've done there! It really looks fantastic!

Create an account or sign in to join the discussion

You need to be a member in order to post a reply

Create an account

Not a member? register to join our community
Members can start their own topics & subscribe to topics
It’s free and only takes a minute

Register

Sign in

  • Similar Topics
    Replies
    Views
    Last post

Return to “Kyosho Forum”

Who is online

Users browsing this forum: No registered users and 6 guests