Page 5 of 23
Re: My new project
Posted: Thu Nov 12, 2015 9:14 pm
by Incredible_Serious
romulus22 wrote:This is from a couple days ago, it didn't come from the car but from working on the car. Anyone care to guess what this is? I thought it was pretty neat looking so I thought I'd share.
I'm going to guess an angle grinder sanding disk exploded..... or something similar. Looks pretty gruesome....
Alex
Re: My new project
Posted: Thu Nov 12, 2015 9:42 pm
by RC10th
I'm going to guess you bashed your arm against a piece of flaky floor pan material knocking it off the car.
Re: My new project
Posted: Fri Nov 13, 2015 5:52 am
by romulus22
While kneeling down in the engine bay stitch welding the front frame rail to the body I raised my arm up and caught a rouge shard of sheet metal on the cut edge of the firewall.
The black thing in my hand is what, I would guess 2-3oz, of dried up blood on concrete floor looks like.
It poured out so fast after the initial puncture I just let it go for a min so I didn't track it all over the place. Once it slowed down to a slow drip I climbed out of the car and called it quits for the night.
[youtube]dhxj9Yb6u2M[/youtube]
Re: My new project
Posted: Fri Nov 13, 2015 7:26 pm
by klavy69
Yep...pry a good call

Todd
Re: My new project
Posted: Sat Nov 14, 2015 11:44 am
by slotcarrod
Geez that's just nasty!

Must be one tough bastard!
Re: My new project
Posted: Sun Nov 15, 2015 4:03 pm
by romulus22
Did I mention I hate sheetmetal work

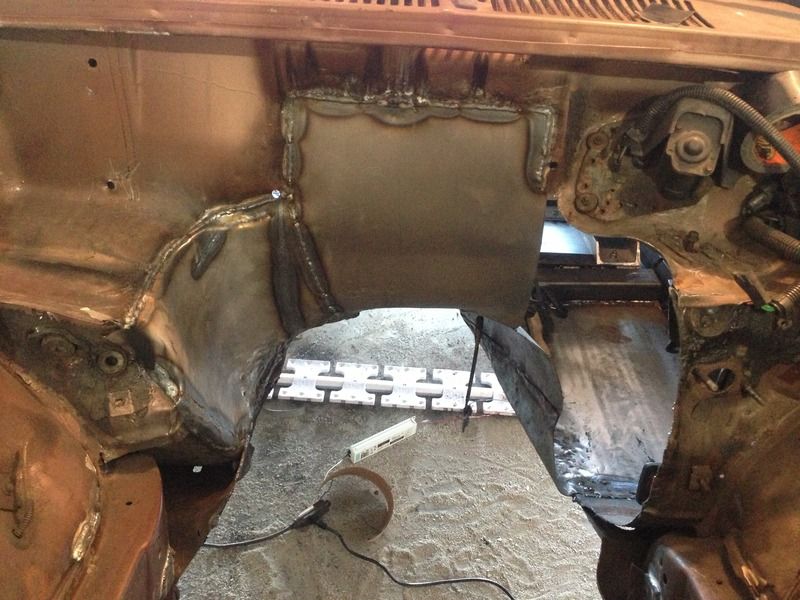
Especially the old wax paper thin rusty factory metal. I'm basically booger welding that stuff back together. Taking a break but I'm close to the end. I went way overkill on opening up the firewall. I'd rather more room than a hassle later.
Re: My new project
Posted: Sun Nov 15, 2015 4:05 pm
by romulus22
slotcarrod wrote:Geez that's just nasty!
Must be one tough bastard!
Ha, I'd only consider that a baby cut. It was just a gusher.
Re: My new project
Posted: Sun Nov 15, 2015 6:50 pm
by romulus22
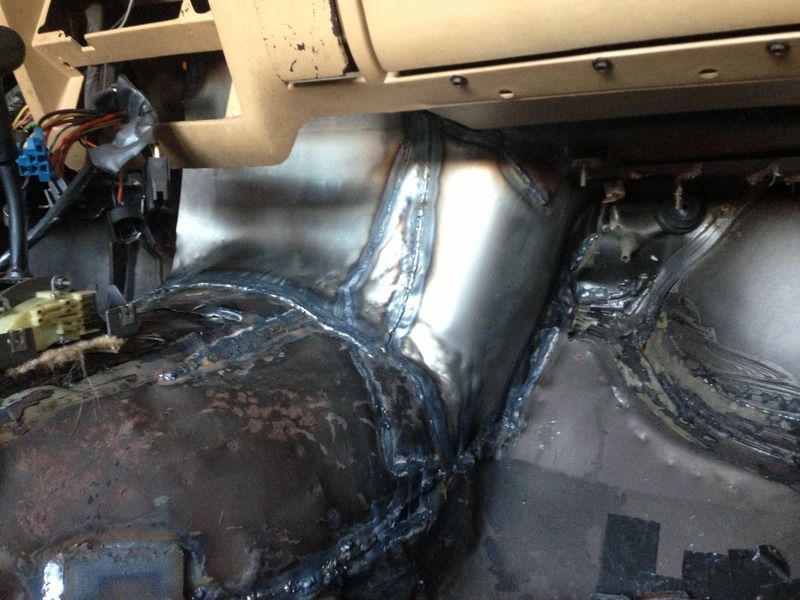
It's all downhill from here.
This time I took a picture of how I made the side pieces.
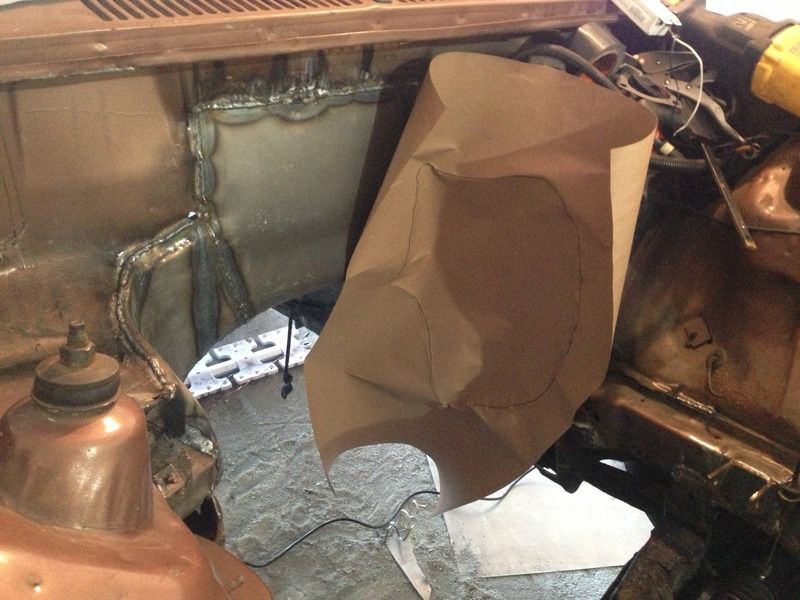
And now the final product minus sealer and paint.
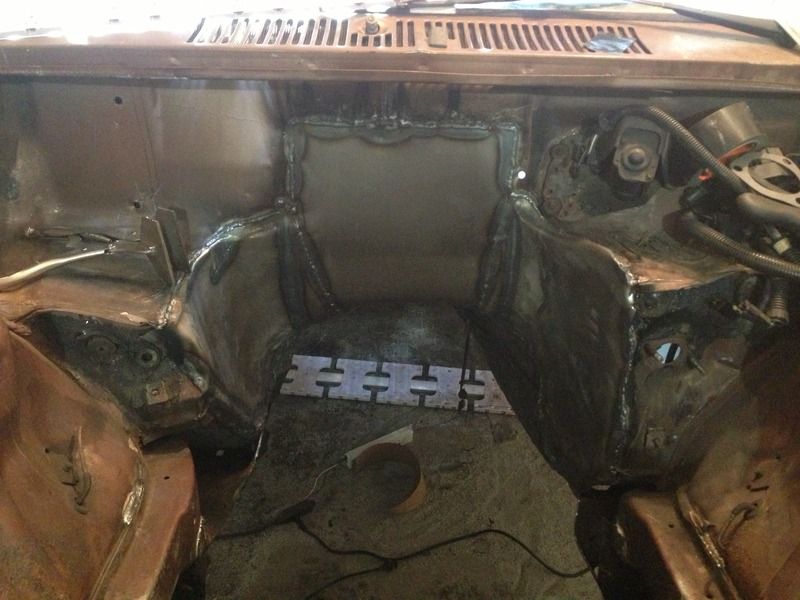
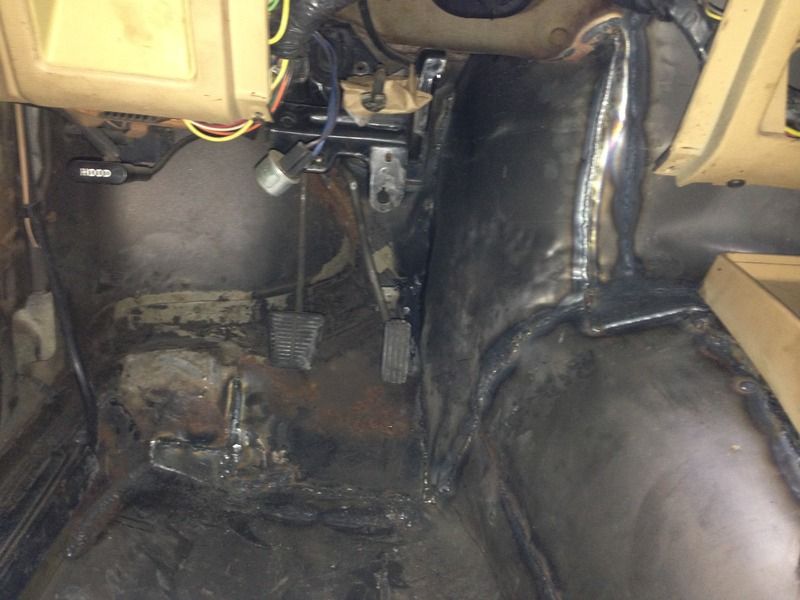
And a view of why I moved the pedals.
Re: My new project
Posted: Mon Nov 16, 2015 8:35 am
by matt1ptkn
romulus22 wrote:I'm basically booger welding that stuff back together.
That does not paint a very pretty picture in my mind.
The car is looking great though! I've been following this topic with great interest.
Re: My new project
Posted: Mon Nov 16, 2015 8:44 am
by RC10th
Pretty creative, I like fabrication stuff...
One skill I haven't taken up is welding, but is something I could benefit immensely from.
Your making great progress, looking forward to more updates.
Re: My new project
Posted: Mon Nov 16, 2015 12:04 pm
by bearrickster
that is cool I drove a Chevette all through High school I had two of them I love them. I got T-boned in my first one a 82 4door and drove it home they towed the 70 Cady away on a Wrecker. I always thought that was cool
Re: My new project
Posted: Mon Nov 16, 2015 1:17 pm
by jwscab
Nice job. On a lot of that crap metal, I find the stitch welding does the job as long as you make sure both sides are welded through. It's about all you can do sometimes. a copper backer also works wonders.
Re: My new project
Posted: Mon Nov 16, 2015 5:51 pm
by romulus22
matt1ptkn wrote:romulus22 wrote:I'm basically booger welding that stuff back together.
That does not paint a very pretty picture in my mind.
The car is looking great though! I've been following this topic with great interest.
I'm not sure if that's the official term, its just what it looks like. Imagine the underside of a kinder garners desk. Thanks for the compliment.
RC10th wrote:Pretty creative, I like fabrication stuff...
One skill I haven't taken up is welding, but is something I could benefit immensely from.
Your making great progress, looking forward to more updates.
I won't pretend to be a good welder. But I can sure make things stick together pretty well. If you ever run into some extra cash just pick up a decent welder and start practicing. Just don't waste your money on a gasless mig. It's not that difficult and the possibilities are endless once you have one. I've got other cool projects in the works once this car is finished.
bearrickster wrote:that is cool I drove a Chevette all through High school I had two of them I love them. I got T-boned in my first one a 82 4door and drove it home they towed the 70 Cady away on a Wrecker. I always thought that was cool
That would be a sight to see. I've been eying my doors trying to think of an easy way to get the side impact beams out without destroying the window function. Or basically without having to do a ton of cutting and welding again.
jwscab wrote:Nice job. On a lot of that crap metal, I find the stitch welding does the job as long as you make sure both sides are welded through. It's about all you can do sometimes. a copper backer also works wonders.
I'm overlapping what I can. Especially where I'm adding all new metal. The worst trouble I had was on the tunnel on the passenger side, I made some relief cuts and unded up not really needing them. I should have just made a backer and stuck it in first then welded my cut. I was being lazy and ended up fighting it worse in the end. I can't remember if I mentioned this but I hate sheet metal work
Just a small square on the passenger floor. And a few more holes on the tunnel and I'm done with the sheet metal. I have a pretty big order I need to place I just need some extra cash. I made myself a promise this car wouldn't touch my savings. Plenty of small stuff I can do in the meantime.
Thanks again guys
Re: My new project
Posted: Wed Nov 18, 2015 4:17 pm
by n20capri
Pretty awesome! Subscribed!
Re: My new project
Posted: Wed Nov 25, 2015 7:54 pm
by romulus22
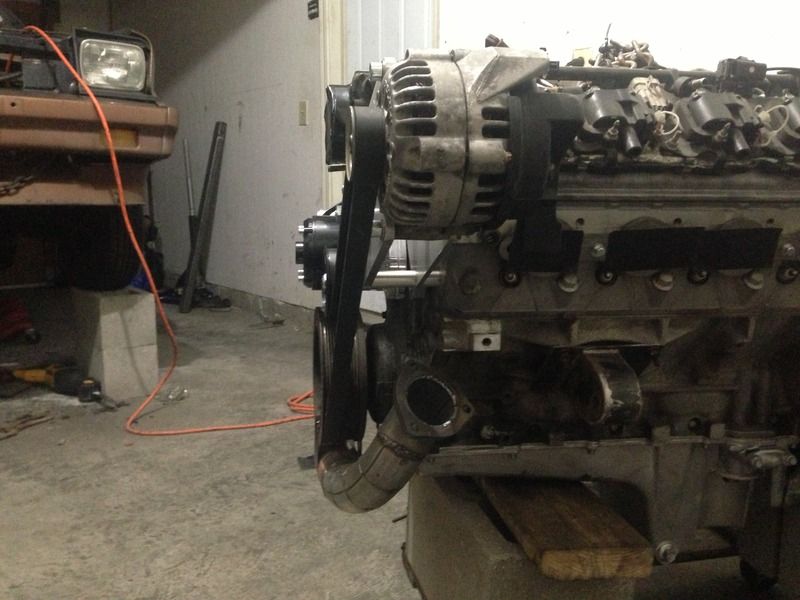
Not that big of an update. I found some extra cash so I bought a couple parts I figured I'd put on since the engine is out of the car.
I'm not a fan of the flashy shiny parts but they are exactly what I wanted otherwise. New alt bracket, tensioner, and electric water pump.
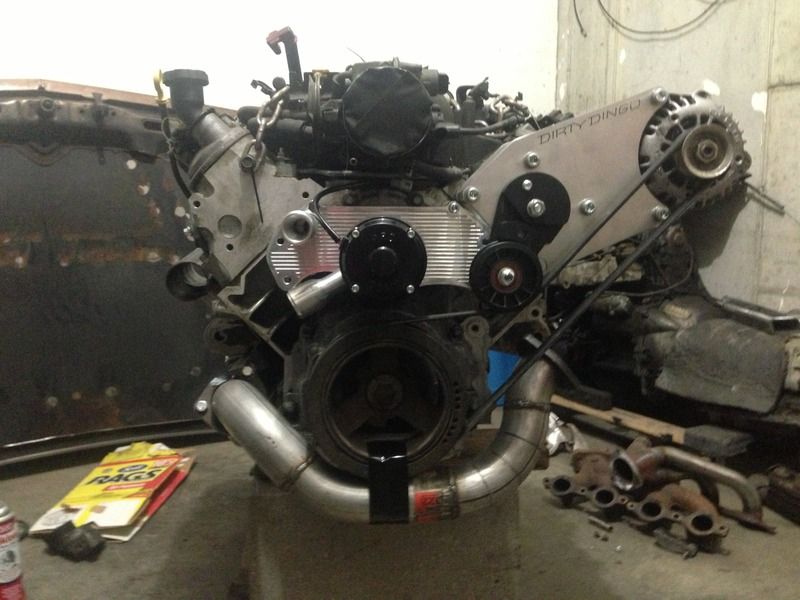
I need to clearance the alt bracket slightly for the pump to sit flush on the block. But still way more room for my electric fan/s now compared to the stock water pump pully.