Page 4 of 7
Re: SRB Free Styling
Posted: Mon Mar 23, 2020 7:28 am
by Dadio
This is where i am at the moment , each gold section was going to be inset with bronze so it was bronze on gold on white , each colour separated by a layer of clear lacquer to make them float , what i have is white , clear , gold and clear , when i tried the bronze next layer it just wrinkled up again so I'm just going to repaint the nose and roof to match and leave it there .


Re: SRB Free Styling
Posted: Mon Mar 23, 2020 5:07 pm
by Dadio
Re: SRB Free Styling
Posted: Tue Mar 24, 2020 3:37 pm
by Dadio
Re: SRB Free Styling
Posted: Wed Mar 25, 2020 4:56 am
by Dadio
Lights and the wife's feet.


They just clip onto the frame and could be removed easily so they don't get lost , the lights that is , my wife's feet are firmly attached .
Re: SRB Free Styling
Posted: Wed Mar 25, 2020 10:40 am
by Dadio
Re: SRB Free Styling
Posted: Wed Mar 25, 2020 11:36 am
by XLR8
Looks great Dadio.
The lights, nets and car, I mean.

About time to mow the lawn??


Re: SRB Free Styling
Posted: Wed Mar 25, 2020 3:00 pm
by Dadio
Thanks , it really needs a 70s driver figure , blonde beard ,hairy chest and a gold medallion, nearest thing I've found so far is Elvis ....
Re: SRB Free Styling
Posted: Wed Mar 25, 2020 5:32 pm
by XLR8
Dadio wrote: ↑Wed Mar 25, 2020 3:00 pm
Thanks , it really needs a 70s driver figure , blonde beard ,hairy chest and a gold medallion, nearest thing I've found so far is Elvis ....
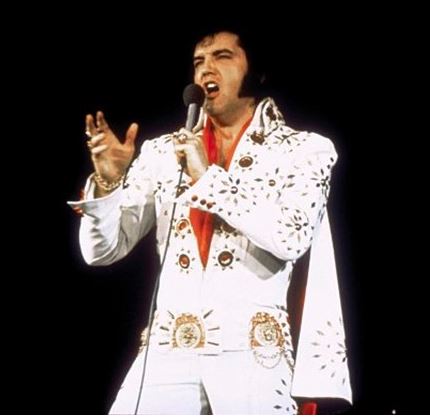
- elvis.JPG (28.25 KiB) Viewed 1818 times
- elvis.JPG (28.25 KiB) Viewed 1818 times
Perfect!
And now we know why you've chosen white and gold.
Re: SRB Free Styling
Posted: Wed Mar 25, 2020 6:10 pm
by Dadio
Ha ha no
I'm still gutted that the paint kept going wrong , I had planned to inset bronze into every gold section so the gold was just a border but I can't face more paint grief so its staying this way

Elvis is growing on me though
Re: SRB Free Styling
Posted: Wed Mar 25, 2020 11:34 pm
by XLR8
Well, as a no-paint option to add the final color I was thinking about recommending Topflite Monokote trim sheet material but apparently they don't make it in bronze.
https://www.centralhobbies.com/cat4.php?cat=2&subcat=13&sub2cat=7
Your panels are relatively flat so something like this might work.
I've used this stuff for years and it works pretty well - except on curved surfaces.
Re: SRB Free Styling
Posted: Thu Mar 26, 2020 4:18 am
by Dadio
Thanks its not a bad idea , I was thinking along the lines of " go faster stripes " as an option , not sure if you can still get them but you used to be able to get rolls of tape about 5mm wide to add detail stripes to full size cars . just looked for it on eBay and you can still get it !
might have to give it a try
Re: SRB Free Styling
Posted: Thu Mar 26, 2020 4:21 pm
by Dadio
Several hours of trying to plot the rear frame as a 3d model ..... My brain is turning to mush .
Re: SRB Free Styling
Posted: Thu Mar 26, 2020 9:17 pm
by XLR8
You mean the tube frame you've made? Piece o' cake.
Start with photos: a top down and one from the side (only one side image is needed assuming the frame is symmetrical). Hold the camera parallel to the floor for the top down, and parallel to the car's longitudinal axis for the side profile and hold the camera as far away from the car as possible without loosing too much clarity or making the image too grainy. Also make the frame (the very part you're modeling) appear at the exact center of the photos. Doing this will minimize distortion in the image and you'll create a more accurate model. Import the images into Fusion, place them appropriately in 3d space and use them to to aid in establishing the angles and intersect points for each of the frame tubes. Also, before you begin modeling, it's really helpful to establish a few control points in 3d space to anchor your model: mounting points, screw hole locations, etc. taken from the Tamiya parts.
It takes time but you can make a very accurate 3d representation of the physical model using this technique.
I've used a similar technique to create 3d models of bodies and other complex shapes.
Here is a Turbo Ultima body work in process. Since the body is so long, this can lead to a lot of distortion in a single image so I've taken a series of images (6 or 7 I guess), advancing the body about 2 inches between shots, then composite the images together.
The result is very little distortion in the final composite and I was able to reference the body lines in the photo to create a fairly accurate 3d model.
Hope this was helpful.
Re: SRB Free Styling
Posted: Fri Mar 27, 2020 4:01 am
by Dadio
Its not making the shape or even that its asymmetric but the connection of all the round sections so fillets work , if you know fusion then you know how frustrating it can be .
Re: SRB Free Styling
Posted: Fri Mar 27, 2020 9:48 am
by XLR8
Ah yes, fillets and rounds can be extremely frustrating.
I've not used Fusion but I have used ProE, Inventor, Solid Works and one other that I can't recall and all of them can struggle with fillets.
Sometimes it comes down to the sequence in which you pick the surfaces to be filleted and the sequence in which the features have be created.
Lots of trial and error to get the results your after.


