Page 4 of 23
Re: My new project
Posted: Fri Sep 18, 2015 9:17 pm
by DaveM
Hi Guys,
With solid engine mounts it pays to keep the transmission mount rubber.
Cheers, Dave.

Re: My new project
Posted: Fri Sep 18, 2015 11:48 pm
by RC10th
I don't really see this as being built for comfort, so I wouldn't worry.
Re: My new project
Posted: Sat Sep 19, 2015 7:22 pm
by romulus22
LTO_Dave wrote:Cool project!
FWIW, I had Prothane urethane motor and tranny mounts on my AWD Eagle Talon and it was terrible as a daily driver. Removing the balance shafts didn't help, but you feel
every vibration the drivetrain makes.

The good news is it won't be a daily driver
DaveM wrote:Hi Guys,
With solid engine mounts it pays to keep the transmission mount rubber.
Cheers, Dave.
I don't think I want to do that. If the front is solid but the tail of the trans is able to move at all I would assume it would stress and eventually break my mounts, or block. It either solid or not. Can't be both.
RC10th wrote:I don't really see this as being built for comfort, so I wouldn't worry.
Correct, I don't think it qualifies as a race car. Just a weekend cruiser, highway 1/4 mile sleeper.
Here's a video of the function of the stock shifter to the now 4spd trans. The detents don't match up together but it should work ok.
P-R-N-4-3-2-1.....push the button and bring the shifter all the way back. It will only go to 4th without pushing the button in. It also allows shifting between 3rd-4th without the button. N-R are also in the same no button range.
[youtube]g7Y9X5ihEgQ[/youtube]
Re: My new project
Posted: Sat Sep 19, 2015 8:40 pm
by RC10th
So you can click up from 1st to 4th gear but not neutral? Can you skip gears ie push too hard and go from 1 to 3? My shifter was like that which is dangerous in my opinion. The bushing in mine was worn out so the stick was sloppy. You had to push the button to get neutral - one day while driving it felt like the car was dragging so I went to pop it into neutral but missed and grabbed reverse. Luckily I was only doing about 10mph.
That was a wake up to why that style of shifter is dangerous for performance cars and why NHRA requires a reverse lockout.
Personally I'd look into a ratcheting shifter. You can only bang the stick one gear at a time, and can bang neutral if things go wrong. It's impossible to grab reverse or park without taking it out of ratchet mode.
Re: My new project
Posted: Sat Sep 19, 2015 9:19 pm
by romulus22
I could widen the detent slot for 3rd-4th so I could squeeze neutral in the same range. So I would then have to hit the button for reverse. I personally despise those hurst ratcheting shifters though. You'd never catch me with one of those in my car. Pretty much when I'm racing it will just be left in OD/4th. If I'm highway racing ill manually downshift to 3rd.
Re: My new project
Posted: Sun Sep 20, 2015 3:30 am
by RC10th
To each their own, I've had many and the B&M Quicksilver is my favorite. Nothing is as quick as a ratchet shifter. The console models can be made to look fairly stock, I wanted to use the stock button handle on mine for a factory look. You could also easily make the stick look more factory.
Looks like your making good progress, I wish I could move along that quick

Re: My new project
Posted: Sun Sep 20, 2015 9:37 am
by jwscab
It doesn't take much to bump from neutral to reverse with no detent. I would highly suggest modifying the shift gate to include a lock out of od. Depending on how much vibration you get in the car, it could bump itself out of gear.
You have the welding skills down shouldn't be too difficult. I had to do the same thing for a57 Chevy from a pwerglide to th350.
Re: My new project
Posted: Tue Oct 27, 2015 7:08 pm
by romulus22
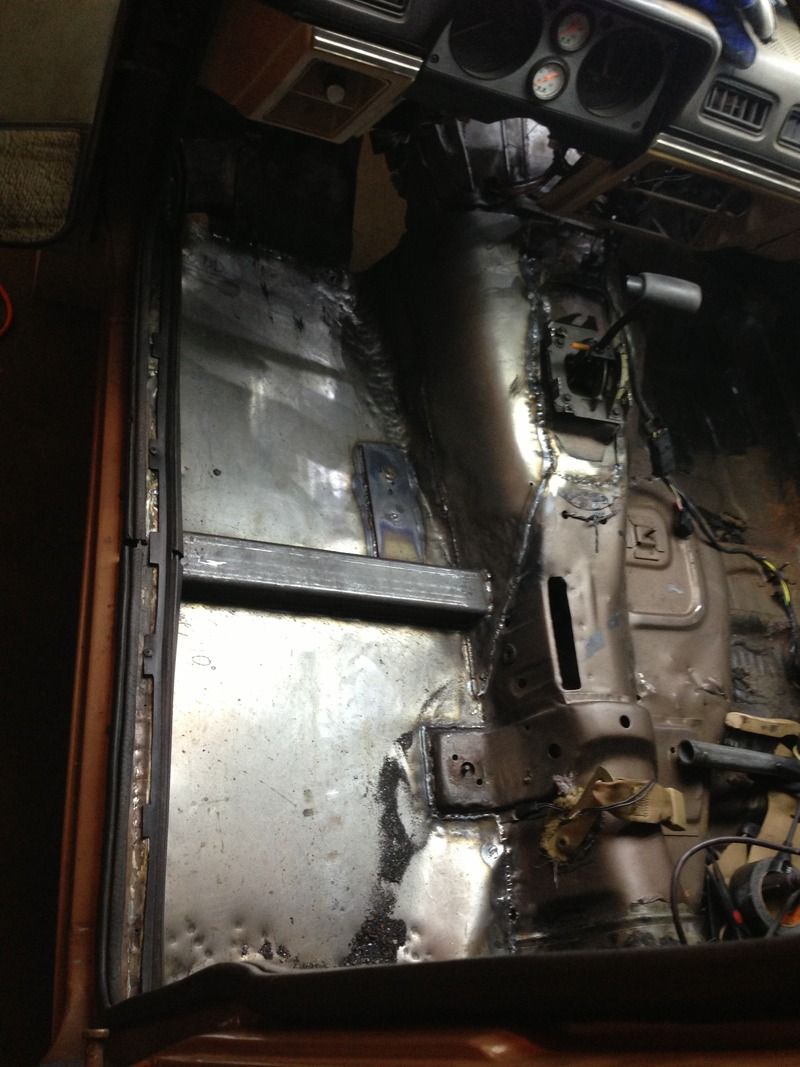
Still slow progress due to OT at work. I'm about 80% finished with replacing the rotten drivers "floor". Haven't touched the firewall yet.
You body/sheet metal guys would cringe at my method for putting this floor in. I used the cut to shape and smash into place method. Once I'm finished ill seal it top and bottom and call it good.
Re: My new project
Posted: Tue Oct 27, 2015 8:00 pm
by klavy69
romulus22 wrote: I used the cut to shape and smash into place method.
and whats wrong with that method. My 2nd body shop job
taught me that method
Lookin good so far. OT might hurt your progress speed but I'm sure it helps fund a fun project like this. 9 years of OT and they took ours away a couple months ago. Things just don't get paid as fast now but love the fact I have time to work on some of my stuff for once
Todd
Re: My new project
Posted: Wed Nov 04, 2015 6:58 pm
by romulus22
klavy69 wrote:romulus22 wrote: I used the cut to shape and smash into place method.
and whats wrong with that method. My 2nd body shop job
taught me that method
I can't say it looks like a quality job but it gets the job done. Not something I would do on a restoration job but I'm also not a restoration type guy.
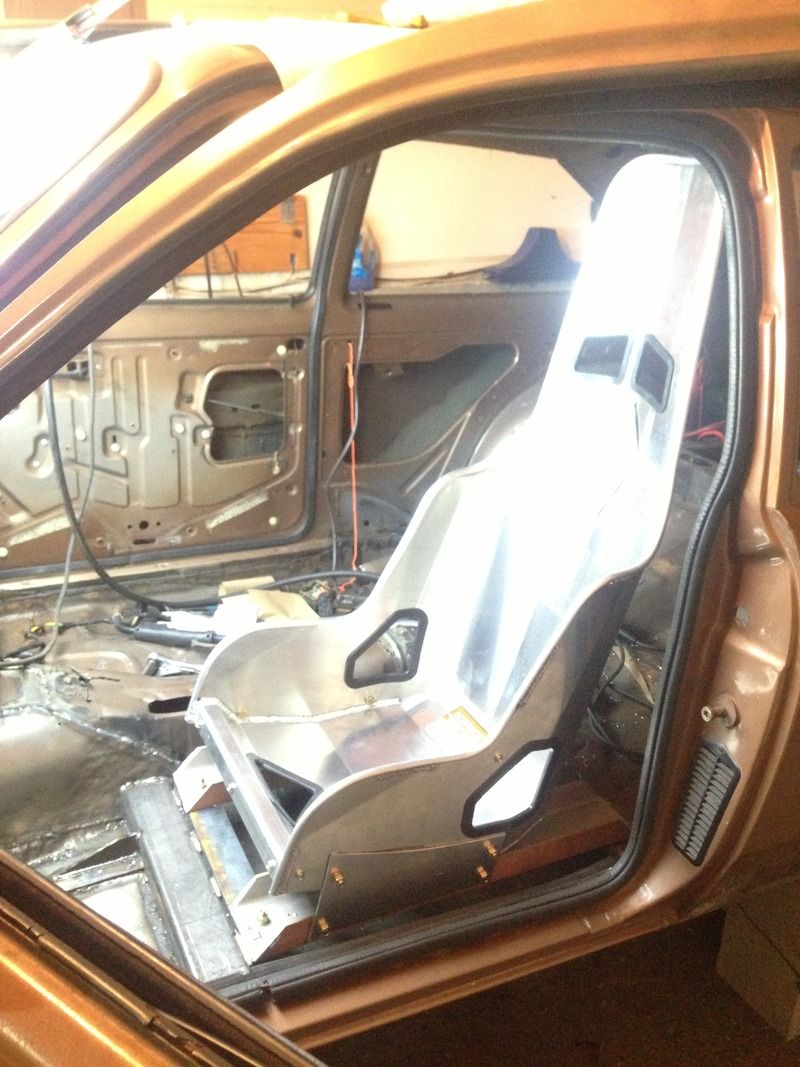
The other day I came across some nice alum channel and knew exactly where to put it. It may be a bit overkill but its solid. One thing I don't like is a loose, leaning, crooked seat. Everything is still just mocked up. Still need to get back to the floor and firewall I just hate sheetmetal work. Now the seat is in ill stick the pedals and column next to avoid the sheetmetal a little longer.
Re: My new project
Posted: Thu Nov 05, 2015 12:20 am
by Diamond Dave
This project is going to be a blast to drive, Love the seat. Coming along nicely.
Re: My new project
Posted: Fri Nov 06, 2015 7:50 pm
by romulus22
Diamond Dave wrote:This project is going to be a blast to drive, Love the seat. Coming along nicely.
All I vision while driving is the cars I'd like to race when its finished. Passed a Hellcat Challenger a couple days ago and thought about how the outcome would be. According to the maths it is a very close power to weight ratio.
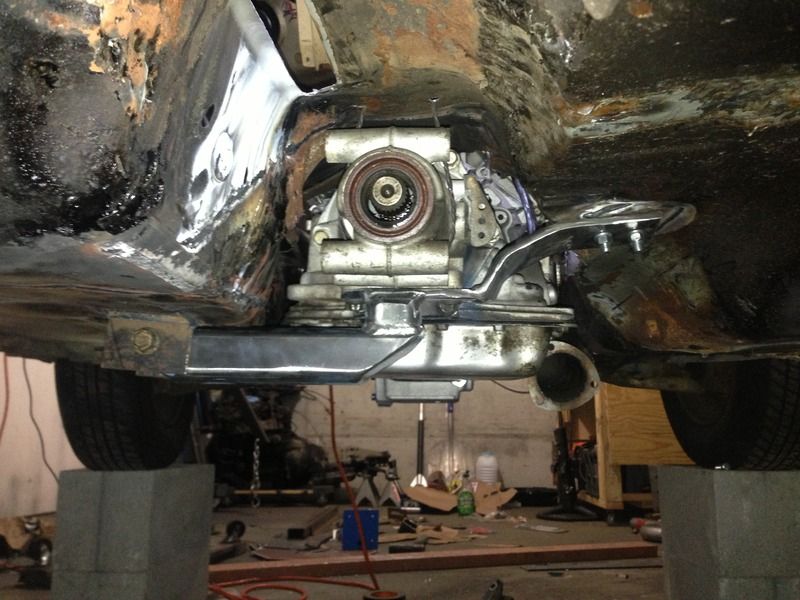
Been waiting on the right material to finish my trans mount to be able to make it how I wanted. Ugly but very stout. I think Im going to pull the engine and trans again to get at the floor and firewall easier.
Re: My new project
Posted: Thu Nov 12, 2015 7:35 pm
by romulus22
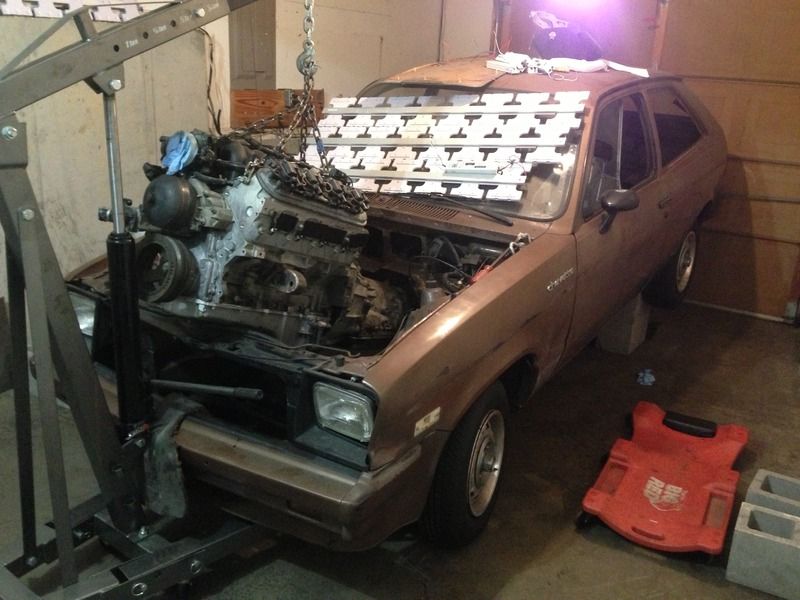
Engine and trans is now able to come out through the engine bay instead of doing them separate and loading the trans through the bottom.
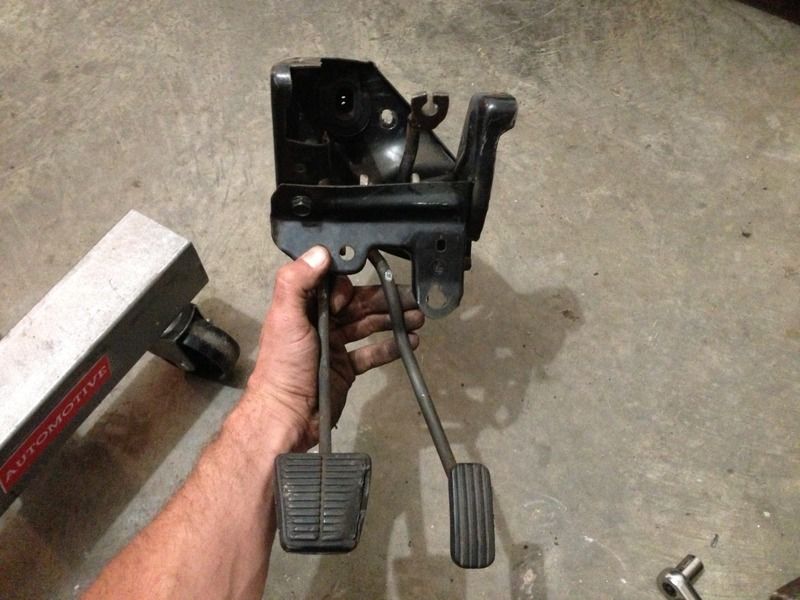
The auto chevette uses the same pedal rack as the manual so I slid the brake over where the clutch would be. Mounted and adjusted the arm on the gas pedal for the throttle cable. Ill come back to this part later for more work but the gas part is finished.
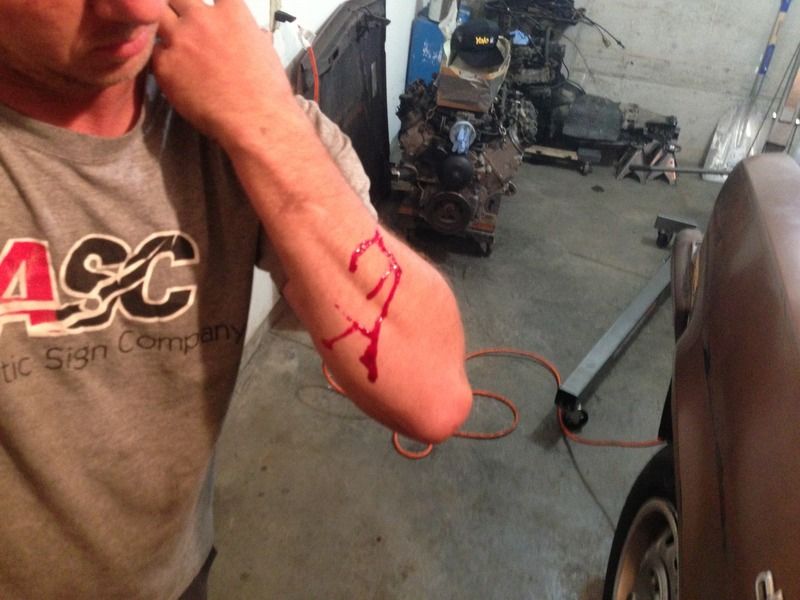
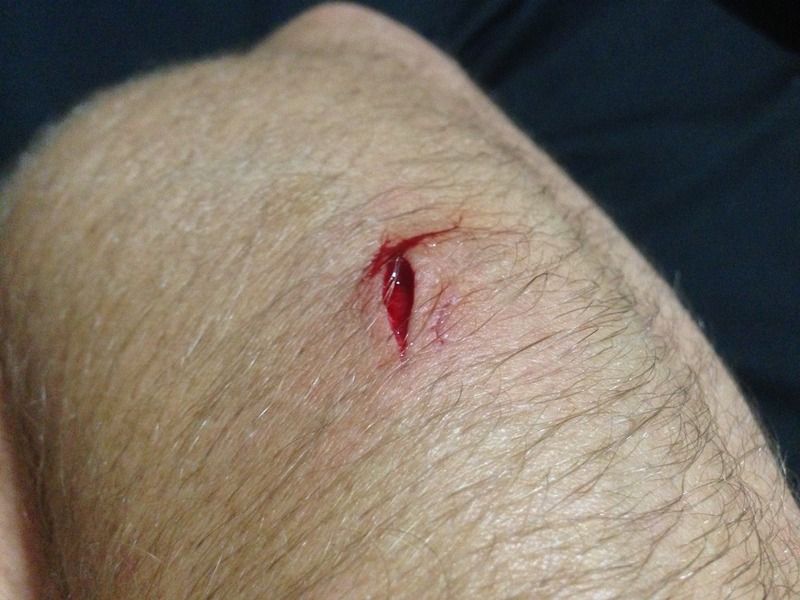
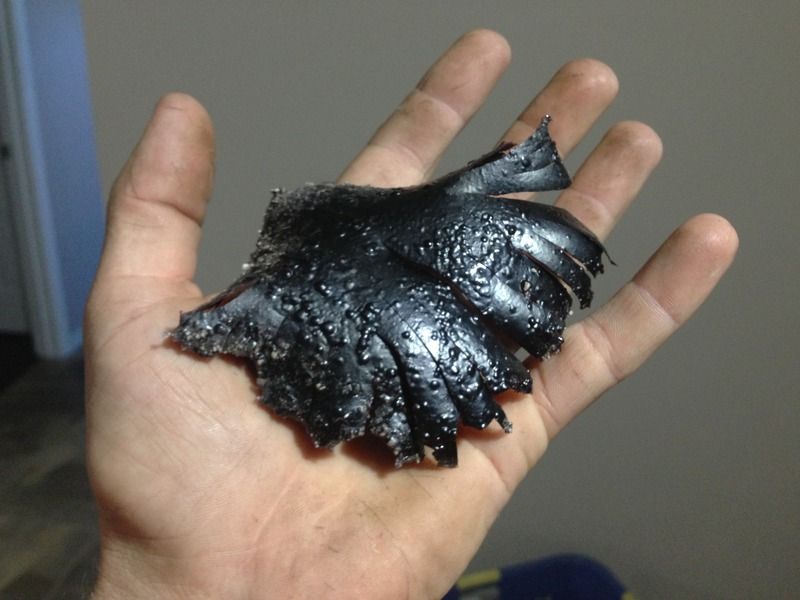
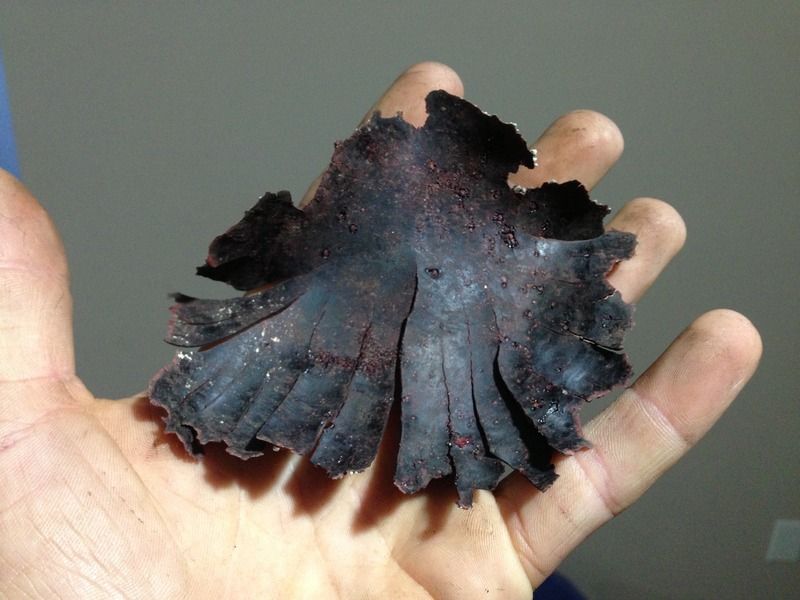
This is from a couple days ago, it didn't come from the car but from working on the car. Anyone care to guess what this is? I thought it was pretty neat looking so I thought I'd share.
Re: My new project
Posted: Thu Nov 12, 2015 8:07 pm
by klavy69
Cool that the motor/trans can be pulled easily now. I'm betting that makes for an easier way to work up ambition to work on this.

That black thing looks like a roll on bedliner type material that broke off of something rounded...
Todd
Re: My new project
Posted: Thu Nov 12, 2015 8:18 pm
by romulus22
Here's a hint on the black thing.