
nice job on the cars, all around.....so the rear brace for the B4 trans ended up under the chassis? how is the fit on that? Did you have to stretch that peice to make it fit?
I will also venture to say that you might be dissapointed with the DS front tower. I believe the angle of the shocks will interfere with the brace tubes, but I could be wrong.
TC's Project: Red Headed Stepchildren (10/31) w/pics)
-
Toasted Coastie
- Approved Member
- Posts: 662
- Joined: Sun Apr 11, 2010 9:22 pm
- Location: Nashua, NH
- Been thanked: 1 time
Re: TC's Project Red Headed Stepchild part 2 (9/22 w/pics)
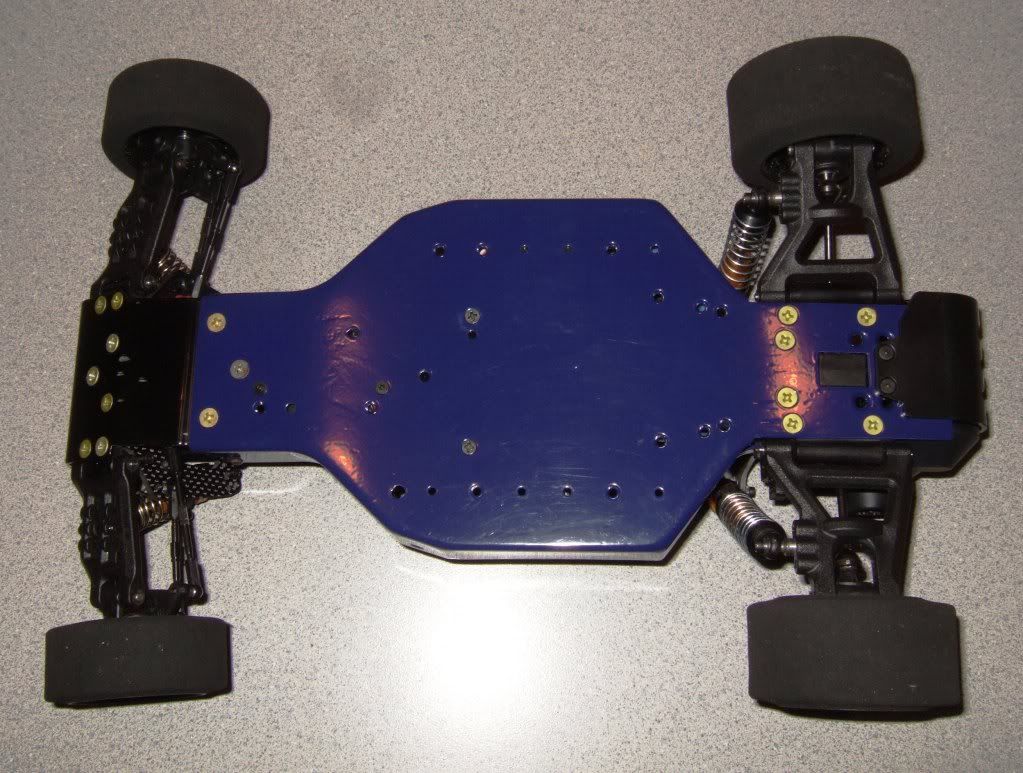
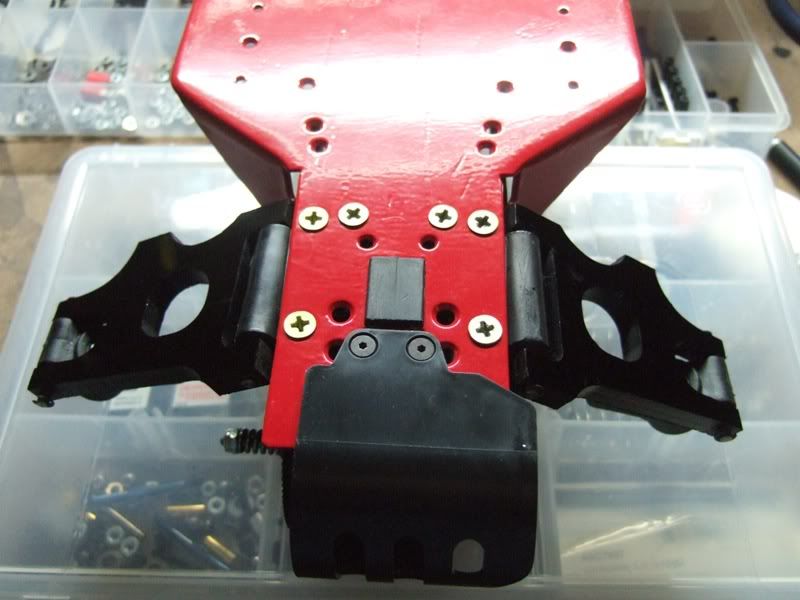
Yup. On RHSC 1 (the Blue Chassis), the motor guard/transmission chassis screws in on the underside of the chassis. No need to stretch, but maybe a little bend:jwscab wrote:nice job on the cars, all around.....so the rear brace for the B4 trans ended up under the chassis? how is the fit on that? Did you have to stretch that peice to make it fit?
I will also venture to say that you might be dissapointed with the DS front tower. I believe the angle of the shocks will interfere with the brace tubes, but I could be wrong.
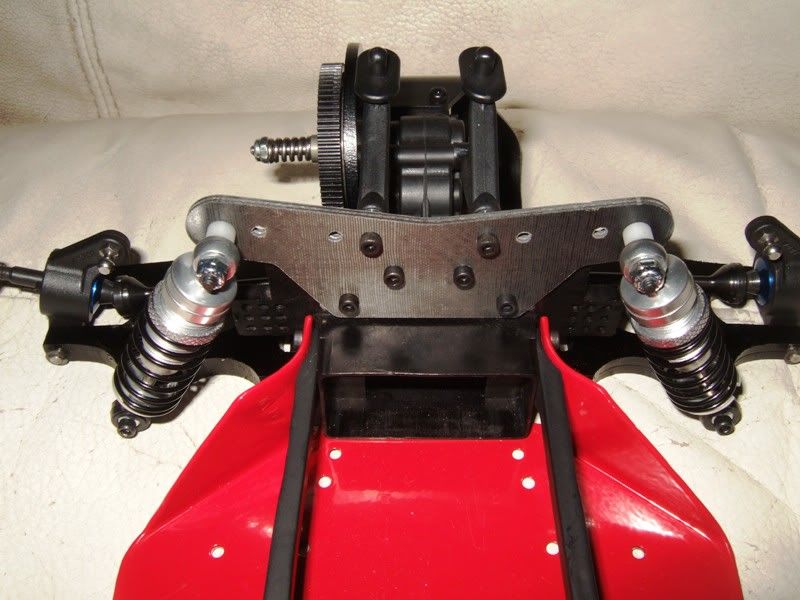
The B4 also uses the wing mount set up as a transmission brace, where the mounts attach to the transmission and shock tower:
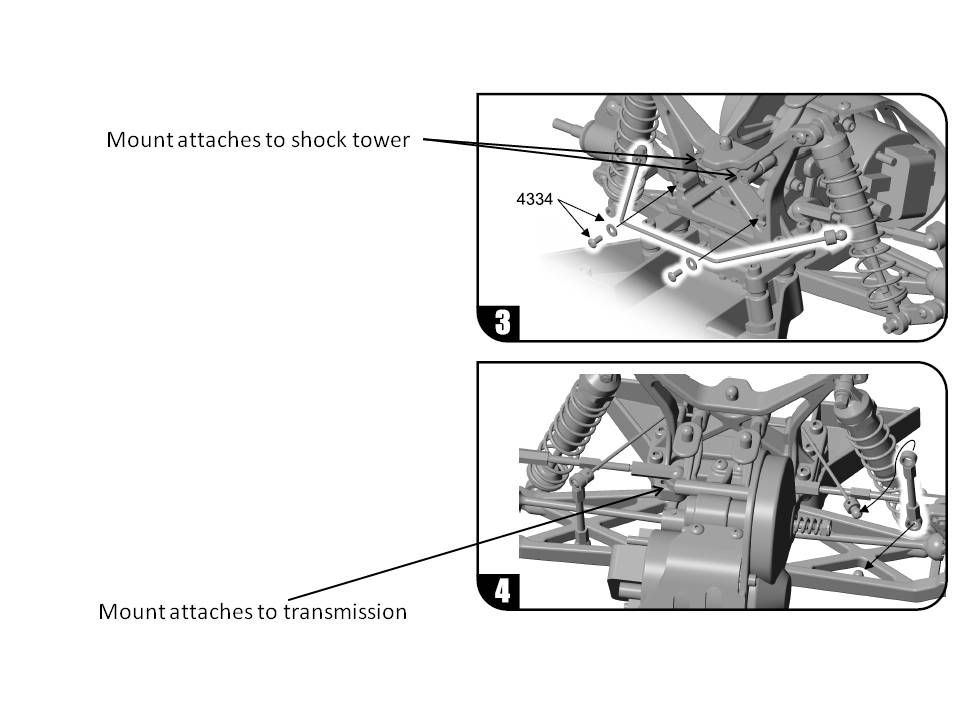
I'll do the same thing, attaching it to the rear shock tower.
Sucks to hear that about the DS tower, but like I said before, I like to learn the hard way....
-
Toasted Coastie
- Approved Member
- Posts: 662
- Joined: Sun Apr 11, 2010 9:22 pm
- Location: Nashua, NH
- Been thanked: 1 time
Re: TC's Project Red Headed Stepchild part 2 (9/22 w/pics)
Oh damn it, good eye on that. I didn't even notice! Crap crap crap!jwscab wrote:I will also venture to say that you might be dissapointed with the DS front tower. I believe the angle of the shocks will interfere with the brace tubes, but I could be wrong.

-
Toasted Coastie
- Approved Member
- Posts: 662
- Joined: Sun Apr 11, 2010 9:22 pm
- Location: Nashua, NH
- Been thanked: 1 time
Re: TC's Project Red Headed Stepchild part 2 (9/22 w/pics)
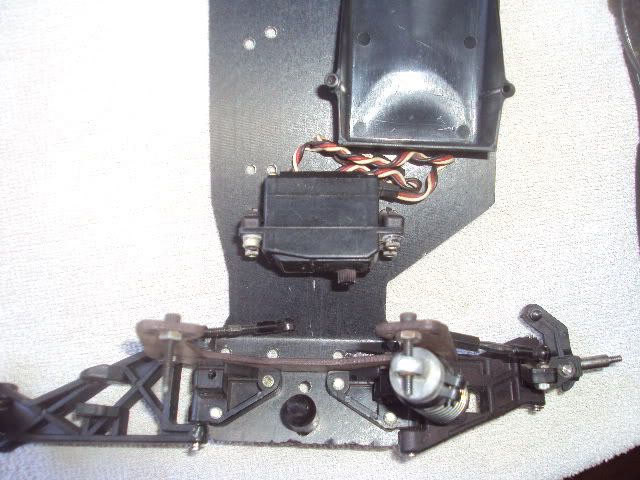
Thanks! I figured out why the servos don't fit right. With all the trying to get fancy with aluminum servo posts, I haven't found one that is exactly the same dimentions as the nylon blocks used on the originals. The originals give the right clearance for the servo all the way around. Should have known better than to mess with it....
-
Toasted Coastie
- Approved Member
- Posts: 662
- Joined: Sun Apr 11, 2010 9:22 pm
- Location: Nashua, NH
- Been thanked: 1 time
Re: TC's Project Red Headed Stepchild part 2 (9/24 w/pics)
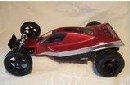
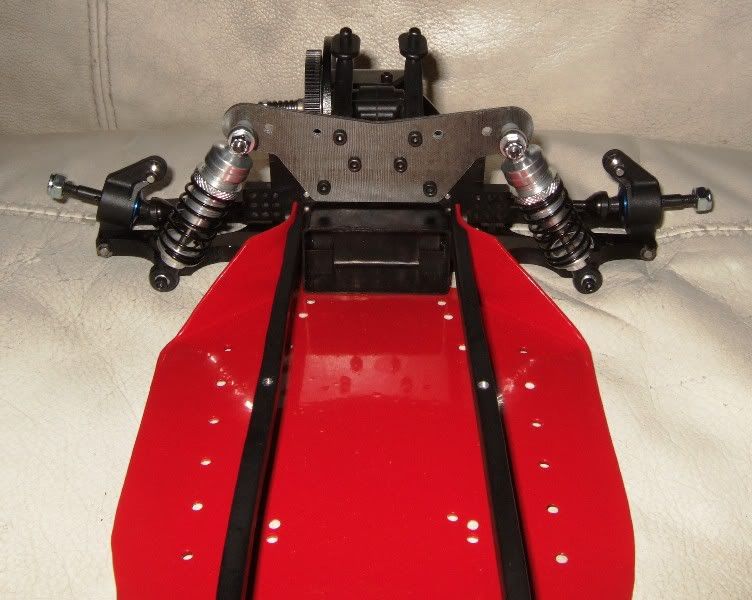
The transmission made its way onto the chassis today. For some reason or another, it was easier this time, and lookes so much better, with the black and the red, than it did with the black and the blue. Some spacers to help out on this set off the black and red
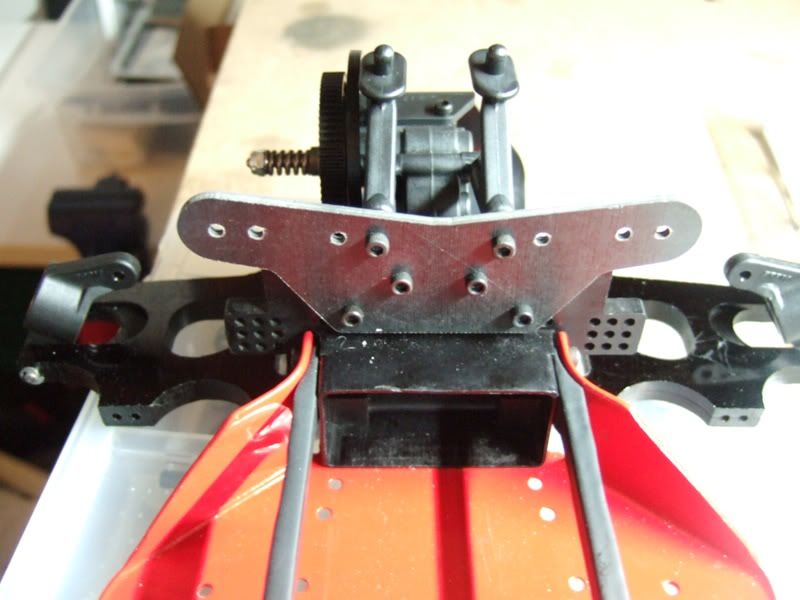
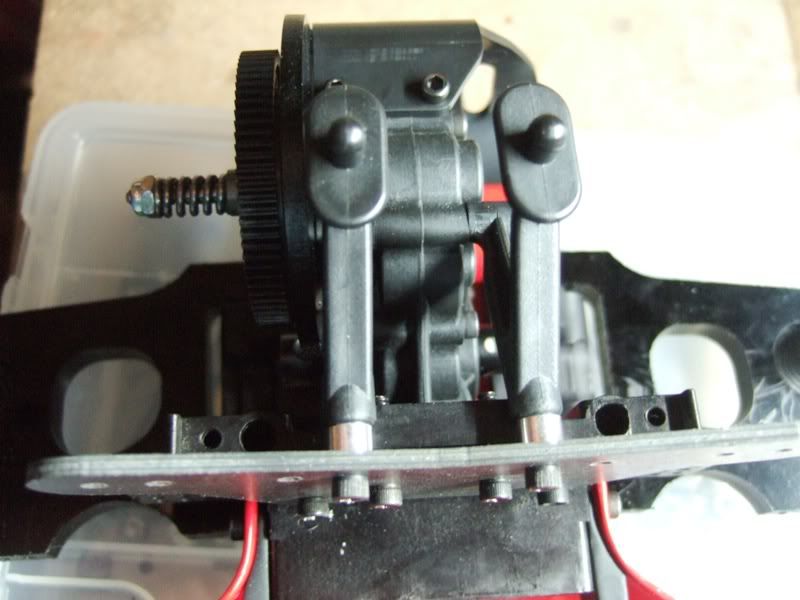
I think because this one is sitting so low, that instead of the wing mounts being used for a wing, I may just use them to hold the body on.
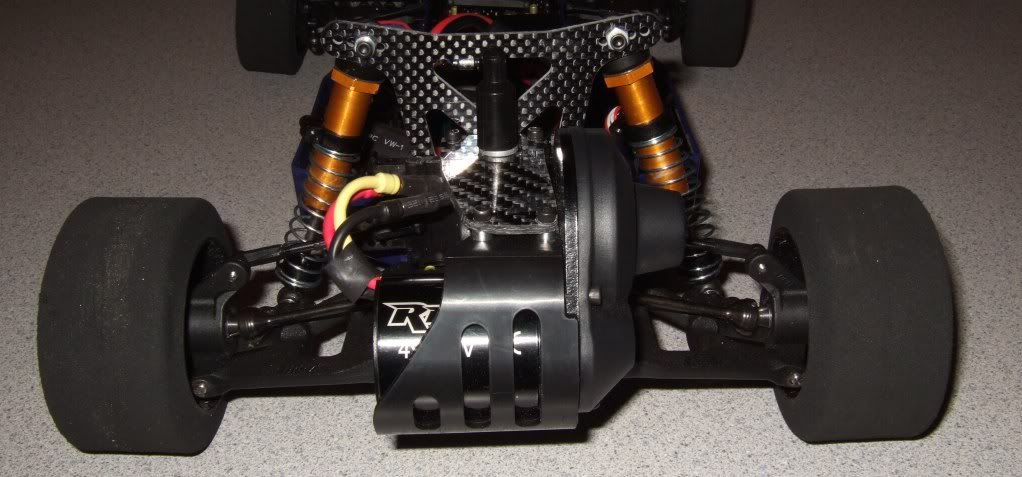
The motor guard looks much better whn mounted to the underside
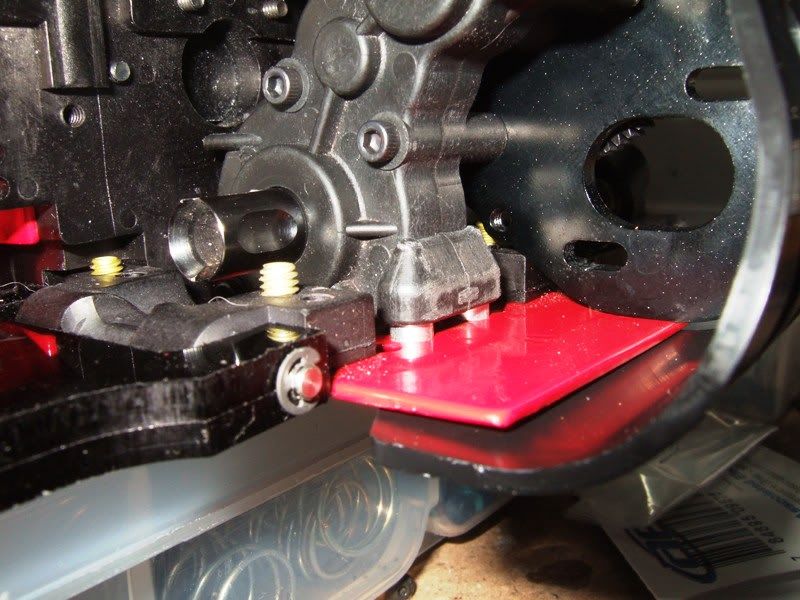
A couple of spacers to help out:
I dropped an original servo mount post off at New Era. They are going to replicate it in aluminum and powder coat them black for me. I'm having them make me 4 sets, that way I can replace the posts on the other builds and have a spare set "just in case:. I mentioned to Frank that maybe with all the different things he does for me, he should set up an "old is new" section on the website. Sounded good to me.....
I think because this one is sitting so low, that instead of the wing mounts being used for a wing, I may just use them to hold the body on.
The motor guard looks much better whn mounted to the underside
A couple of spacers to help out:
I dropped an original servo mount post off at New Era. They are going to replicate it in aluminum and powder coat them black for me. I'm having them make me 4 sets, that way I can replace the posts on the other builds and have a spare set "just in case:. I mentioned to Frank that maybe with all the different things he does for me, he should set up an "old is new" section on the website. Sounded good to me.....
-
Toasted Coastie
- Approved Member
- Posts: 662
- Joined: Sun Apr 11, 2010 9:22 pm
- Location: Nashua, NH
- Been thanked: 1 time
Re: TC's Project Red Headed Stepchild part 2 (9/24 w/pics)
Oh, yeah, for a kid that just wanted to fix up a Yoke to bash with and had no idea what he was doing, he sure is getting handy with a dremel....
-
THEYTOOKMYTHUMB

- Super Member
- Posts: 7133
- Joined: Wed Oct 22, 2008 5:15 pm
- Location: Evansville, IN
- Has thanked: 3712 times
- Been thanked: 1981 times
Re: TC's Project Red Headed Stepchild part 2 (9/24 w/pics)
Damn TC you've been busy! They look great. I'm hoping to get to a couple of projects I've had in mind real soon. This is some good inspiration to get building(as I sit on my ass with my laptop and watch football  ). Keep the pics coming!
"The world looks so much better through beer goggles: Enjoy today, you never know what tomorrow may bring."
Ken
Ken
-
Toasted Coastie
- Approved Member
- Posts: 662
- Joined: Sun Apr 11, 2010 9:22 pm
- Location: Nashua, NH
- Been thanked: 1 time
Re: TC's Project Red Headed Stepchild part 2 (9/24 w/pics)
Thanks man! I'm doing the same thing actually, sitting on my ass with a Dark & Stormy, watching my FF team get a mudhole stamped in its back side. Damn it, I was 2-0 too...
I actually got in the turnbuckles this weekend, so I can procede some more. I brought a servo post to my friends (they love that I keep throwing money at them) at New Era to make some aluminum ones and powder coat black. Having 4 sets made so I can fix the steering on all my cars. They're all backwards, or too jammed in there.
Next purchase is going to be a table top drill press so I hust have to go to them for powder coating or non custom parts. I'm feeling pretty good about my abilities now.
-
Toasted Coastie
- Approved Member
- Posts: 662
- Joined: Sun Apr 11, 2010 9:22 pm
- Location: Nashua, NH
- Been thanked: 1 time
Re: TC's Project Red Headed Stepchild part 2 (9/24 w/pics)
So because of how low the rear shock tower is, I am going to be using 60mm shocks in the rear. I think I am actually going to be using longer shocks in the front. Have to wait and see when they come in....
-
THEYTOOKMYTHUMB
- Super Member
- Posts: 7133
- Joined: Wed Oct 22, 2008 5:15 pm
- Location: Evansville, IN
- Has thanked: 3712 times
- Been thanked: 1981 times
Re: TC's Project Red Headed Stepchild part 2 (9/24 w/pics)
Might help with your servo problem- Futaba S132H. I’m not sure how easy they are to find, but there’s probably a modern equivalent(I haven‘t done any homework). It’s the same width as a standard, but not nearly as deep. It’s very fast, but a little light on torque. Not too light for buggy applications though. Here’s a pic. It’s hard to tell it’s size in the pic. I should have held a standard sized servo next to it. I can get another pic if you need it. Best of all it’s pure vintage… 
"The world looks so much better through beer goggles: Enjoy today, you never know what tomorrow may bring."
Ken
Ken
-
Toasted Coastie
- Approved Member
- Posts: 662
- Joined: Sun Apr 11, 2010 9:22 pm
- Location: Nashua, NH
- Been thanked: 1 time
Re: TC's Project Red Headed Stepchild part 2 (9/30 w/pics)
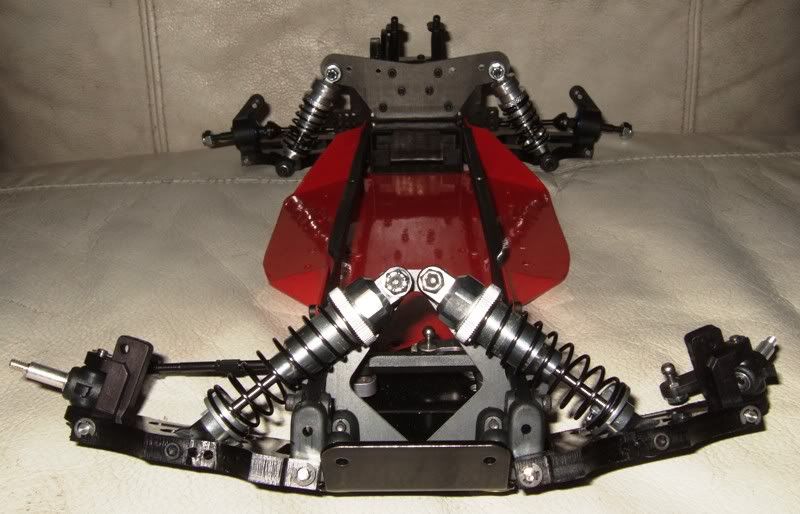
So I got some 60mm shocks that Paul (Treehugger) pointed out to me on the bay. They are 60mm, and were bought as a set of 4. I put them on tonight. The car is lying flush on the cheesy leather ottoman....
Sharp looking shocks! However, they were too short for the front. I put one on, and the suspension arm was all the way up at its max, so the shocks were useless on the front. So I had to improvise. Remember these?
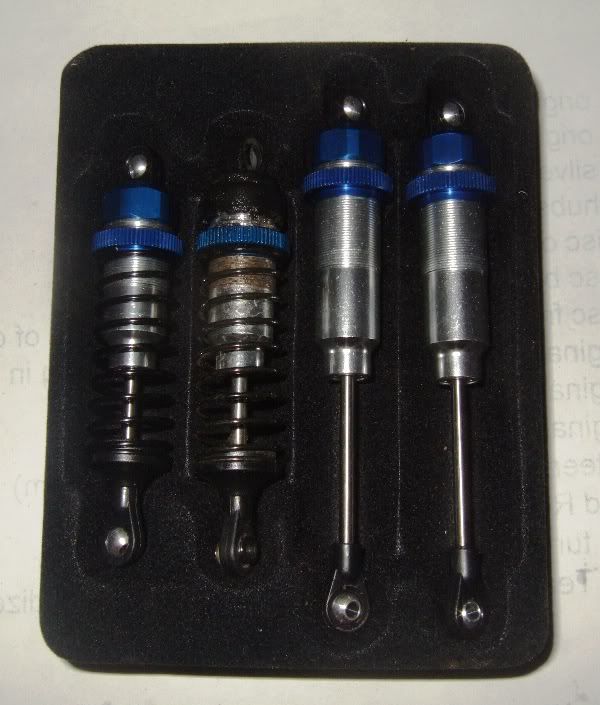
These are the Kyosho ZX5 shocks from 3racing that I have used a couple of times. The last set I used was for Project X: http://www.rc10talk.com/viewtopic.php?f=35&t=16290
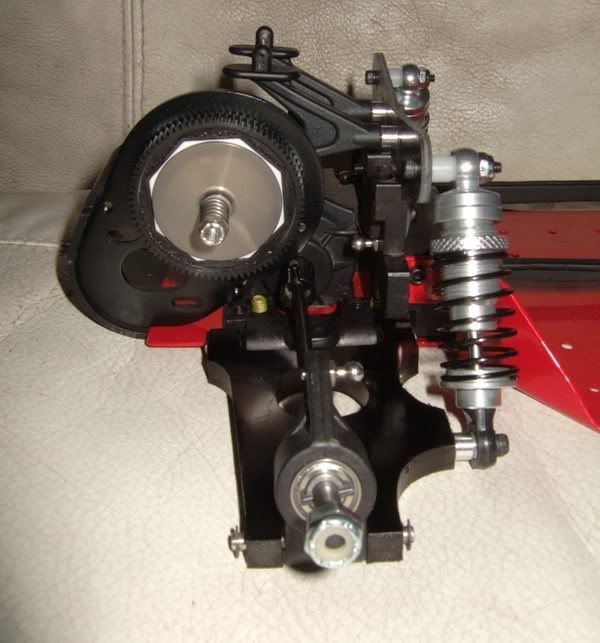
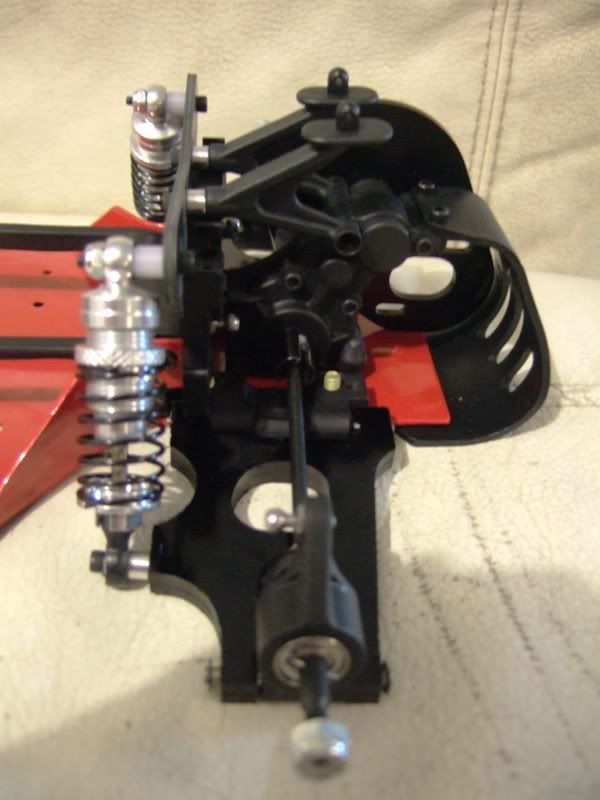
So I liked them so much, I bought a couple of sets to have just in case, and they continue to prove themselves handy. The fronts are 70mm and were perfect to put on the front of this project. However, they have a blue cap and adjuster.
Using the awesome knowledge I have gained from being a member here, I let them sit in Greased Lightning while having a couple of pops with the bride, then polished. Here is what I got:
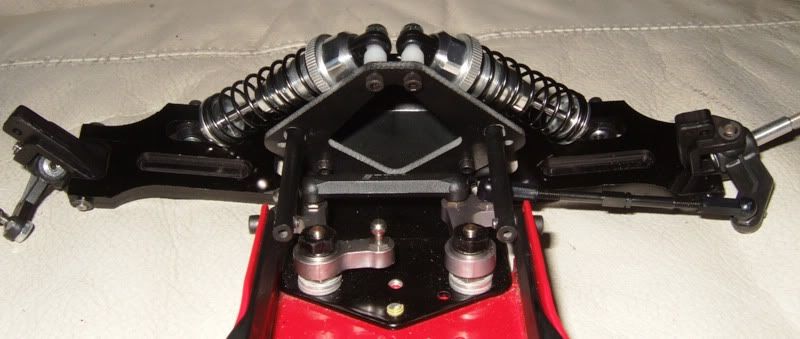
As you can see from this picture, the spring is right on the nose tube, but the body is not.

Same side fully compressed:

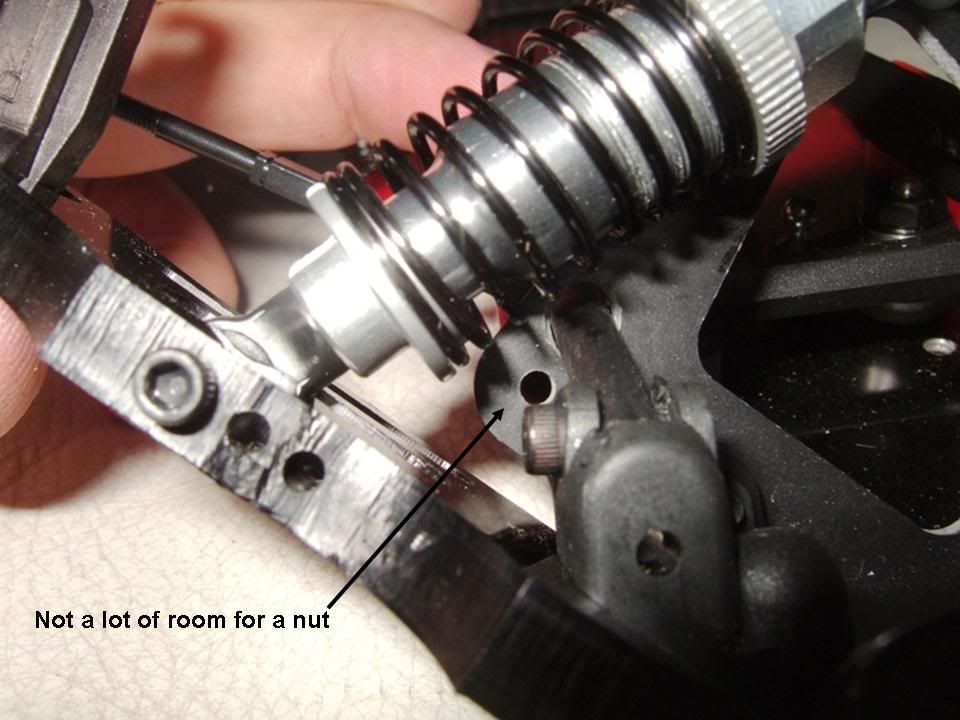
Now, my next issue is putting the ball joint on for the front tie rod. Not enough room for a nut, so I guess I will modify a couple:
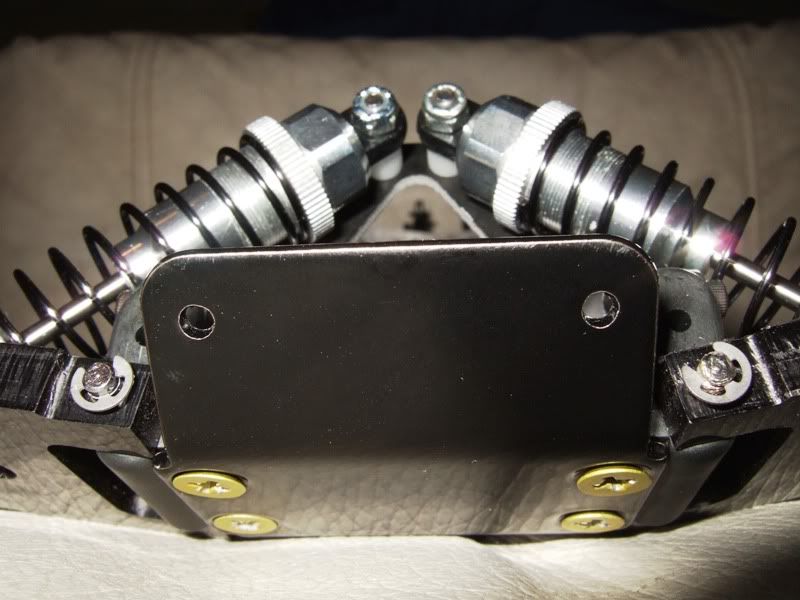
So we are moving right along. Waiting for the red screw kit to come in, and am trying to decide how to paint a cover for this, because my painting skills suck
Sharp looking shocks! However, they were too short for the front. I put one on, and the suspension arm was all the way up at its max, so the shocks were useless on the front. So I had to improvise. Remember these?
These are the Kyosho ZX5 shocks from 3racing that I have used a couple of times. The last set I used was for Project X: http://www.rc10talk.com/viewtopic.php?f=35&t=16290
So I liked them so much, I bought a couple of sets to have just in case, and they continue to prove themselves handy. The fronts are 70mm and were perfect to put on the front of this project. However, they have a blue cap and adjuster.
Using the awesome knowledge I have gained from being a member here, I let them sit in Greased Lightning while having a couple of pops with the bride, then polished. Here is what I got:
As you can see from this picture, the spring is right on the nose tube, but the body is not.
Same side fully compressed:
Now, my next issue is putting the ball joint on for the front tie rod. Not enough room for a nut, so I guess I will modify a couple:
So we are moving right along. Waiting for the red screw kit to come in, and am trying to decide how to paint a cover for this, because my painting skills suck
-
vintage AE
- Approved Member
- Posts: 3012
- Joined: Fri Nov 14, 2008 1:47 pm
- Location: Sunken Lake, Nova Scotia
- Has thanked: 29 times
- Been thanked: 36 times
Re: TC's Project Red Headed Stepchild part 2 (9/30 w/pics)
that's looking real good and the red screw kit will definitely add to it. Too bad there wasn't nose tubes that were a smaller diameter. Maybe the LHS has something similar that you could use as nose tubes? I'm just brain storming, and it's the only thing that I can think of to get more clearance.
-
Toasted Coastie
- Approved Member
- Posts: 662
- Joined: Sun Apr 11, 2010 9:22 pm
- Location: Nashua, NH
- Been thanked: 1 time
Re: TC's Project Red Headed Stepchild part 2 (9/30 w/pics)
It's a great idea and I will check on that. The thing is, the shock isn't actually resting on the tube, nor is the tube interfering with the throw of the shock.
I'm in need for some tubing anyway, I am in the planning stage of a complete custom chassis buggy using Associated parts, just to see what I can do. Drafting out the plans next week, and will be trying to make 2.
I'm in need for some tubing anyway, I am in the planning stage of a complete custom chassis buggy using Associated parts, just to see what I can do. Drafting out the plans next week, and will be trying to make 2.
-
vintage AE
- Approved Member
- Posts: 3012
- Joined: Fri Nov 14, 2008 1:47 pm
- Location: Sunken Lake, Nova Scotia
- Has thanked: 29 times
- Been thanked: 36 times
Re: TC's Project Red Headed Stepchild part 2 (9/30 w/pics)
you are one busy man, lol. As long as there is not interference with the shock and the nose tubes then that's good to go.
Create an account or sign in to join the discussion
You need to be a member in order to post a reply
Create an account
Not a member? register to join our community
Members can start their own topics & subscribe to topics
It’s free and only takes a minute
Sign in
-
- Similar Topics
- Replies
- Views
- Last post
-
- 34 Replies
- 4924 Views
-
Last post by R Cane
-
- 37 Replies
- 4669 Views
-
Last post by tiger1
-
- 9 Replies
- 2342 Views
-
Last post by THEYTOOKMYTHUMB
-
- 51 Replies
- 7548 Views
-
Last post by Prince Steve
-
- 26 Replies
- 2077 Views
-
Last post by fastang
-
- 36 Replies
- 5952 Views
-
Last post by moozo
-
- 69 Replies
- 7197 Views
-
Last post by foots
-
- 11 Replies
- 1476 Views
-
Last post by FlyinGN
