I got a local graphic artist to make them. Any decal shop can do it and probably already has it on file.slotcarrod wrote:Where did you find the Oakley decal?
Showcase's Kinwald Worlds inspired WOIN build
-
Showcase1186
- Approved Member
- Posts: 221
- Joined: Tue May 15, 2012 3:56 pm
- Location: Saratoga Springs NY
- Been thanked: 3 times
Re: Showcase's Kinwald Worlds inspired WOIN build
-
Showcase1186
- Approved Member
- Posts: 221
- Joined: Tue May 15, 2012 3:56 pm
- Location: Saratoga Springs NY
- Been thanked: 3 times
Re: Showcase's Kinwald Worlds inspired WOIN build
Build is still on and will be gaining traction after this weekend. I'll get in to the details of stripping the anodizing.
-
slotcarrod

- Approved Member
- Posts: 4415
- Joined: Tue Nov 25, 2008 10:57 pm
- Location: Calgary Alberta Canada
- Has thanked: 1 time
- Been thanked: 45 times
Re: Showcase's Kinwald Worlds inspired WOIN build
Good to see you cooking something up! 
Rod Littau
Slotcarrod's Rumpus Room: http://www.rc10talk.com/viewtopic.php?f=77&t=16113
25 Years of the RC10: http://www.rc10talk.com/viewtopic.php?f=35&t=13059
Slotcarrod's Rumpus Room: http://www.rc10talk.com/viewtopic.php?f=77&t=16113
25 Years of the RC10: http://www.rc10talk.com/viewtopic.php?f=35&t=13059
-
Showcase1186
- Approved Member
- Posts: 221
- Joined: Tue May 15, 2012 3:56 pm
- Location: Saratoga Springs NY
- Been thanked: 3 times
Re: Showcase's Kinwald Worlds inspired WOIN build
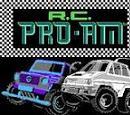
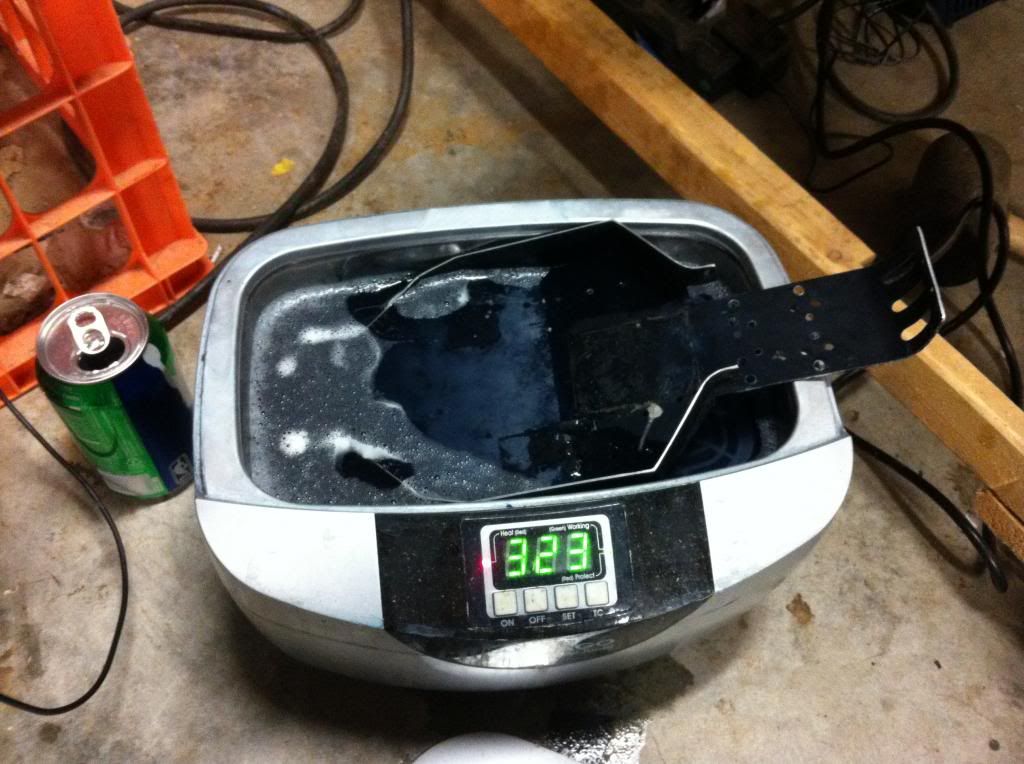
LOL, the pot is for dyeing the parts, but has acted as a staging area for months. Yes, I'll be cooking something up with the RIT dye.
-
Showcase1186
- Approved Member
- Posts: 221
- Joined: Tue May 15, 2012 3:56 pm
- Location: Saratoga Springs NY
- Been thanked: 3 times
Re: Showcase's Kinwald Worlds inspired WOIN build
Let's tackle the subject of stripping anodizing off chassis components. Its probably the most tedious part of the RC hobby along with taping for high end multiple color paint jobs, but it's necessary if you're going to re-coat the chassis. I'm not one for expensive media blasting, or taking a wire wheel to the chassis leaving permanent damage. So I opt this method which leaves the chassis bare natural and unharmed. I'm electing to powder coat my chassis components instead of sticking with the anodizing route. Powder coating is extremely durable and looks great! Plus it's more scratch resistant than anodizing. Powder coating requires a bare metal surface, which is why I need to strip coating.
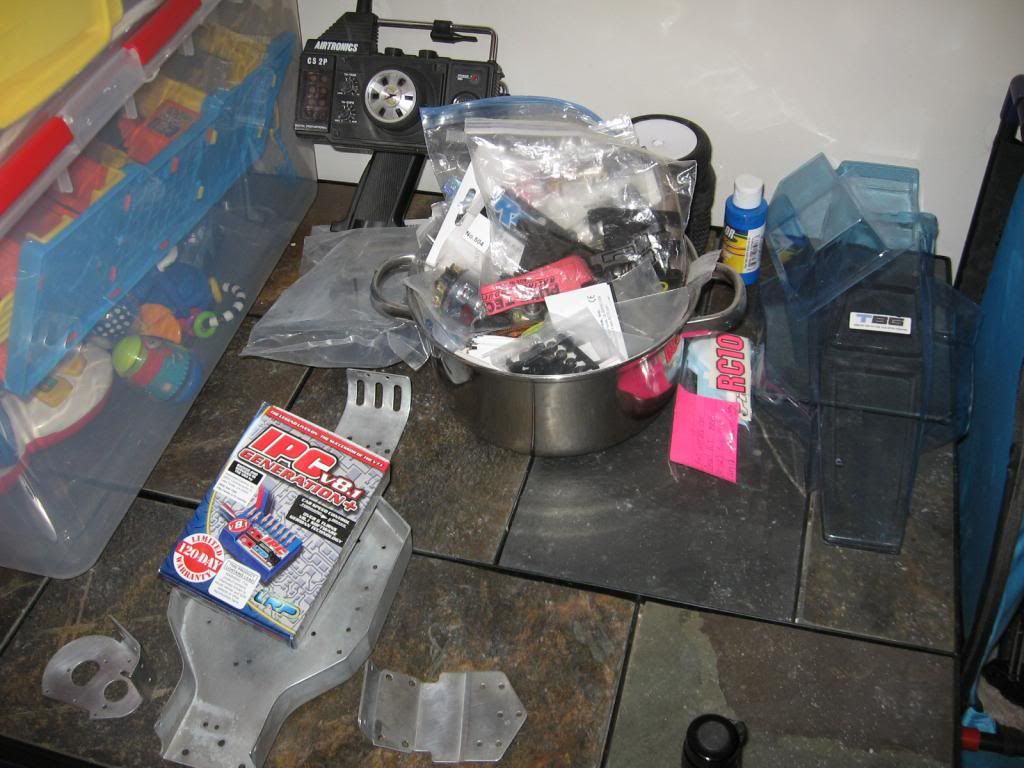
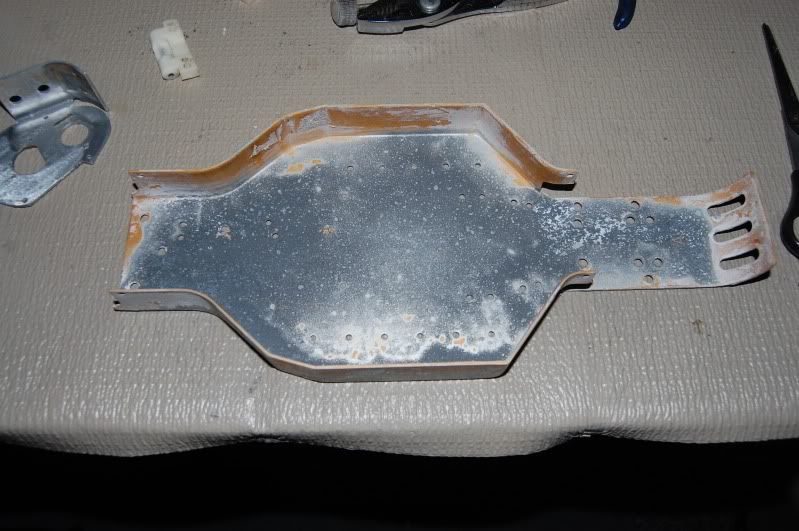
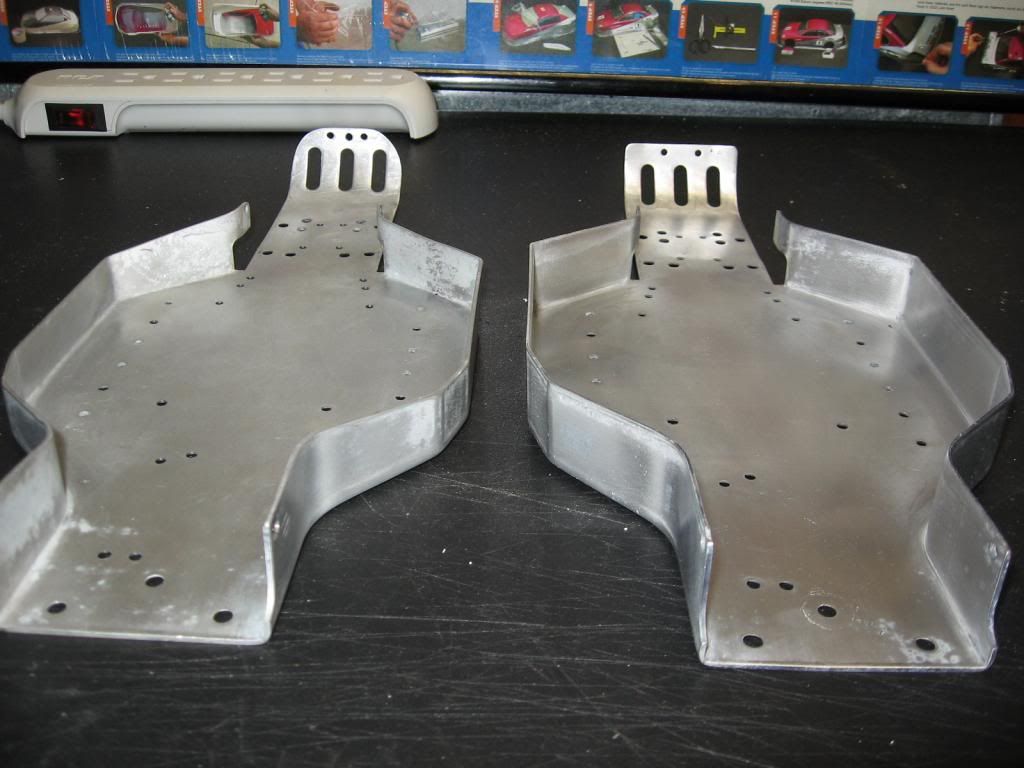
So the million dollar question is how do you go from this:
To this:
The answer is quite simple, use this (must be the yellow easy off bottle, the blue bottled environmentally friendly one doesn't work):
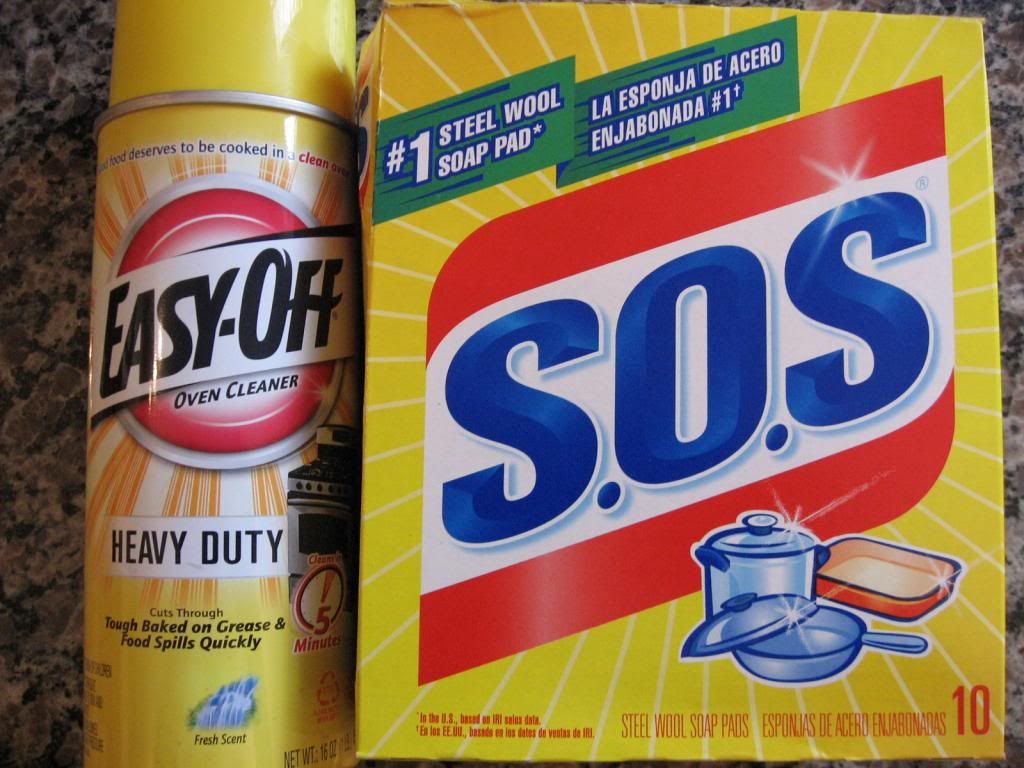
Now... I said the answer was simple, but the process is anything but. Oven cleaner is one of the nastiest household chemicals available. In fact it's more gaseous and aggressive than any chems I use in the garage. The warning label on the bottle doesn't do any justice on how potent this stuff is. This is one of those projects that requires the wife and the kids to be out of the house for a couple hours. OK, so how's it work? Clean all debris off the chassis and be sure to remove any and all decals/servo tape residue. OPEN ALL WINDOWS TAKE A DEEP BREATH AND SPRAY. One of the key active components in Easy Off oven cleaner is LYE.
This link shows a chemical burn induced by LYE courtesy of the movie FIGHT CLUB: http://youtu.be/TfDVLsBXYcM
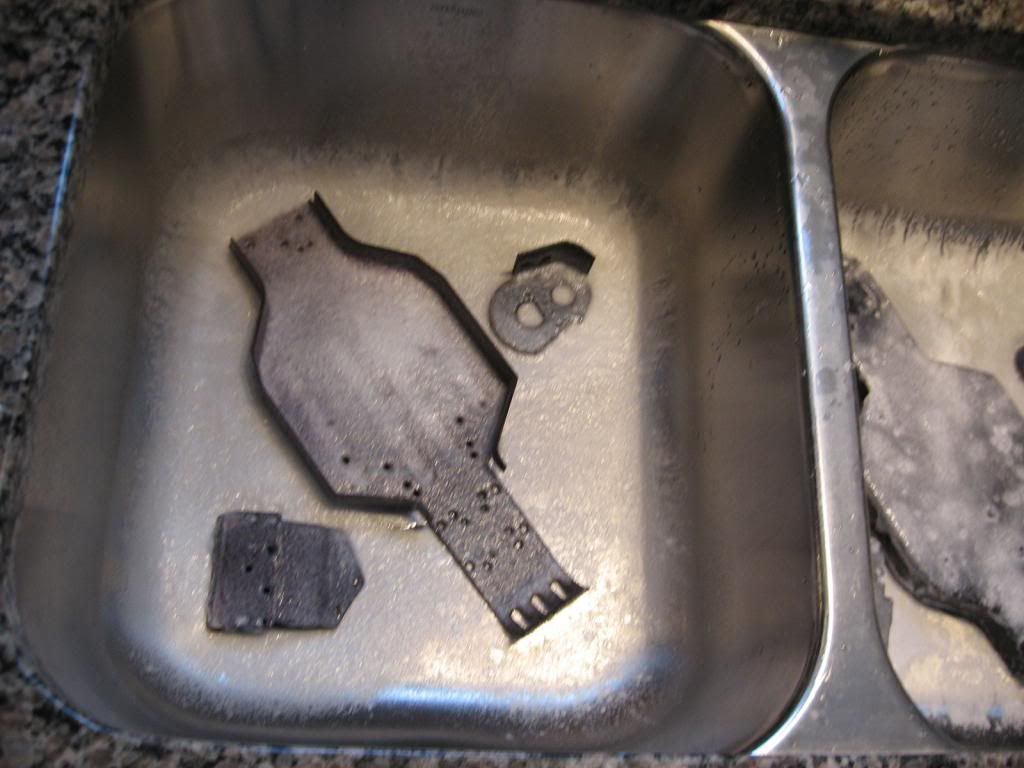
The LYE causes a chemical reaction which burns/etches the top layer of aluminum. Leave the oven cleaner on the surface of your parts for about 5-10minutes for the first round.
It should look like this:
After rinsing and wet scrubbing with the SOS steel wool pads (or you can use 220 grit sand paper with water) it should look more like this:
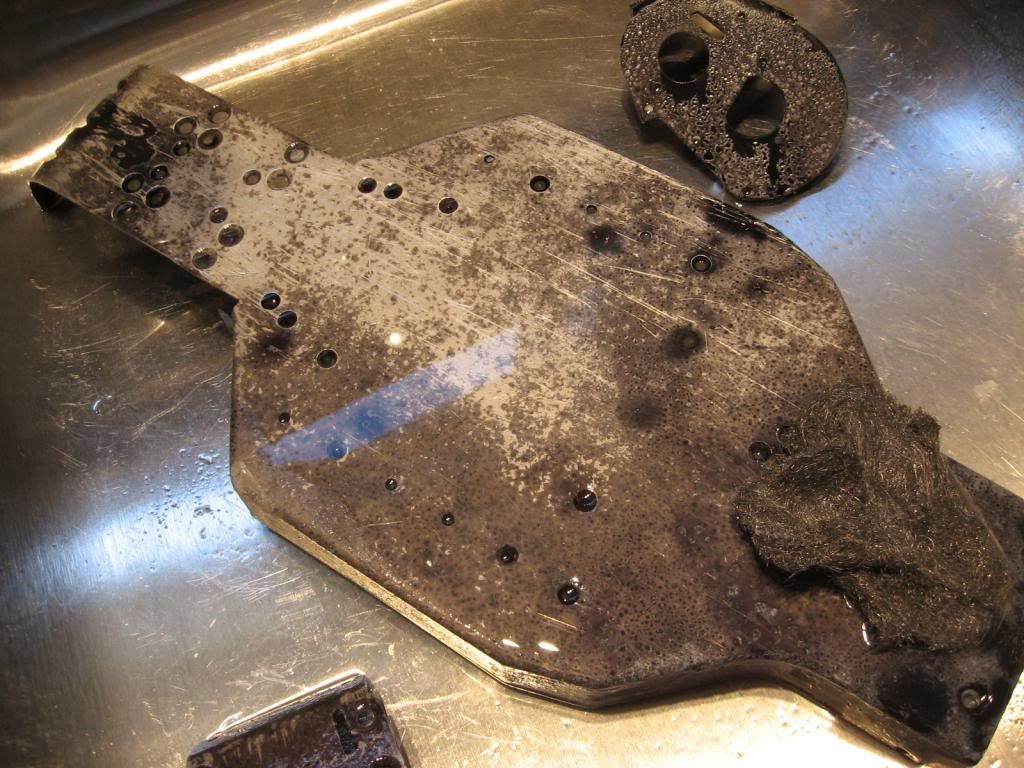
Keep repeating spray, sit, rinse, scrub until all the anodizing is removed. A key thing to remember is to reduce the amount of active time you leave the the oven cleaner on the part the less anodizing you have left, because you will just be burning more of the aluminum and it leaves a black residue that's a PITA to scrub off.
So the million dollar question is how do you go from this:
To this:
The answer is quite simple, use this (must be the yellow easy off bottle, the blue bottled environmentally friendly one doesn't work):
Now... I said the answer was simple, but the process is anything but. Oven cleaner is one of the nastiest household chemicals available. In fact it's more gaseous and aggressive than any chems I use in the garage. The warning label on the bottle doesn't do any justice on how potent this stuff is. This is one of those projects that requires the wife and the kids to be out of the house for a couple hours. OK, so how's it work? Clean all debris off the chassis and be sure to remove any and all decals/servo tape residue. OPEN ALL WINDOWS TAKE A DEEP BREATH AND SPRAY. One of the key active components in Easy Off oven cleaner is LYE.
This link shows a chemical burn induced by LYE courtesy of the movie FIGHT CLUB: http://youtu.be/TfDVLsBXYcM
The LYE causes a chemical reaction which burns/etches the top layer of aluminum. Leave the oven cleaner on the surface of your parts for about 5-10minutes for the first round.
It should look like this:
After rinsing and wet scrubbing with the SOS steel wool pads (or you can use 220 grit sand paper with water) it should look more like this:
Keep repeating spray, sit, rinse, scrub until all the anodizing is removed. A key thing to remember is to reduce the amount of active time you leave the the oven cleaner on the part the less anodizing you have left, because you will just be burning more of the aluminum and it leaves a black residue that's a PITA to scrub off.
-
JK Racing

- Approved Member
- Posts: 4619
- Joined: Thu Jul 19, 2007 2:32 pm
- Location: Placentia, CA
- Has thanked: 139 times
- Been thanked: 246 times
Re: Showcase's Kinwald Worlds inspired WOIN build
Like this?Showcase1186 wrote: A key thing to remember is to reduce the amount of active time you leave the the oven cleaner on the part the less anodizing you have left, because you will just be burning more of the aluminum and it leaves a black residue that's a PITA to scrub off.
--Joey --
Vintage A&L and Factory Works
Old School Racer & Vintage RC Car nut
JKRacingRC.com
Vintage A&L and Factory Works
Old School Racer & Vintage RC Car nut
JKRacingRC.com
-
Showcase1186
- Approved Member
- Posts: 221
- Joined: Tue May 15, 2012 3:56 pm
- Location: Saratoga Springs NY
- Been thanked: 3 times
Re: Showcase's Kinwald Worlds inspired WOIN build
Yup!!! It burns/removes material and leaves pits like that when left on for too long. Better get out the 120grit. It's kinda like using a wire wheel on steel, sparks you see is material being removed. The black you see when using oven cleaner on AL is your chassis being removed. The scrubbing or sanding merely smooths the etched/burned surface.
-
JK Racing
- Approved Member
- Posts: 4619
- Joined: Thu Jul 19, 2007 2:32 pm
- Location: Placentia, CA
- Has thanked: 139 times
- Been thanked: 246 times
Re: Showcase's Kinwald Worlds inspired WOIN build
yep, that car (couple years ago), got blasted then powder coated.
--Joey --
Vintage A&L and Factory Works
Old School Racer & Vintage RC Car nut
JKRacingRC.com
Vintage A&L and Factory Works
Old School Racer & Vintage RC Car nut
JKRacingRC.com

Re: Showcase's Kinwald Worlds inspired WOIN build
I accidently cleaned the anodize off a worlds chassis while using Eagle One heavy duty degreaser, its the purple stuff. It was almost too easy. It didn't have any side effects on the aluminum either.
-
Showcase1186
- Approved Member
- Posts: 221
- Joined: Tue May 15, 2012 3:56 pm
- Location: Saratoga Springs NY
- Been thanked: 3 times
Re: Showcase's Kinwald Worlds inspired WOIN build
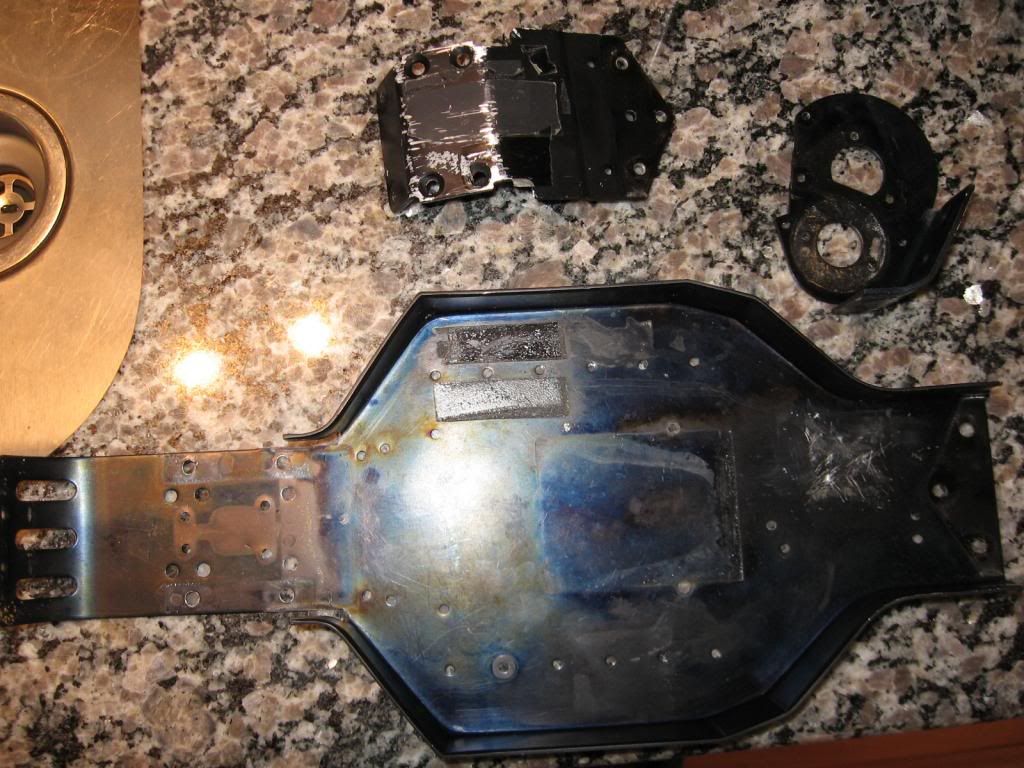
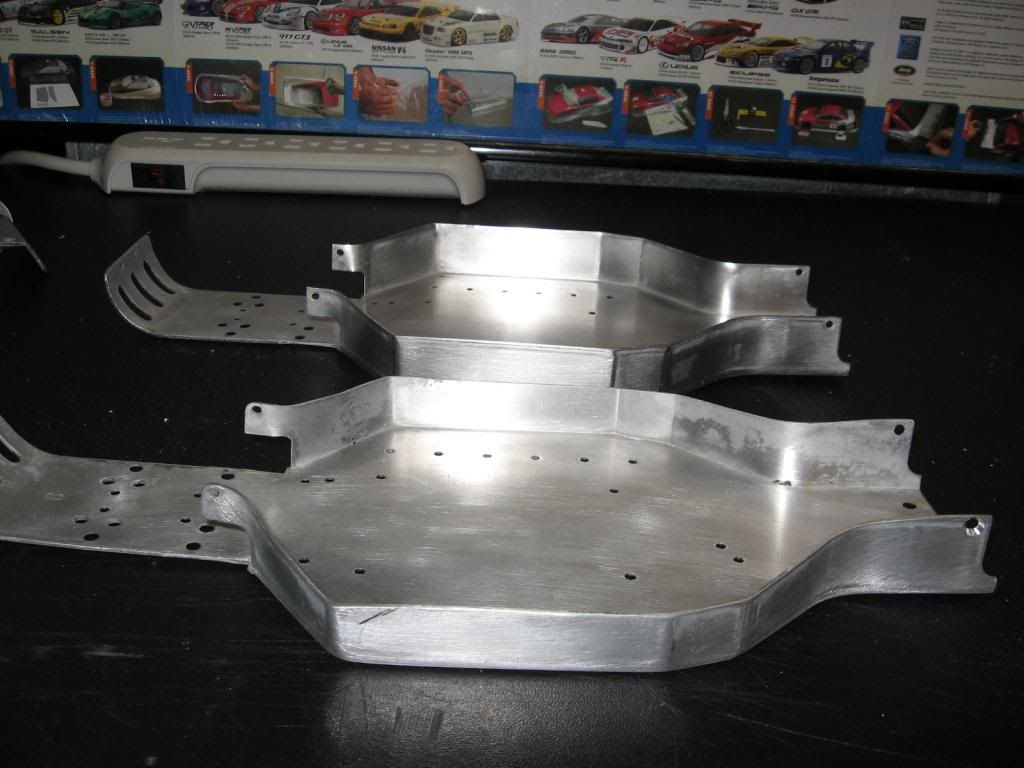
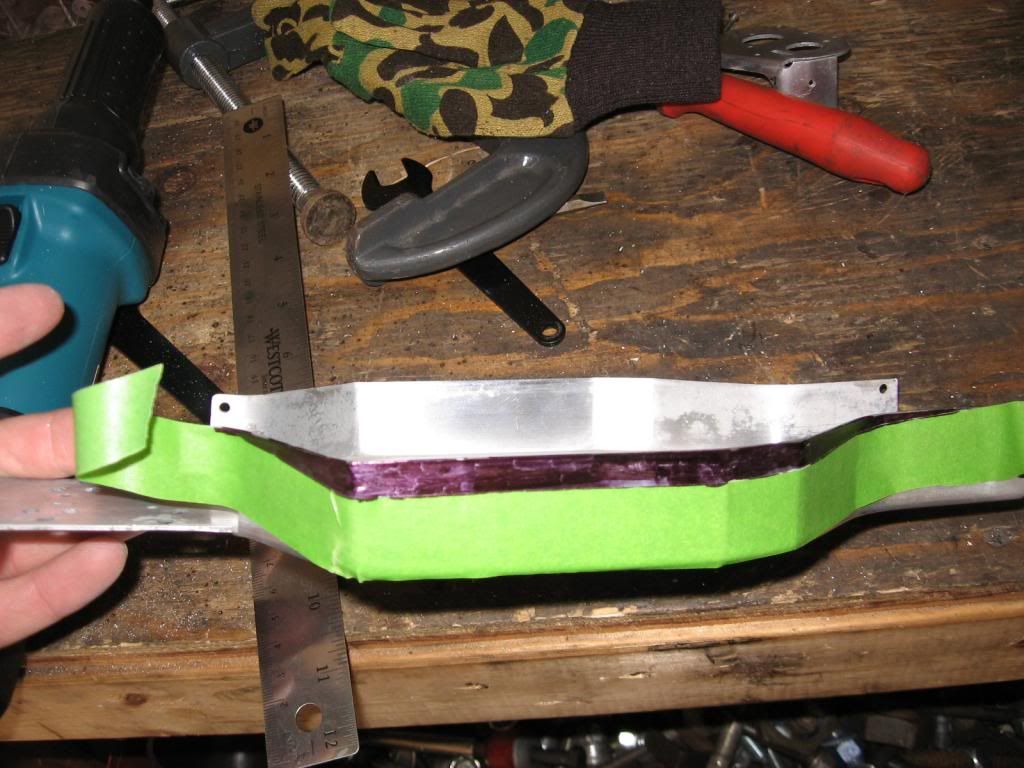
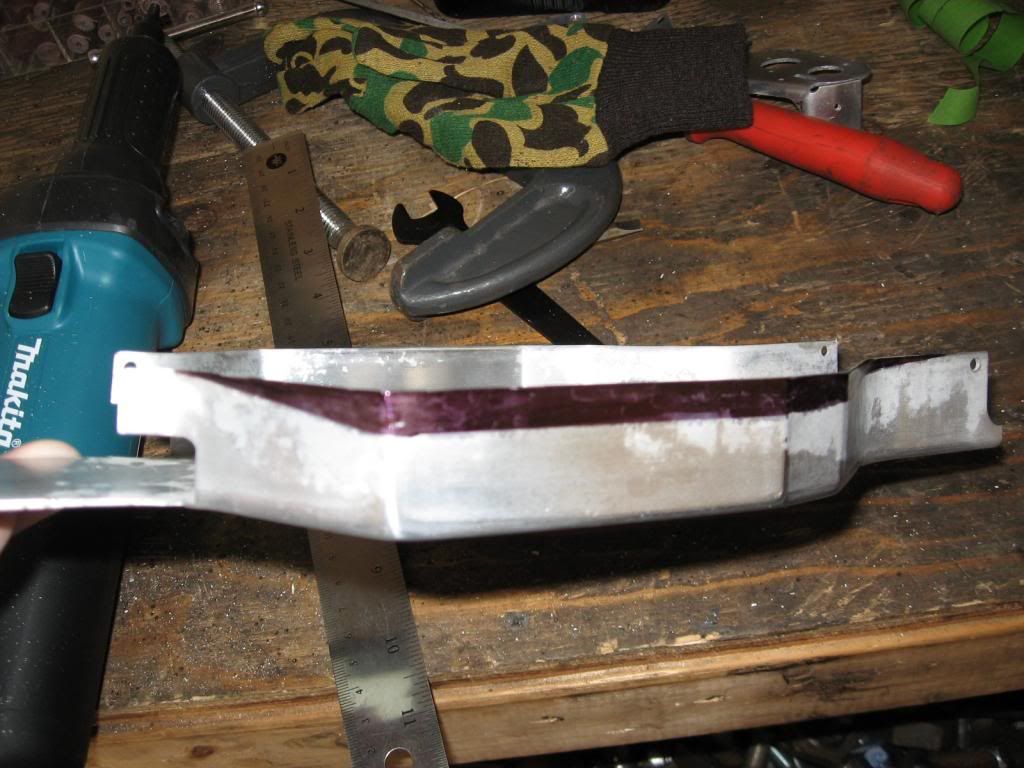
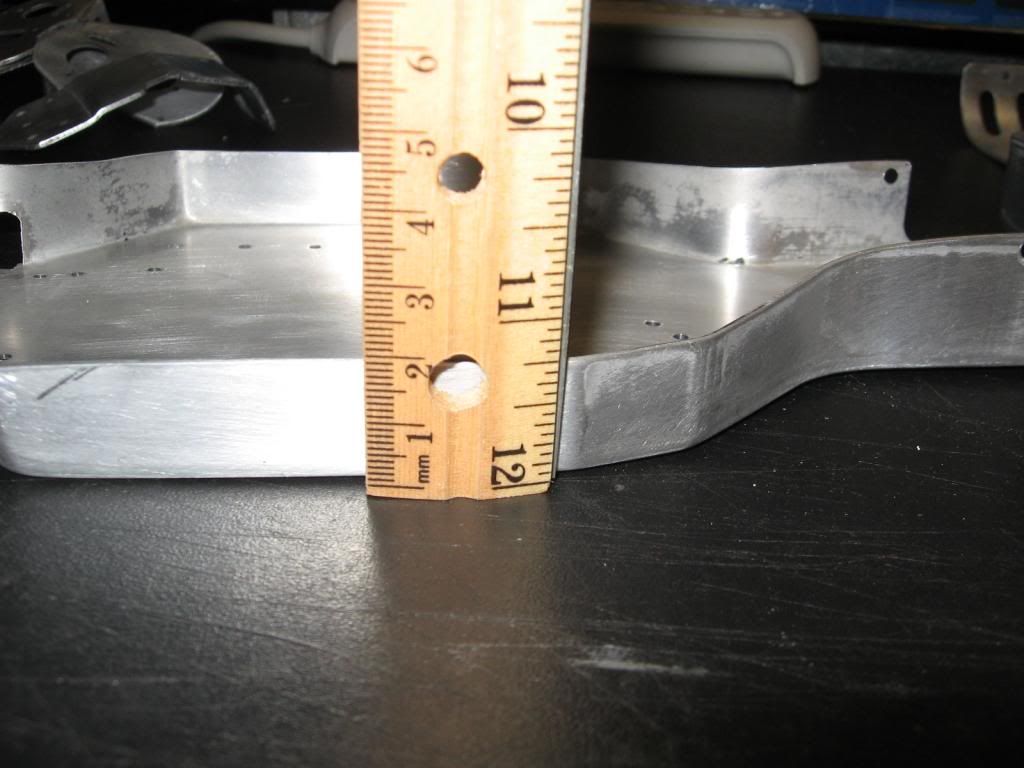
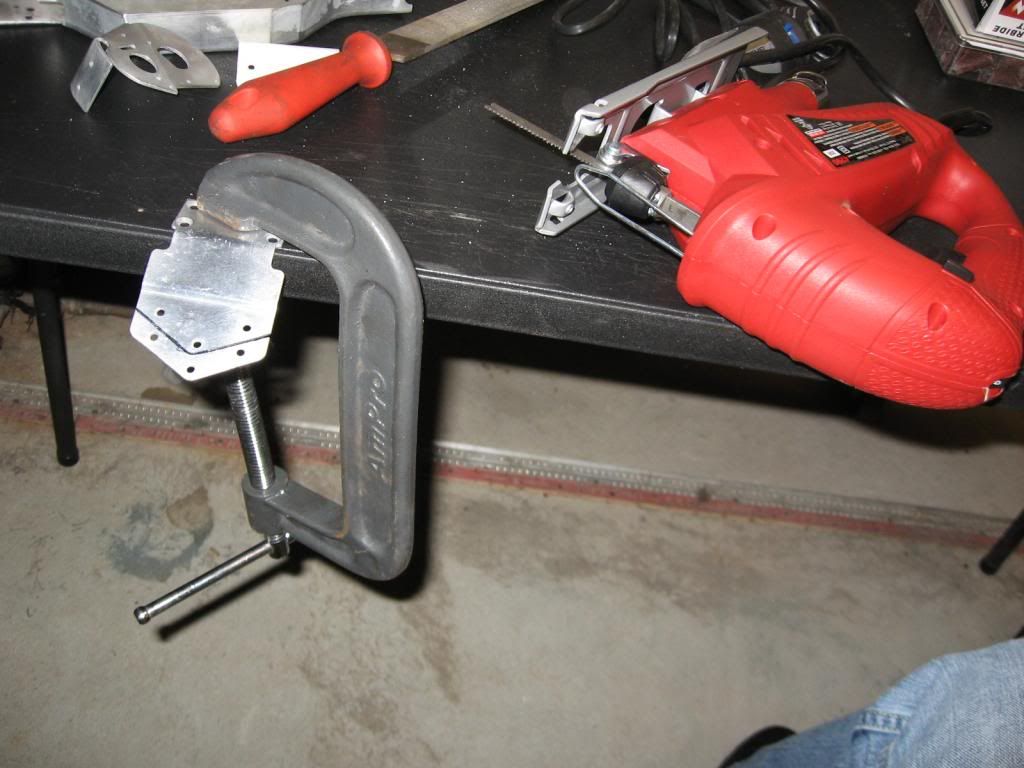
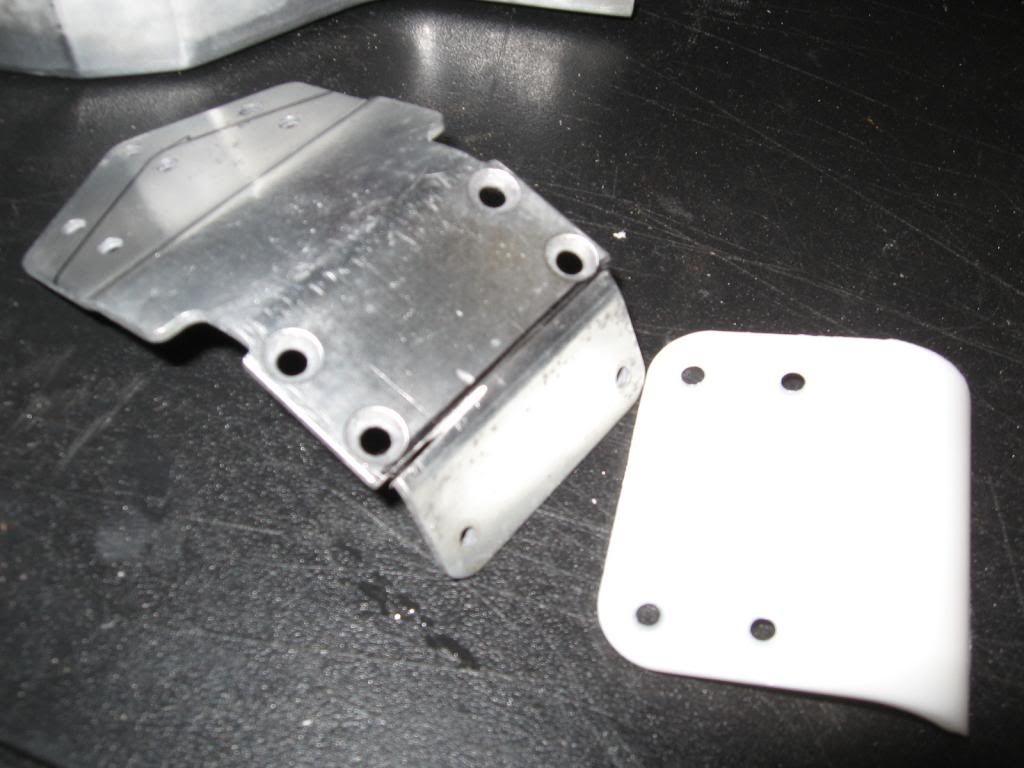
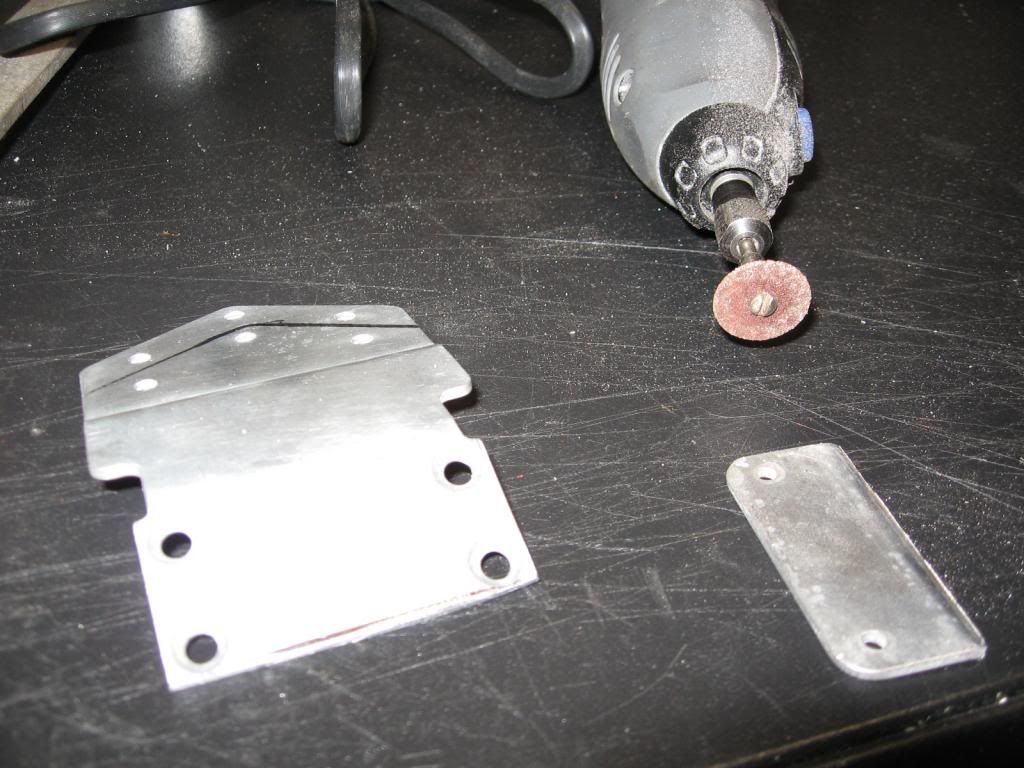
I finished the Kinwald world style cut on the chassis. I ended up using a jig saw, dremel and a 1/4 die grinder. The process should have been easier, but I feel I didn't have the right tool for the job. I also removed the kick up on the front truck nose plate since I'll be using an RPM bumper. I found it was helpful to use tape as a reference to scribe the cut lines.
-
Showcase1186
- Approved Member
- Posts: 221
- Joined: Tue May 15, 2012 3:56 pm
- Location: Saratoga Springs NY
- Been thanked: 3 times
Re: Showcase's Kinwald Worlds inspired WOIN build
While the chassis is out for powder coat I decided to use my new master G33 airbrush for the first time. For paint I used Parma Faskolor fasescent blue, black and backed it all with the pactra rattle can sprint white. With the compressor regulator set to 50psi, which had an actual output of 35psi consistent when shooting I was on my way. The paint scheme is based on Brian Kinwald's RC10 he drove to victory in the 93 worlds / IFMAR. My version boasts slightly bigger and more geometrically equal drips, which I like a bit more than the original box art, but it's all preference.
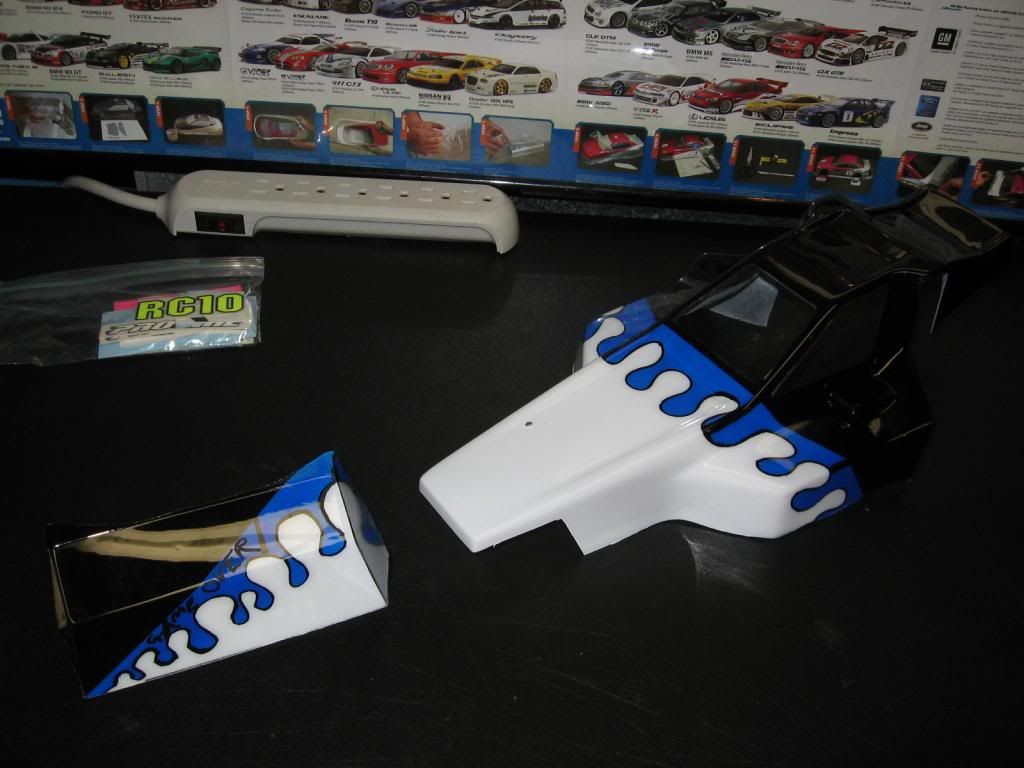
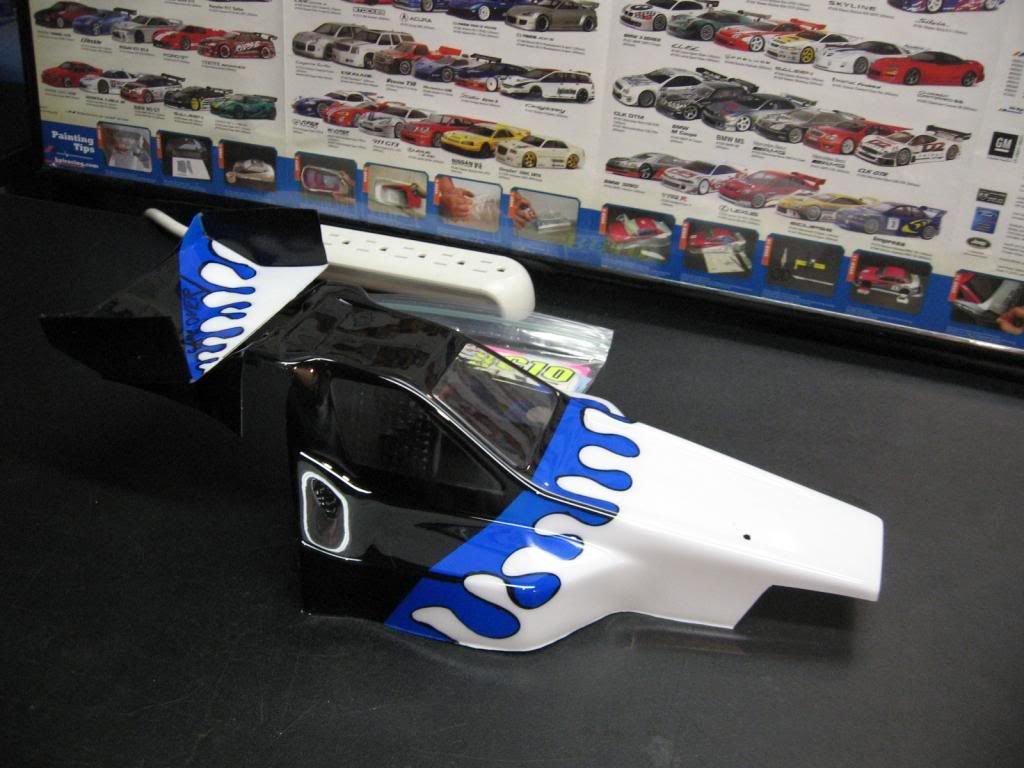
Updated pictures on the chassis and decal'd body will be posted next week.
Updated pictures on the chassis and decal'd body will be posted next week.
-
upforit365
- Approved Member
- Posts: 79
- Joined: Mon May 07, 2012 1:12 pm
- Location: West London, UK
- Been thanked: 1 time
Re: Showcase's Kinwald Worlds inspired WOIN build
How did you do the thin black line between the white and blue on the "drips"?
-
Showcase1186
- Approved Member
- Posts: 221
- Joined: Tue May 15, 2012 3:56 pm
- Location: Saratoga Springs NY
- Been thanked: 3 times
Re: Showcase's Kinwald Worlds inspired WOIN build
This is a good question, because I'm looking for a better way to do it than I currently do. If you look closely the black painted lines between the drips aren't as sharp and smooth as I'd like, meaning they vary in line thickness slightly.upforit365 wrote:How did you do the thin black line between the white and blue on the "drips"?
OK to answer you question I'll give a quick over view on how to do the paint job.
This paint job isn't hard by any means, but it does take time and patients.
1) You always want to spray your darkest colors 1st to avoid any color bleed thru. So with this body you'll be working from the back of the body forward.
2) Tape off the windows and tape off the front part of the buggy and then spray your black (on the inside of the body of course, assuming we've all painted lexan bodies before). Be sure to do several light coats of black (I did say light). The darker the paint color, the more it tends to propagate behind your tape and cause whats called bleeding or runs.
3) Once the black is dry, remove the tape from the nose of the body, but leave the masking over the windows for the entire paint process.
4) Now you can re-apply tape on the nose of the body and use a marker to make the pattern on the tape where you will cut out the drips with an X-acto knife. XXX Main makes a really nice pre-cut drip paint mask that alleviates using an X-acto knife and laying out your own.
View link: http://www3.towerhobbies.com/cgi-bin/wti0001p?&I=LXEFW1&P=7
- xxxc0003.jpg (22.45 KiB) Viewed 1026 times
- xxxc0003.jpg (22.45 KiB) Viewed 1026 times
6) Now simply lay down you blue paint.
7) Remove your tape/drip stencil, check for any runs and erase them using the tip above
With the window mask still on the body spray the remainder of the body white.
The wing is a whole different animal, but same basic principal, only keep in mind which surface you want shiny and which surface you want to apply the the paint. I'm not going to get in to wing details unless someone really wants to ask.
I hope this helps and thanx for looking!
More to come!
-
discgolfer72

- Approved Member
- Posts: 336
- Joined: Sun Mar 17, 2013 5:36 pm
- Location: op kansas
- Has thanked: 21 times
- Been thanked: 36 times
Re: Showcase's Kinwald Worlds inspired WOIN build
ps next time instead if a stinky oven cleaner
and brillow pad
use ultrasonic cleaner and la awsome oxy cleaner
it wipes right off with a paper towl
and brillow pad
use ultrasonic cleaner and la awsome oxy cleaner
it wipes right off with a paper towl
-
Showcase1186
- Approved Member
- Posts: 221
- Joined: Tue May 15, 2012 3:56 pm
- Location: Saratoga Springs NY
- Been thanked: 3 times
Re: Showcase's Kinwald Worlds inspired WOIN build
This is all good stuff!!! Thanx for the input and all good ideas are welcome!!!!! Keep em coming!
Create an account or sign in to join the discussion
You need to be a member in order to post a reply
Create an account
Not a member? register to join our community
Members can start their own topics & subscribe to topics
It’s free and only takes a minute
Sign in
-
- Similar Topics
- Replies
- Views
- Last post
-
- 53 Replies
- 6808 Views
-
Last post by glastornjet73
-
- 12 Replies
- 2313 Views
-
Last post by 1911Colt
-
- 54 Replies
- 10424 Views
-
Last post by romulus22
-
- 7 Replies
- 2307 Views
-
Last post by Showcase1186
-
- 55 Replies
- 12601 Views
-
Last post by scr8p
-
- 5 Replies
- 1299 Views
-
Last post by will5879
-
- 13 Replies
- 1906 Views
-
Last post by mikea96
-
- 46 Replies
- 6828 Views
-
Last post by GoMachV
Who is online
Users browsing this forum: ![]() Bing [Bot] and 8 guests
Bing [Bot] and 8 guests