Page 2 of 3
Re: ebay Rc10L *restore/build thread* custom CNC parts insi
Posted: Fri Mar 30, 2012 7:33 am
by drbelleville
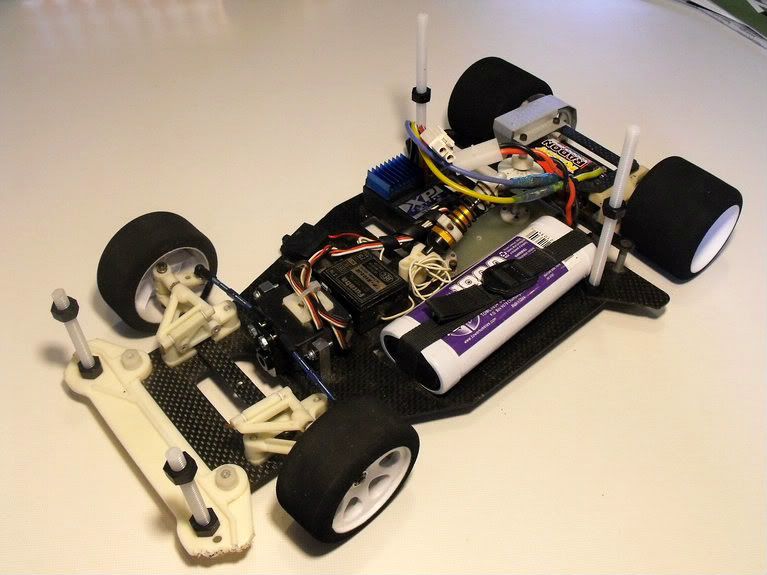
Your car is coming together nicely, looking great!
Just to give you a tip, you want to run a bit of caster on that front end, from your pics I can not tell under the front suspension blocks, if you have any caster wedges. These will speed up the steering a little, and will help with the tire wanting to self center itself. You dont want to much caster though - it will seem squirly. Associated, and a few other manufacturers offered the caster wedges in various degrees. I am not sure but Speedmerchant may have some as they ran the old style front end the longest. There are some that are slotted to facilitate fast removal. Also I have run washers / shims just under the forward front screw with none in the rear, which allowed me to tune the caster to my liking. I hope this helps you out some.
Re: ebay Rc10L *restore/build thread* custom CNC parts insi
Posted: Fri Mar 30, 2012 8:02 am
by durb69
I have some of those still attached to the plastic tree that came with the car when it was new
I know my rc10lso had them installed. I know I should have installed some but I didn't know how many or how much. I will install some before I take it to the track. Thanks for your advice

Re: ebay Rc10L *restore/build thread* custom CNC parts insi
Posted: Fri Mar 30, 2012 9:05 am
by durb69
TerryC wrote:That is looking awesome!

Thanks! this is pretty much my second restore. The first was my RC10Lso
Re: ebay Rc10L *restore/build thread* custom CNC parts insi
Posted: Sun Apr 01, 2012 2:06 am
by durb69
Re: ebay Rc10L *restore/build thread* custom CNC parts insi
Posted: Sun Apr 01, 2012 8:52 am
by EvolutionRevolution
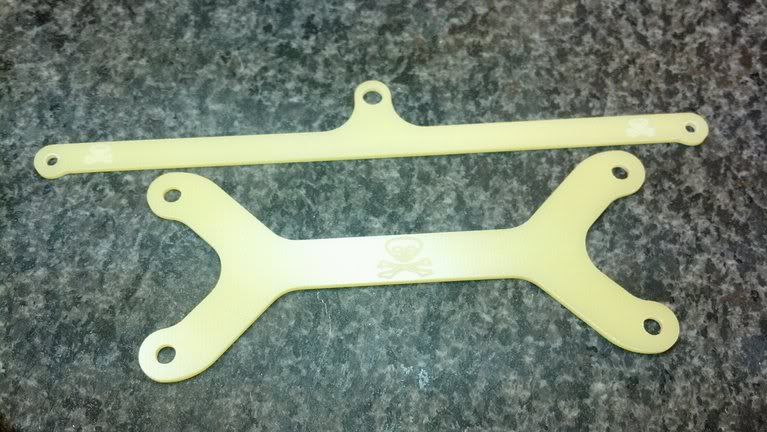
Looking very nice so far, but aren't you afraid those nerf wings will bend if you hit something?
Re: ebay Rc10L *restore/build thread* custom CNC parts insi
Posted: Sun Apr 01, 2012 9:08 am
by durb69
They are .100 thick aluminum. They should hold up pretty well. But there is only one way to find out lol.
Re: ebay Rc10L *restore/build thread* custom CNC parts insi
Posted: Sun Apr 01, 2012 5:03 pm
by CAT3K
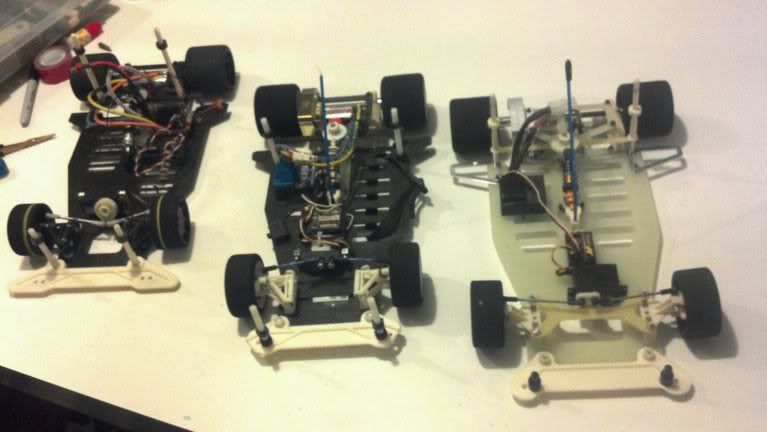
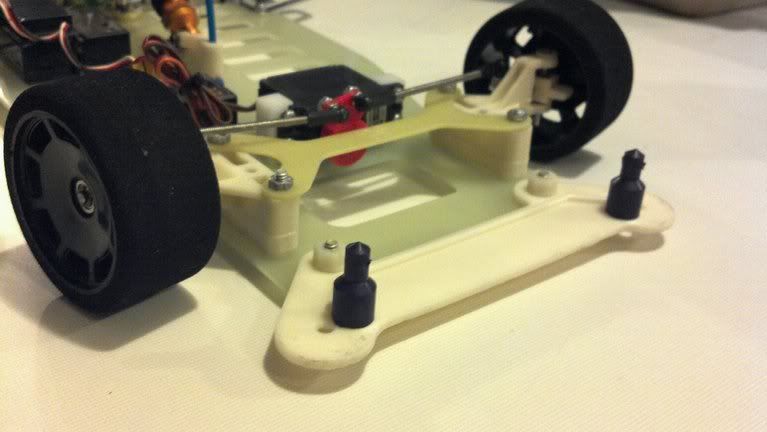
I'm really liking those alloy nerf bars and gear covers
Shows me i need to get my 10L out for a blast some time.
Re: ebay Rc10L *restore/build thread* custom CNC parts insi
Posted: Sun Apr 01, 2012 7:57 pm
by durb69
Heck yeah we had a blast running mine today. They got a real beating lol. We are all novice drivers. The nerf wings held up rock solid too! I am going to make a small batch of them soon. Thanks for your compliments!
Re: ebay Rc10L *restore/build thread* custom CNC parts insi
Posted: Tue Apr 10, 2012 12:14 am
by durb69
Re: ebay Rc10L *restore/build thread* custom CNC parts insi
Posted: Thu Apr 19, 2012 4:27 am
by unclemikey1978
In an ealier post you metioned that you polished the chassis. I was wondering what you used to get it so new and shiny looking. I have cleaned mine with Simple Green but it doesn't have the same sheen as yours.
Re: ebay Rc10L *restore/build thread* custom CNC parts insi
Posted: Thu Apr 19, 2012 10:52 am
by durb69
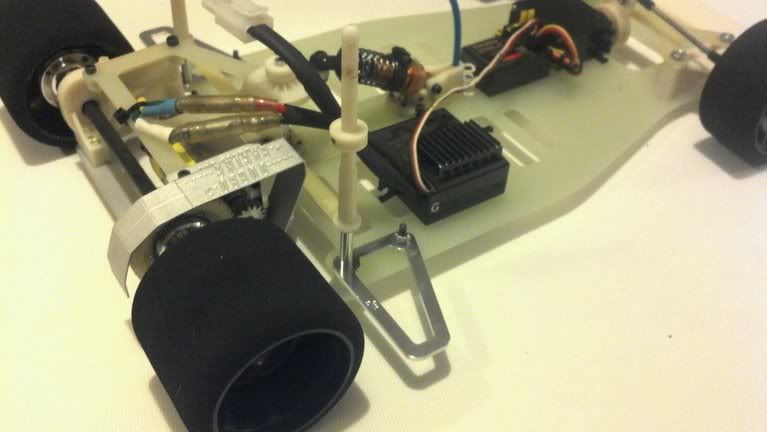
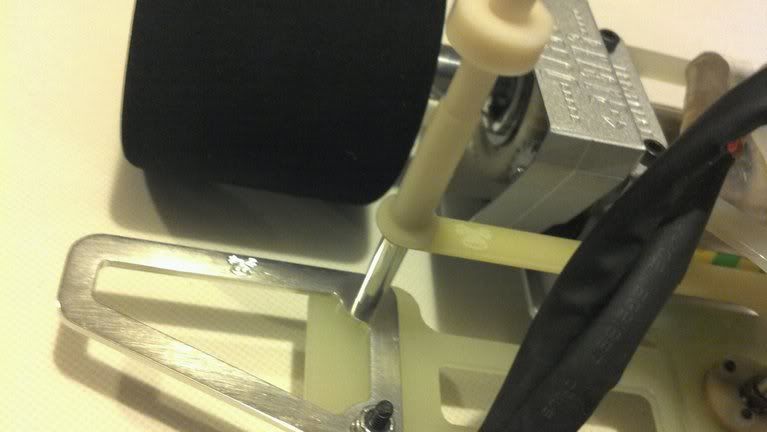
This is a post i put up explaining some of the details. Read more below i will elaborate on this for you.
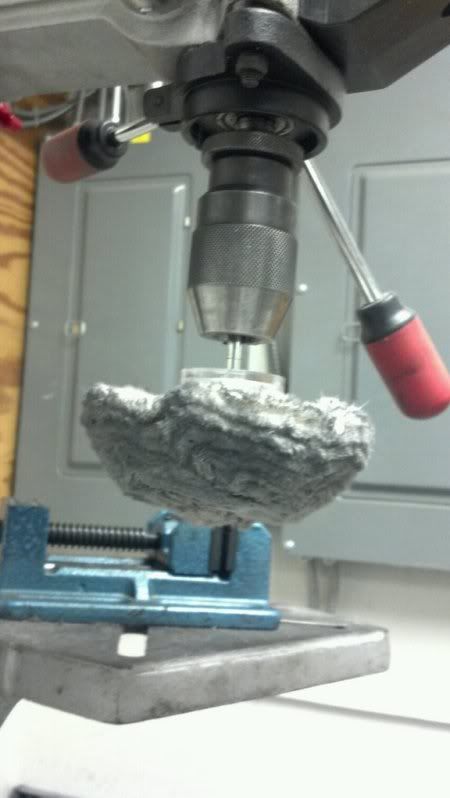
durb69 wrote:Sure thing. If you want to clean up the G-10 fiberglass parts you can starts with some cleaner degreaser and a toothbrush. Then to help with some of those scratches you can sand them away with 500 grit wet sand paper. Be sure to use water! For really deep scratched areas I use 220 ans then go back with the 500 in those areas. Then I use 1000 grit, 1200 grit and finish off with 1500 grit. Always washing off the parts between each grit. Then use a large buffing wheel and some mild polish and buff to a better then new shine! The white plastic can be whitened with oxyclean and peroxide mixed together. I put the parts in a small bowl and set them under a UV light for a few hours. The longer you wait the better the results. Also you can put them in the sun. I polished all metal parts using metal polish and a lathe. And sand blasted the rear lower brace
To start with I don't think anything beats hot tap water and a very generous amount of DAWN dish soap. Save your money and dont use simple green.
the large buffing wheel i used
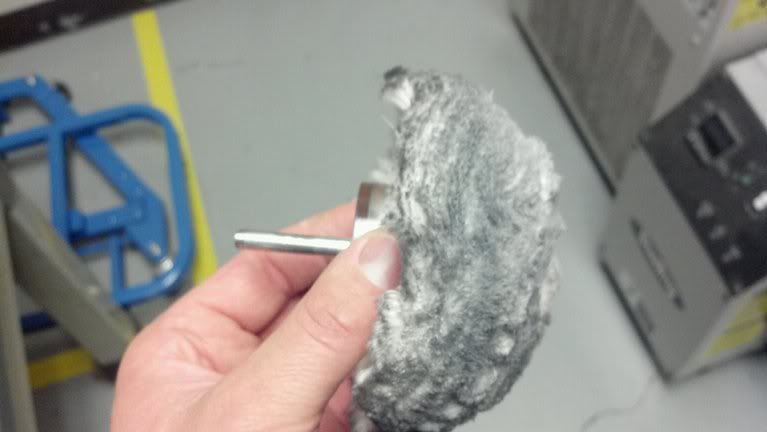
I attached this to a small stationary drill press. If you dont have one of these get creative. Put it in a battery powered hand drill and go to town! you could also strap it to a table, or clamp it in a vice. I always like to use my resources creatively lol.
The buffing wheel can be found very cheap here
http://www.mcmaster.com/#catalog/118/2690/=h6857n
i used the 4 inch round buff #4349A14 for $8.33
and the polish i used was found at mscdirect.com it is called simichrome metal polish
http://www1.mscdirect.com/cgi/NNSRIT2?PMAKA=77552198&PMPXNO=12143135&cm_re=ItemDetail-_-ResultListing-_-SearchResults
a little reading about simichrome
http://www.competitionchemicals.com/simichrome/
im sure you can find this at other online stores as well. You can also use a fine metal polish like this one found at any advance auto parts.
http://shop.advanceautoparts.com/webapp/wcs/stores/servlet/product_Multipurpose-Metal-Polish-and-Sealant-White-Diamond_7590032-P_N3303_T|GRP2074_____
i found this polish at advanced on sale one time for 7 bucks!
just make sure the polish you use also has a sealer. This type of polish is much finer and does not have any grit feeling to it. DO NOT USE MOTHERS MAG POLISH!! just a warning its much to gritty and will leave a scratched finish im almoast sure of it!
So you just smear some buffing compound on the chassis after you have been through the wet sanding process and then just press hard against the buffing wheel making sure you stay at a low RPM like 500 or less and just keep buffing until you see a fine shinny surface. Once you have yourself a shinny new chassis take it to the sink and get some nice hot water running and get a NEW sponge wet and drench it in liquid DAWN dish soap then scrub away. Now dry the chassis off and if you see any spots that need touch up repeat the polishing process as needed.
If you have any questions feel free to ask
Re: sweet ebay Rc10L score*restore/build thread*
Posted: Thu Apr 19, 2012 11:09 am
by camlchris
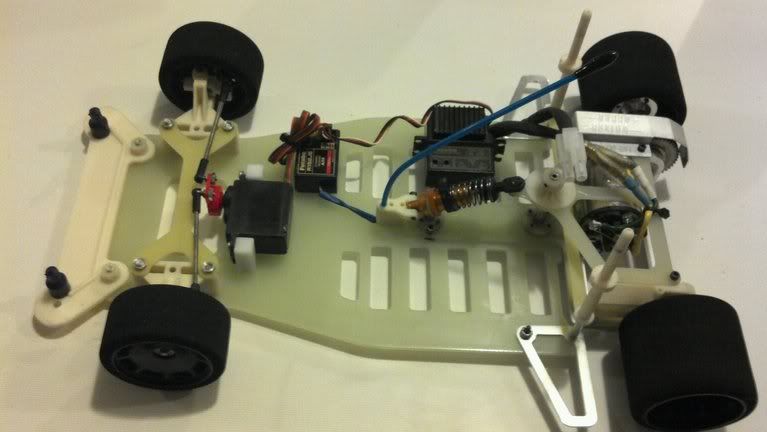
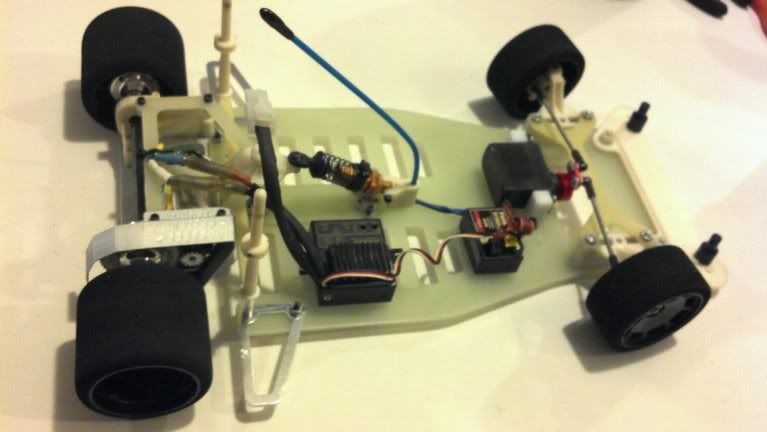
durb69 wrote:I designed some front and rear crossmembers and made them out of G-10
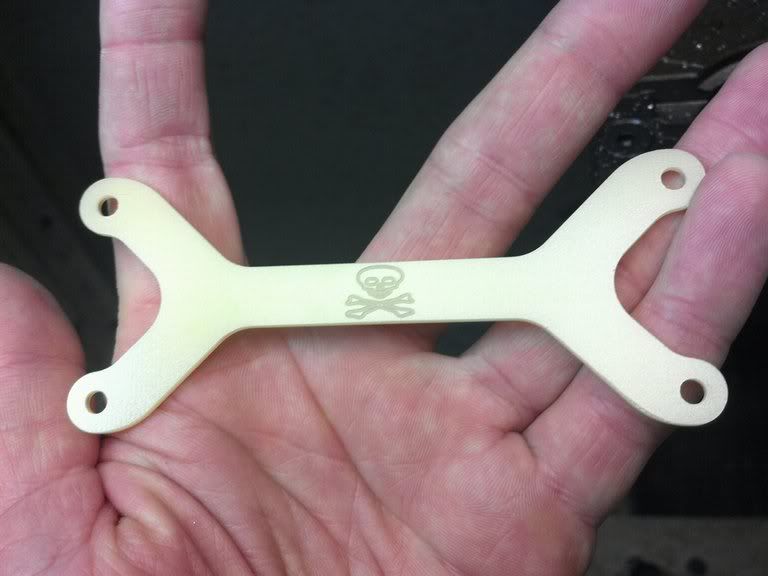
And another view of yesterdays work.
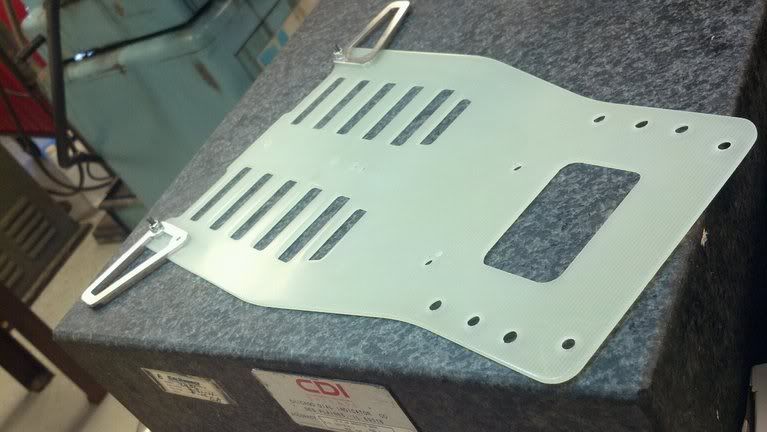
Hi, where can we get the fiberglass sheet ( refer to your G10 ) ? Tks for input.
Re: ebay Rc10L *restore/build thread* custom CNC parts insi
Posted: Thu Apr 19, 2012 11:31 am
by durb69
I got mine here
http://www.mcmaster.com/#grade-g-10-garolite-sheets/=h6aidc
I see they have Blue G-10 also. Might have to order me some of that!
Re: ebay Rc10L *restore/build thread* custom CNC parts insi
Posted: Fri Apr 20, 2012 4:10 am
by unclemikey1978
Thanks for the info! You mentioned sealing, is that done after the final rinse with soap?
Re: ebay Rc10L *restore/build thread* custom CNC parts insi
Posted: Fri Apr 20, 2012 8:05 am
by durb69
The sealant is built into the polish. When you search for a polish to use makes sure it sais someplace on the package that it has a sealant. Or seals the metal. I have found 4 different brands of polish that have this and they all work the same and have the same chemical smell to them.