Page 2 of 6
Re: start of my first vintage Losi buggy
Posted: Sun Nov 13, 2011 8:49 pm
by JK Racing
updates:
hex used to put 22 rear wheels on:

Turnbuckles installed, electronics installed:
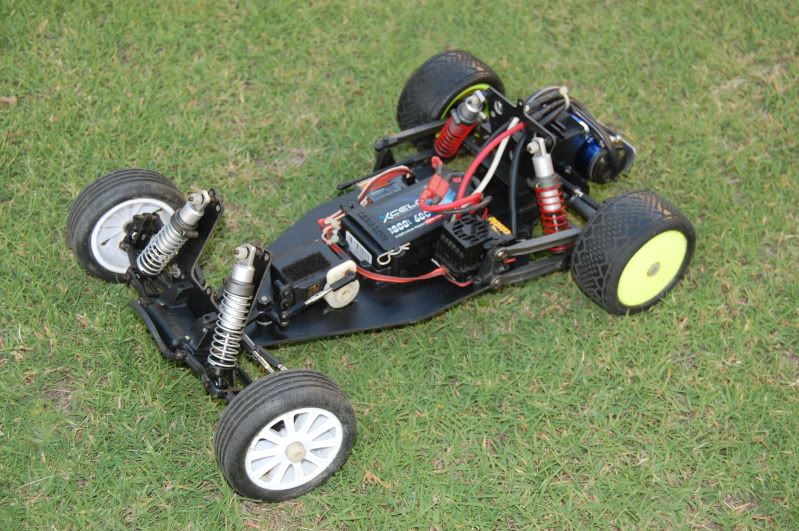
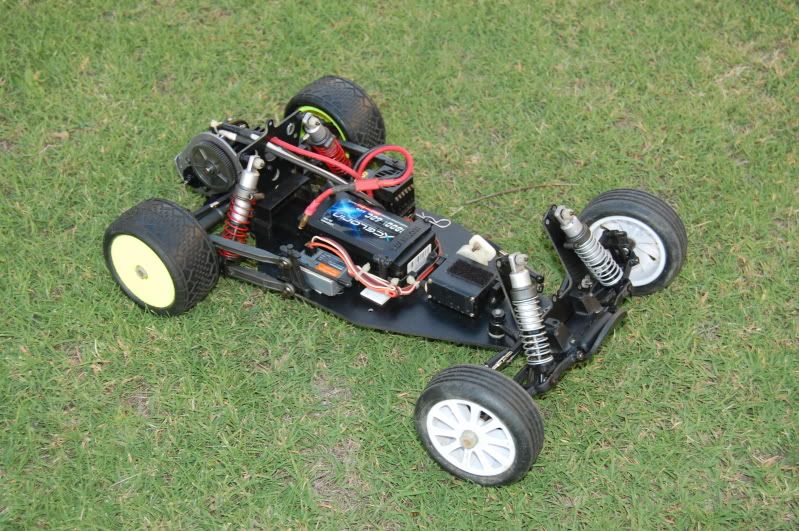
And just in case the 5 link gives me fits:
Re: start of my first vintage Losi buggy
Posted: Sun Nov 13, 2011 9:08 pm
by scr8p

[youtube]p2_lJ2bGltE[/youtube]
Re: start of my first vintage Losi buggy
Posted: Sun Nov 13, 2011 11:04 pm
by vintage AE
You've done a great job Joey! I always wanted a vintage 5 link, I'm jealous of the find.
Re: start of my first vintage Losi buggy
Posted: Mon Nov 14, 2011 10:04 am
by DerbyDan
I like that alot - it looks very capable with all the modern electrics on board!
Great turn-around when you compare the finished product against what you started with. Can't wait to see it finished with a bodyshell & hear how it performs

Re: start of my first vintage Losi buggy
Posted: Sun Nov 27, 2011 9:58 pm
by JK Racing
Haven't hit the track yet (darn holiday season...)
But body acquired and painted up

... I am no painter by a long shot, but pretty pleased with the results.
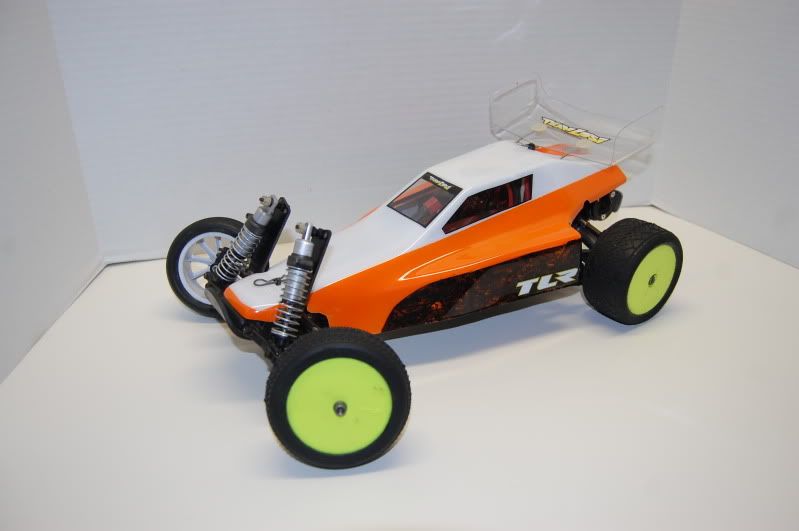
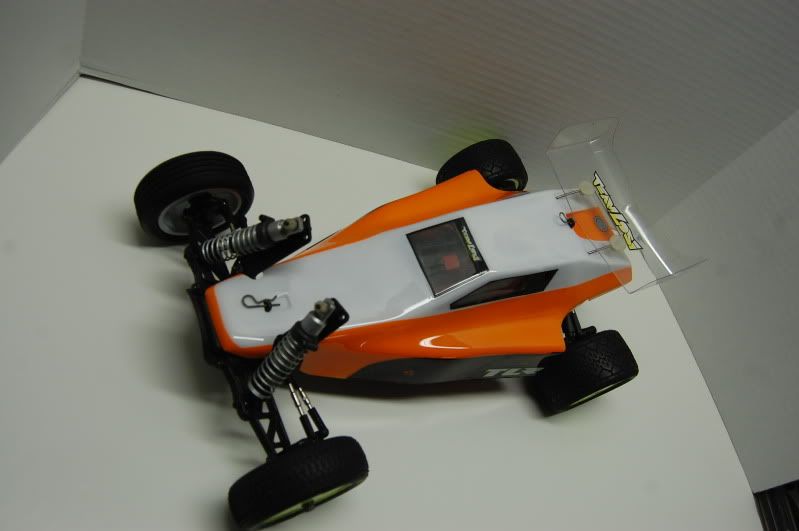
My attempt at marble...
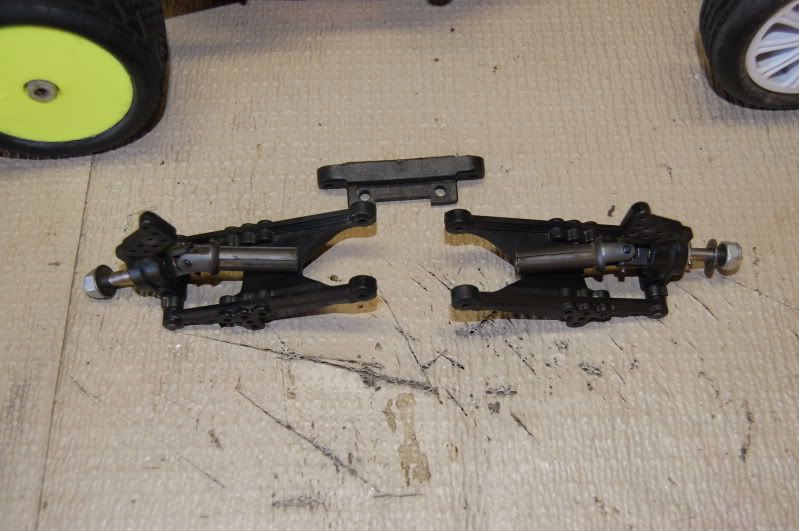
I still need to work on the 22 front wheel set up, this one was just bolted on for the picture, it is still set up for B4 front wheels.
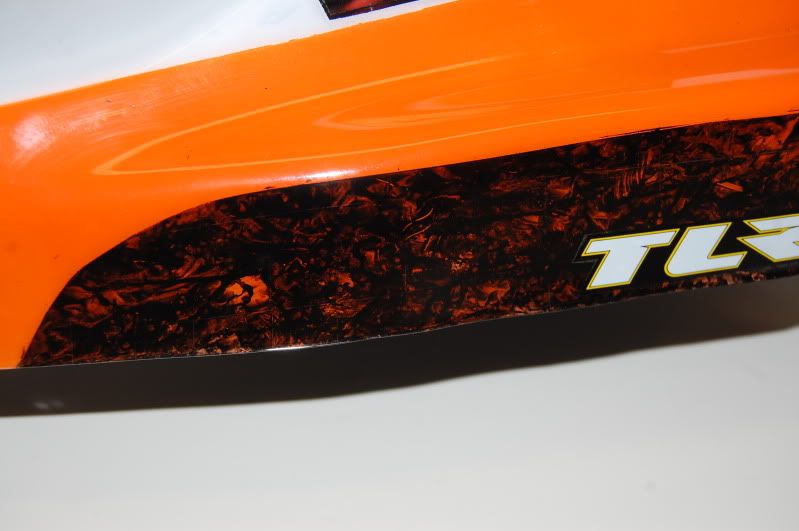
Re: start of my first vintage Losi buggy
Posted: Mon Nov 28, 2011 9:56 am
by Richard
Wow! That marble finish is cool. How'd you do that? It would match up my Guild guitar perfectly!
Re: start of my first vintage Losi buggy
Posted: Mon Nov 28, 2011 10:13 am
by JK Racing
I sprayed the black first, a semi heavy coat, grabbed the plastic bag from the body, crumbled it up into a ball and pressed it into the wet paint. Let it dry, shot the orange, backed it all up with white.
Pretty easy, even for a paint noob like me

Re: start of my first vintage Losi buggy
Posted: Mon Nov 28, 2011 10:37 am
by jamin
JK Racing wrote:I sprayed the black first, a semi heavy coat, grabbed the plastic bag from the body, crumbled it up into a ball and pressed it into the wet paint. Let it dry, shot the orange, backed it all up with white.
Pretty easy, even for a paint noob like me
But with great results! I like that alot, good work!
Re: start of my first vintage Losi buggy
Posted: Sun Dec 04, 2011 12:40 am
by JK Racing
Car runs FANTASTIC.
Love it, sooooooo easy to drive, little pushy at low speed off power, but a change of front tires got rid of most of that. I need to make a longer wing wire set up, it kept falling off (yes, just like back in the 90's). I had a little issue with the rear tires not liking to stay on, but a thinner set of hexes in the rear should allow the nuts to grab more than just a few threads.
I was worried the silver front springs/red rear springs would be WAY off for handling, but the car was very well behaved. I will add the slipper to save the tranny from the abuse I toss at it.
Re: start of my first vintage Losi buggy
Posted: Sun Dec 04, 2011 3:40 am
by jamin
Put a slight bend in the wire where it goes into the tube, this will help it grab and stop it from coming out

Re: start of my first vintage Losi buggy
Posted: Sun Dec 04, 2011 12:13 pm
by JK Racing
I have the bend, I cut the wire short before I mounted the body (level with the shock tower), so when the body is on, it barely even reaches the bend. So I need to remake a new wire that is a bit longer.
Re: start of my first vintage Losi buggy
Posted: Sun Dec 04, 2011 1:18 pm
by aconsola
JK Racing wrote:Car runs FANTASTIC.
I had a little issue with the rear tires not liking to stay on, but a thinner set of hexes in the rear should allow the nuts to grab more than just a few threads.
I can't tell in the pics, have you tried the low-profile aluminum locknuts? They are thinner than either the full nylon or standard steel with only about 2 threads before engaging the nylock portion.
Re: start of my first vintage Losi buggy
Posted: Sun Dec 04, 2011 9:18 pm
by JK Racing
with the 22 rear wheels, you can barely get a nut in there at all. from WAY back in the day, I had some 10/32 nuts that used a 12 point 1/4" wrench. I only had 3 left and lost one yesterday racing

I am thinking of seeing if I can get a local machinist I know to rethread the losi axles to use the 4mm nuts like the 22 does.
And I am a little closer to making the 22 front wheels work, just need to find the final part and pick up the axles/wheel bolts.
Re: start of my first vintage Losi buggy
Posted: Mon Dec 05, 2011 8:42 am
by sgirouard
As a cheaper solution. Get yourself a set of Losi Strike 12mm rear hexes. They're lower profile and should help.
Re: start of my first vintage Losi buggy
Posted: Mon Dec 05, 2011 10:14 am
by JK Racing
i went with the large traxxas hexes to ensure the rear wheels clear the 5 link suspension. i am going to try a shorter hex, but am concerned about rubbing. i also need to measure my width, but i think i am still under regs right now.