Page 2 of 4
Re: Poor CAT
Posted: Thu Jul 21, 2011 5:16 pm
by moozo
I totally agree....but then again Paul does do very good work, despite being very modest about it

Mick
Re: Poor CAT
Posted: Fri Jul 22, 2011 5:57 am
by CAT3K
Thanks for the comments everyone

Need to decide now what shell to go for, Kamtec or TBG..
Re: Poor CAT
Posted: Fri Jul 22, 2011 6:04 am
by kaszal
While you're thinking of which shell maybe you could comment on your preferred vintage paint job here
http://www.oople.com/forums/showthread.php?t=75460&referrerid=7282
Re: Poor CAT
Posted: Fri Jul 22, 2011 10:06 am
by DerbyDan
WOW! Amazing transformation already..... you don't hang around!
P.S; I see you sanded the chassis down to remove the paint & glue.... I wonder if Nitromors would have removed the paint without affecting the fibreglass?? I know Acetone is safe to use onthis material from experience.
P.S; @ Kaszal - I like the Phil Davies design.... simple but effective! Plus I remember seeing his cars race on a number of occations at the club I used to race at in my early days of R/C

Re: Poor CAT
Posted: Fri Jul 22, 2011 10:10 am
by kaszal
Yep, CAT3K (Paul?) did a great restoration job!
I wonder will we see it running one day?
p.s. hi Dan, how's the RC10 going?
Re: Poor CAT
Posted: Fri Jul 22, 2011 10:14 am
by DerbyDan
kaszal wrote:Yep, CAT3K (Paul?) did a great restoration job!
I wonder will we see it running one day?
p.s. hi Dan, how's the RC10 going?
Ha ha - I edited my post whilst you submitted your one!
The RC10 is currently collecting dust on top of my wardrobe - its last race was last year when it earned me a 3rd place in the A final at Hinckley - not bad against all the modern buggies

I've now gone 'modern', racing a Losi CR2.
Re: Poor CAT
Posted: Fri Jul 22, 2011 4:28 pm
by CAT3K
DerbyDan wrote:WOW! Amazing transformation already..... you don't hang around!
P.S; I see you sanded the chassis down to remove the paint & glue.... I wonder if Nitromors would have removed the paint without affecting the fibreglass?? I know Acetone is safe to use onthis material from experience.
I did try it overnight with some acetone and it did nothing to it. I originally thought it was glue, but after sanding it, it seemed a bit more like a resin or plastic. I've no idea what it was doing there, i had a horrible thought that it might be there to repair some damage, but it's almost perfect underneath.
Luckily the sanding did virtually nothing to the chassis, but it removed the gunk well. I just had to take my time and go carefully
Paul.
Re: Poor CAT
Posted: Tue Aug 16, 2011 5:05 am
by CAT3K
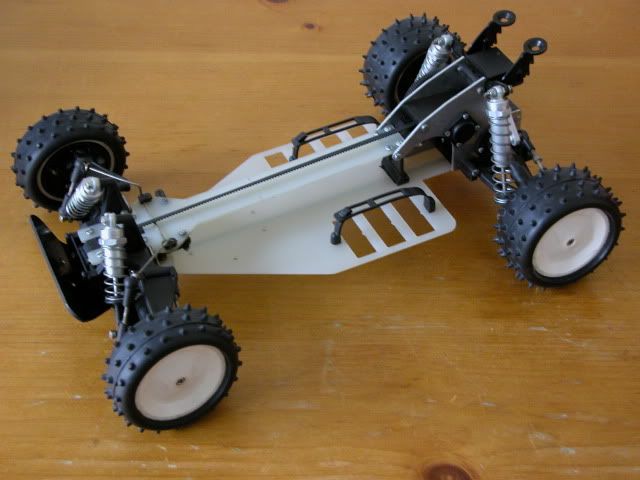
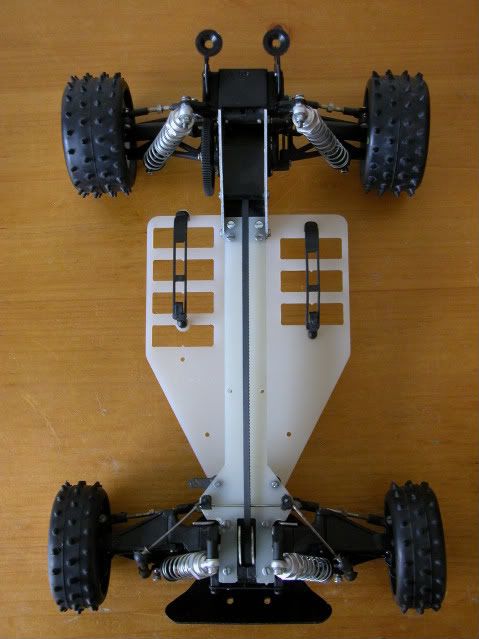
Here's a small update on progress with the ProCAT so far.

I polished the shocks, but they're quite pitted and corroded. I think the buggy has been stored outside/damp at some point as it had this on most exposed metal parts. It almost seemed green if you know what i mean. The rest of the metalwork cleaned up great, but like i said the shocks seem to have come off the worst. I have a spare set somewhere so i may swap them at some point.
Paul.
Re: Poor CAT
Posted: Tue Aug 16, 2011 5:42 am
by Lonestar
CAT3K wrote:
I polished the shocks, but they're quite pitted and corroded. I think the buggy has been stored outside/damp at some point as it had this on most exposed metal parts. It almost seemed green if you know what i mean. The rest of the metalwork cleaned up great, but like i said the shocks seem to have come off the worst. I have a spare set somewhere so i may swap them at some point.
Paul.
superb job on that kitten!!! and...
...Pristine example of how photos can look absolutely perfect while the reality is different, because the pics make these shocks look close to perfect!
Endless source of frustration of used car buyers, esp. on ebay with the postage stamp-sized pics...
I love that cat no matter what
Paul
Re: Poor CAT
Posted: Tue Aug 16, 2011 7:44 am
by RedScampi
What an amazing turnaround! I love seeing these types of restorations, keep going!
Re: Poor CAT
Posted: Tue Aug 16, 2011 2:52 pm
by CAT3K
Lonestar wrote:
superb job on that kitten!!! and...
...Pristine example of how photos can look absolutely perfect while the reality is different, because the pics make these shocks look close to perfect!
Endless source of frustration of used car buyers, esp. on ebay with the postage stamp-sized pics...
I love that cat no matter what
Paul
I know what you mean that pictures can be very deceptive, especially on ebay. I've bought before thinking condition looked good only to be dissapointed when it arrives. These days i don't worry about it as much as i used to, think worst case and if it's better, then it's a bonus!
I don't think i'll end up changing the shocks on this one, the spares i have are only marginally better condition really. And these shocks are part of this buggies history, so i don't mind at all really
One thing, those shocks didn't take nearly as long to complete as removing the foam tyres from the rims.... The person that glued them must have used a tube of tuperglue on each wheel

Paul.
Re: Poor CAT
Posted: Tue Aug 16, 2011 5:10 pm
by QuackingPlums
Got any tips on restoring original shocks? The seals are shot and the bodies and springs are badly tarnished so I doubt I'll get them usable again - I've got some replacements for when I get my kitty racing but it would be nice to have some concours units for photo shoots!
Re: Poor CAT
Posted: Tue Aug 16, 2011 5:31 pm
by Charlie don't surf
Wow!! Great work!!!!

Re: Poor CAT
Posted: Tue Aug 16, 2011 5:52 pm
by GJW
top job on the restore, great fun isn't it! done a similar thing to a procat a few moths ago, i was watching the auction for this buggy and was very tempted. can't wait to see what body you choose
Re: Poor CAT
Posted: Wed Aug 17, 2011 5:02 am
by CAT3K
QuackingPlums wrote:Got any tips on restoring original shocks? The seals are shot and the bodies and springs are badly tarnished so I doubt I'll get them usable again - I've got some replacements for when I get my kitty racing but it would be nice to have some concours units for photo shoots!
I can't help with the seals as mine have all been perfect luckily. For the polishing i start by rubbing them down with a one of those foam/scourer sponges. It doesn't seem as harsh as a sandpaper but it pulls the top tarnished layer off quite well. After that i use do a light polish with silvo polisher and following that i use the polishing mop attachment on my dremel. Once that's all done i buff with a cloth.
For the springs i leave them overnight on some MrMuscle oven cleaner then run a scourer through the coils from top to bottom then back again several times to remove as much corrosion as possible. The i just run a cleaning wipe through them.
Here's a close up at one of the ProCat shocks.
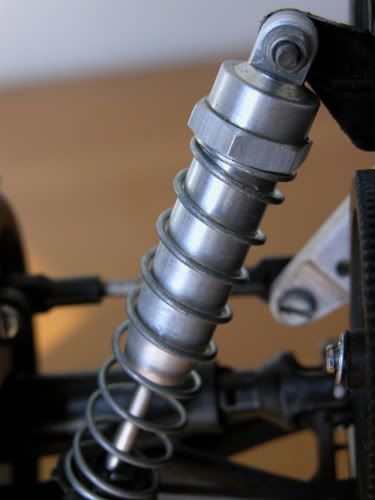
That's as good as i can get them using the above technique. I might go back to them evetually and try a harsher rub down with some sandpaper to see if i can get them slightly glossier.
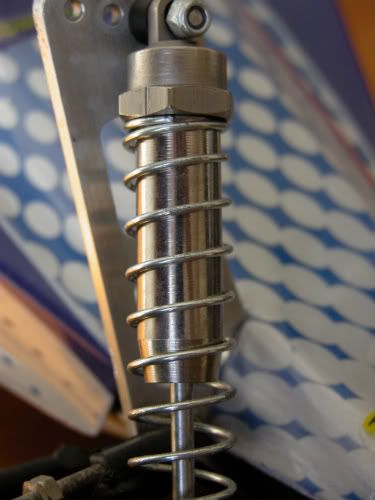
As a comparison here's a shot of a Cougar's shocks. These look nice and shiney, and of course they come with the usual pliar marks on the cap... The ProCat shocks started out heavily tarnished/pitted compared to the Cougar ones, so ended up much more matt than the Cougar.
Paul.