sorry I meant the rear bulkhead of courseFERRETTI wrote:Do you mean the ones on the rear bulkheadAsso_man! wrote:indeed, that all black version is shweeet, but it seems you have left the ball studs on the rear shock tower...I still have a few jobs to do on it I will remove them when I chop it up
FERRETTIs A&L nearly but not quite
-
Asso_man!

- Approved Member
- Posts: 3960
- Joined: Thu Aug 03, 2006 7:49 am
- Location: EU
- Has thanked: 40 times
- Been thanked: 82 times
_____________________________________________
_____________________________________________
Come and visit the stable
_____________________________________________
Come and visit the stable

-
Synergy

- Approved Member
- Posts: 1787
- Joined: Sat Dec 23, 2006 5:57 am
- Location: North East England
- Has thanked: 127 times
- Been thanked: 72 times
That seems to work nice Badhoopty I will try that method, thanks.
Experience is that marvelous thing that enables you to recognize a mistake when you make it again.
Here's my TC Showroom
http://www.tamiyaclub.com/showroom.asp?id=18028
Here's my TC Showroom
http://www.tamiyaclub.com/showroom.asp?id=18028
-
Synergy
- Approved Member
- Posts: 1787
- Joined: Sat Dec 23, 2006 5:57 am
- Location: North East England
- Has thanked: 127 times
- Been thanked: 72 times
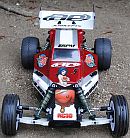
This has moved on only a little bit, but I've added a couple of new pics. I've chopped the bulkhead and found that it was once white and I've cut and painted a motor mount so all that’s left to do is some dyeing and body cutting, which I am not looking forward to.
- Attachments
-
- Img_1381.jpg (80.32 KiB) Viewed 1132 times
- Img_1381.jpg (80.32 KiB) Viewed 1132 times
-
- Img_1380.jpg (88.48 KiB) Viewed 1132 times
- Img_1380.jpg (88.48 KiB) Viewed 1132 times
-
- Img_1379.jpg (70.92 KiB) Viewed 1132 times
- Img_1379.jpg (70.92 KiB) Viewed 1132 times
Experience is that marvelous thing that enables you to recognize a mistake when you make it again.
Here's my TC Showroom
http://www.tamiyaclub.com/showroom.asp?id=18028
Here's my TC Showroom
http://www.tamiyaclub.com/showroom.asp?id=18028
-
Daryl Lane
- Approved Member
- Posts: 301
- Joined: Fri Jun 01, 2007 9:29 am
- Location: California
Looks Great, coming along very nicely. I need to cut and past some of these pics to my new web pages, all the pics I have are on paper, computers were not totally available back in the day.
Old is more FUN
Team A&L know it all - really
LINK TO TALK A&L Off topic/Chit Chat http://www.rc10talk.com/viewtopic.php?f=39&t=31149
Team A&L know it all - really
LINK TO TALK A&L Off topic/Chit Chat http://www.rc10talk.com/viewtopic.php?f=39&t=31149

-
Asso_man!
- Approved Member
- Posts: 3960
- Joined: Thu Aug 03, 2006 7:49 am
- Location: EU
- Has thanked: 40 times
- Been thanked: 82 times
pure fiberglassBrat wrote:May I know what's the material of that white chassis?
_____________________________________________
_____________________________________________
Come and visit the stable
_____________________________________________
Come and visit the stable
-
Asso_man!
- Approved Member
- Posts: 3960
- Joined: Thu Aug 03, 2006 7:49 am
- Location: EU
- Has thanked: 40 times
- Been thanked: 82 times
it is more fragile, more flexible and less resistant than CF, but also less expensive 
_____________________________________________
_____________________________________________
Come and visit the stable
_____________________________________________
Come and visit the stable
-
RichieRich
- Approved Member
- Posts: 2360
- Joined: Wed Jun 14, 2006 11:42 pm
- Location: Los Angeles, CA
- Has thanked: 39 times
- Been thanked: 25 times
-
scr8p

- Administrator
- Posts: 16815
- Joined: Tue Feb 07, 2006 9:46 pm
- Location: Northampton, PA
- Has thanked: 36 times
- Been thanked: 1318 times
i had thought about doing that to mine, also (bracing the nose with gt parts). but, since it's a shelfer, i'd rather keep it looking as period correct as possible.RichieRich wrote:The A&L fiberglass chassis is crazy thick.
-
Synergy
- Approved Member
- Posts: 1787
- Joined: Sat Dec 23, 2006 5:57 am
- Location: North East England
- Has thanked: 127 times
- Been thanked: 72 times
What you guys need are graphite nose plates, no braces, no flex, no worriesscr8p wrote:i had thought about doing that to mine, also (bracing the nose with gt parts). but, since it's a shelfer, i'd rather keep it looking as period correct as possible.RichieRich wrote:The A&L fiberglass chassis is crazy thick.
Experience is that marvelous thing that enables you to recognize a mistake when you make it again.
Here's my TC Showroom
http://www.tamiyaclub.com/showroom.asp?id=18028
Here's my TC Showroom
http://www.tamiyaclub.com/showroom.asp?id=18028

-
scr8p
- Administrator
- Posts: 16815
- Joined: Tue Feb 07, 2006 9:46 pm
- Location: Northampton, PA
- Has thanked: 36 times
- Been thanked: 1318 times
Create an account or sign in to join the discussion
You need to be a member in order to post a reply
Create an account
Not a member? register to join our community
Members can start their own topics & subscribe to topics
It’s free and only takes a minute
Sign in
-
- Similar Topics
- Replies
- Views
- Last post
-
- 11 Replies
- 1716 Views
-
Last post by Synergy
-
- 13 Replies
- 2099 Views
-
Last post by rc-10 gold pan
-
- 2 Replies
- 686 Views
-
Last post by bdrmbully
-
- 19 Replies
- 2222 Views
-
Last post by scr8p
Who is online
Users browsing this forum: ![]() Yandex [Bot] and 3 guests
Yandex [Bot] and 3 guests