Subaru Impreza rally car build
- XLR8
- Approved Member
- Posts: 3295
- Joined: Sun Feb 19, 2017 3:46 am
- Location: north/central Alabama
- Has thanked: 1636 times
- Been thanked: 1155 times
Subaru Impreza rally car build
I’ve been making good progress on the Scooby during the virus lockdown. The car is basically finished, I’ve just a couple decals to fit onto the wing sideplates and to paint and install the side mirror. I’ll post pics when it’s finished.
Meanwhile, I have the driver/navigator detail set Tamiya makes for these cars but I really wanted to add a roll cage.
Here’s a reference image I’ve found on the net:
Here is the cage in design phase.
And here it is complete and nearly ready for paint. There are a few voids at some of the unions that need to be filled and sanded.
I’ve used 3/16” diameter ABS rod and bent it using a heat gun. Race car roll cages are typically made using 1-3/4” diameter steel tube so this plastic rod is very close to being 1/10 scale. The roll cage assembly is fastened to the driver’s pan using six M2 screws so it can be removed for painting.
The pan will be matte black with some details like seats in gloss black, the racing suits and navigator’s notebook will be matte white, helmets gloss white and seat belts will be red. The cage will be Tamiya PS-16 metallic blue like the car body. There is a decal set supplied for the various gauges and switches.
Inspired by Mark Bryan’s excellent video:
Doug
- XLR8
- Approved Member
- Posts: 3295
- Joined: Sun Feb 19, 2017 3:46 am
- Location: north/central Alabama
- Has thanked: 1636 times
- Been thanked: 1155 times
Re: Subaru Impreza rally car build
Got some painting done today. I'll do the roll cage tomorrow.
I wanted red accents to be flat but unfortunately I only have that color in gloss.
I'm planning to apply a water-based black wash over the driver's suits so maybe that will dull the red a little.
I wanted red accents to be flat but unfortunately I only have that color in gloss.
I'm planning to apply a water-based black wash over the driver's suits so maybe that will dull the red a little.
Doug
- winner_evo
- Approved Member
- Posts: 229
- Joined: Mon Apr 02, 2018 4:27 pm
- Location: London, UK
- Has thanked: 43 times
- Been thanked: 74 times
Re: Subaru Impreza rally car build
Nice, what chassis is it going on? I've got the Tamiya lancia rally body that I got with the TT-01 about 15 years ago, detail is really very good.
-
- Approved Member
- Posts: 4054
- Joined: Sun Apr 24, 2016 2:21 pm
- Location: Guildford UK
- Has thanked: 2697 times
- Been thanked: 2234 times
Re: Subaru Impreza rally car build
That's a really good job on the painting , WAY better than i can do ! i hate painting tiny things .
If a jobs not worth doing then its certainly not worth doing well.
A problem shared is a problem halved but an advantage shared is no advantage at all.
- XLR8
- Approved Member
- Posts: 3295
- Joined: Sun Feb 19, 2017 3:46 am
- Location: north/central Alabama
- Has thanked: 1636 times
- Been thanked: 1155 times
Re: Subaru Impreza rally car build
Thank you! It's the TT-02 chassis and I've done some minor modifications to improve the suspension and perhaps make it more suitable for off-road but I'll go into that when I post the finished car.winner_evo wrote: ↑Thu Apr 30, 2020 5:51 am Nice, what chassis is it going on? I've got the Tamiya lancia rally body that I got with the TT-01 about 15 years ago, detail is really very good.
Doug
- XLR8
- Approved Member
- Posts: 3295
- Joined: Sun Feb 19, 2017 3:46 am
- Location: north/central Alabama
- Has thanked: 1636 times
- Been thanked: 1155 times
Re: Subaru Impreza rally car build
haha... I used to hate that as well until I discovered a little secret. If I remove my glasses, I can actually see those tiny details much better.

Doug
-
- Approved Member
- Posts: 4054
- Joined: Sun Apr 24, 2016 2:21 pm
- Location: Guildford UK
- Has thanked: 2697 times
- Been thanked: 2234 times
Re: Subaru Impreza rally car build
Does it stop the micro trembles in your hands as well 

If a jobs not worth doing then its certainly not worth doing well.
A problem shared is a problem halved but an advantage shared is no advantage at all.
- XLR8
- Approved Member
- Posts: 3295
- Joined: Sun Feb 19, 2017 3:46 am
- Location: north/central Alabama
- Has thanked: 1636 times
- Been thanked: 1155 times
Re: Subaru Impreza rally car build
haha... That has been a problem but I think much of the trembling subsided a bit after I retired a couple years ago. Also, I just drink more coffee and that seems to help.
So, the roll cage is painted and clear coated. I had just enough paint left in the can to finish the car - not one drop to spare.
A keen eye will spot the helmets protruding slightly above the top of the cage. oops!
Just need to finish the decals and install the mirror and it's finished.
And I probably should find some pacenotes for the co-driver to look at.

So, the roll cage is painted and clear coated. I had just enough paint left in the can to finish the car - not one drop to spare.
A keen eye will spot the helmets protruding slightly above the top of the cage. oops!

Just need to finish the decals and install the mirror and it's finished.
And I probably should find some pacenotes for the co-driver to look at.
Doug
- XLR8
- Approved Member
- Posts: 3295
- Joined: Sun Feb 19, 2017 3:46 am
- Location: north/central Alabama
- Has thanked: 1636 times
- Been thanked: 1155 times
Re: Subaru Impreza rally car build
TT-02 Chassis and modifications:
A racer friend from bitd, Bill Birmingham, gave these shocks to me. They’re scratch-made one-offs patterned after the small Delta shocks we ran on our CW Dominators. He ran them a few times and didn’t like them so he passed them on to me and I’ve had them in a box for over 30 years.
The shocks fit this car very well but they were a little over-sprung so I’ve made some lower offset mounting plates from G10 to effectively soften them a bit. A by-product of the mounting plates is some increased suspension travel. My backyard track is very rough so I need as much suspension travel as I can get.
The TT-02 offers two wheelbase options (by flipping the rear A arms) and two ride height options (by flipping the hub carriers). The Subaru rally car requires the long WB option and it also requires the tall ride height but, either way, suspension travel is limited in the rear by way of a ‘droop limiter’ molded onto the inside of the hub carrier. I’ve removed these limiters and let the shock control droop.
In the front, for a taller ride height, we’re instructed to reverse the positions of two spacers that fit around the hub carrier pivot posts (A8 and A6). Installing the A6 spacer on the bottom of the post places its screw head very close to the ground establishing a potential hang-up point under the chassis so I’ve omitted the A6 spacer, trimmed the lower pivot post on the hub carrier, and installed a button head machine screw. Having done this, none of the suspension parts hang below the bottom of the chassis tub.
Next up, pics of the finished car.
Doug
- matt1ptkn
- Approved Member
- Posts: 910
- Joined: Wed Dec 12, 2012 8:27 am
- Location: Moundsville, WV
- Has thanked: 80 times
- Been thanked: 133 times
Re: Subaru Impreza rally car build
As a 1:1 Impreza owner, I'm very interested in this build and I'm looking forward to your progress!
Matt
Just a part of my RC collection: Matt1ptkn's Toys
"I wish there was a way to tell you're in the good old days, before you've actually left them."
Just a part of my RC collection: Matt1ptkn's Toys
"I wish there was a way to tell you're in the good old days, before you've actually left them."
- XLR8
- Approved Member
- Posts: 3295
- Joined: Sun Feb 19, 2017 3:46 am
- Location: north/central Alabama
- Has thanked: 1636 times
- Been thanked: 1155 times
Re: Subaru Impreza rally car build
Thanks Matt, I'm a little envious. I've never owned a Subaru but I've admired them since the Brat was introduced back in the '80's.
You're probably gonna be a bit disappointed with the finished rally car as it is just box art. Still, I'm very happy with it and will post some pics soon and close out this build.
I'm really getting into these road cars. During my 20 year hiatus from the RC hobby, I've completely missed the touring car era so I'm trying to make up for lost time.

I have at least four more on-road builds in the works at the moment: a custom RC10-based Greenwood Vette, a Mustang GT4 from Tamiya, a hybrid Vaterra/Tamiya '69 Camero RS, and the Merc CLK-GTR by Tamiya. I can post these up as they are finished for anyone who might be interested in seeing them.
Doug
- winner_evo
- Approved Member
- Posts: 229
- Joined: Mon Apr 02, 2018 4:27 pm
- Location: London, UK
- Has thanked: 43 times
- Been thanked: 74 times
Re: Subaru Impreza rally car build
XLR8 wrote: ↑Fri May 08, 2020 11:15 am
I'm really getting into these road cars. During my 20 year hiatus from the RC hobby, I've completely missed the touring car era so I'm trying to make up for lost time.
I have at least four more on-road builds in the works at the moment: a custom RC10-based Greenwood Vette, a Mustang GT4 from Tamiya, a hybrid Vaterra/Tamiya '69 Camero RS, and the Merc CLK-GTR by Tamiya. I can post these up as they are finished for anyone who might be interested in seeing them.
Like you I missed the bulk of the touring car explosion but when I started to become interested again they were still pretty big so the first three cars I rebuilt were all on-road before I got back into buggies (I still missed those back then

As mentioned earlier I got a TT-01 with the Lancia Delta rally body in 2005 (I have a full size integrale) so I built that into a road going version. Originally I bought a secondhand Associated TC5 that I was planning on fitting the Delta body to but then took a different path when I saw the VTA bodies.
Here's the two I did (I also converted a 1/8 nitro buggy into GT8 on-road electric).

and the TC5...

I'm definitely interested in your on-road builds

- Coelacanth
- Approved Member
- Posts: 7421
- Joined: Thu Jul 29, 2010 6:20 pm
- Location: Alberta, Canada
- Has thanked: 16 times
- Been thanked: 325 times
Re: Subaru Impreza rally car build
Nice cars, winner_evo. That first one looked so realistic, I was thinking, "Damn, that house has big bricks!" 

Completed projects: CYANide Onroad Optima | Zebra Gold Optima | Barney Optima | OptiMutt RWD Mid
Gallery - Coel's Stalls: Marui Galaxy & Shogun Resto-Mods | FrankenBuff AYK Buffalo | 1987 Buick GNX RC12L3
- Biz73
- Approved Member
- Posts: 111
- Joined: Tue Apr 21, 2020 6:57 pm
- Location: Santa Cruz, CA
- Has thanked: 43 times
- Been thanked: 21 times
Re: Subaru Impreza rally car build
I thought the same thingCoelacanth wrote: ↑Sat May 09, 2020 4:26 pm Nice cars, winner_evo. That first one looked so realistic, I was thinking, "Damn, that house has big bricks!"![]()

- XLR8
- Approved Member
- Posts: 3295
- Joined: Sun Feb 19, 2017 3:46 am
- Location: north/central Alabama
- Has thanked: 1636 times
- Been thanked: 1155 times
Re: Subaru Impreza rally car build
Well, I guess that makes three of us.
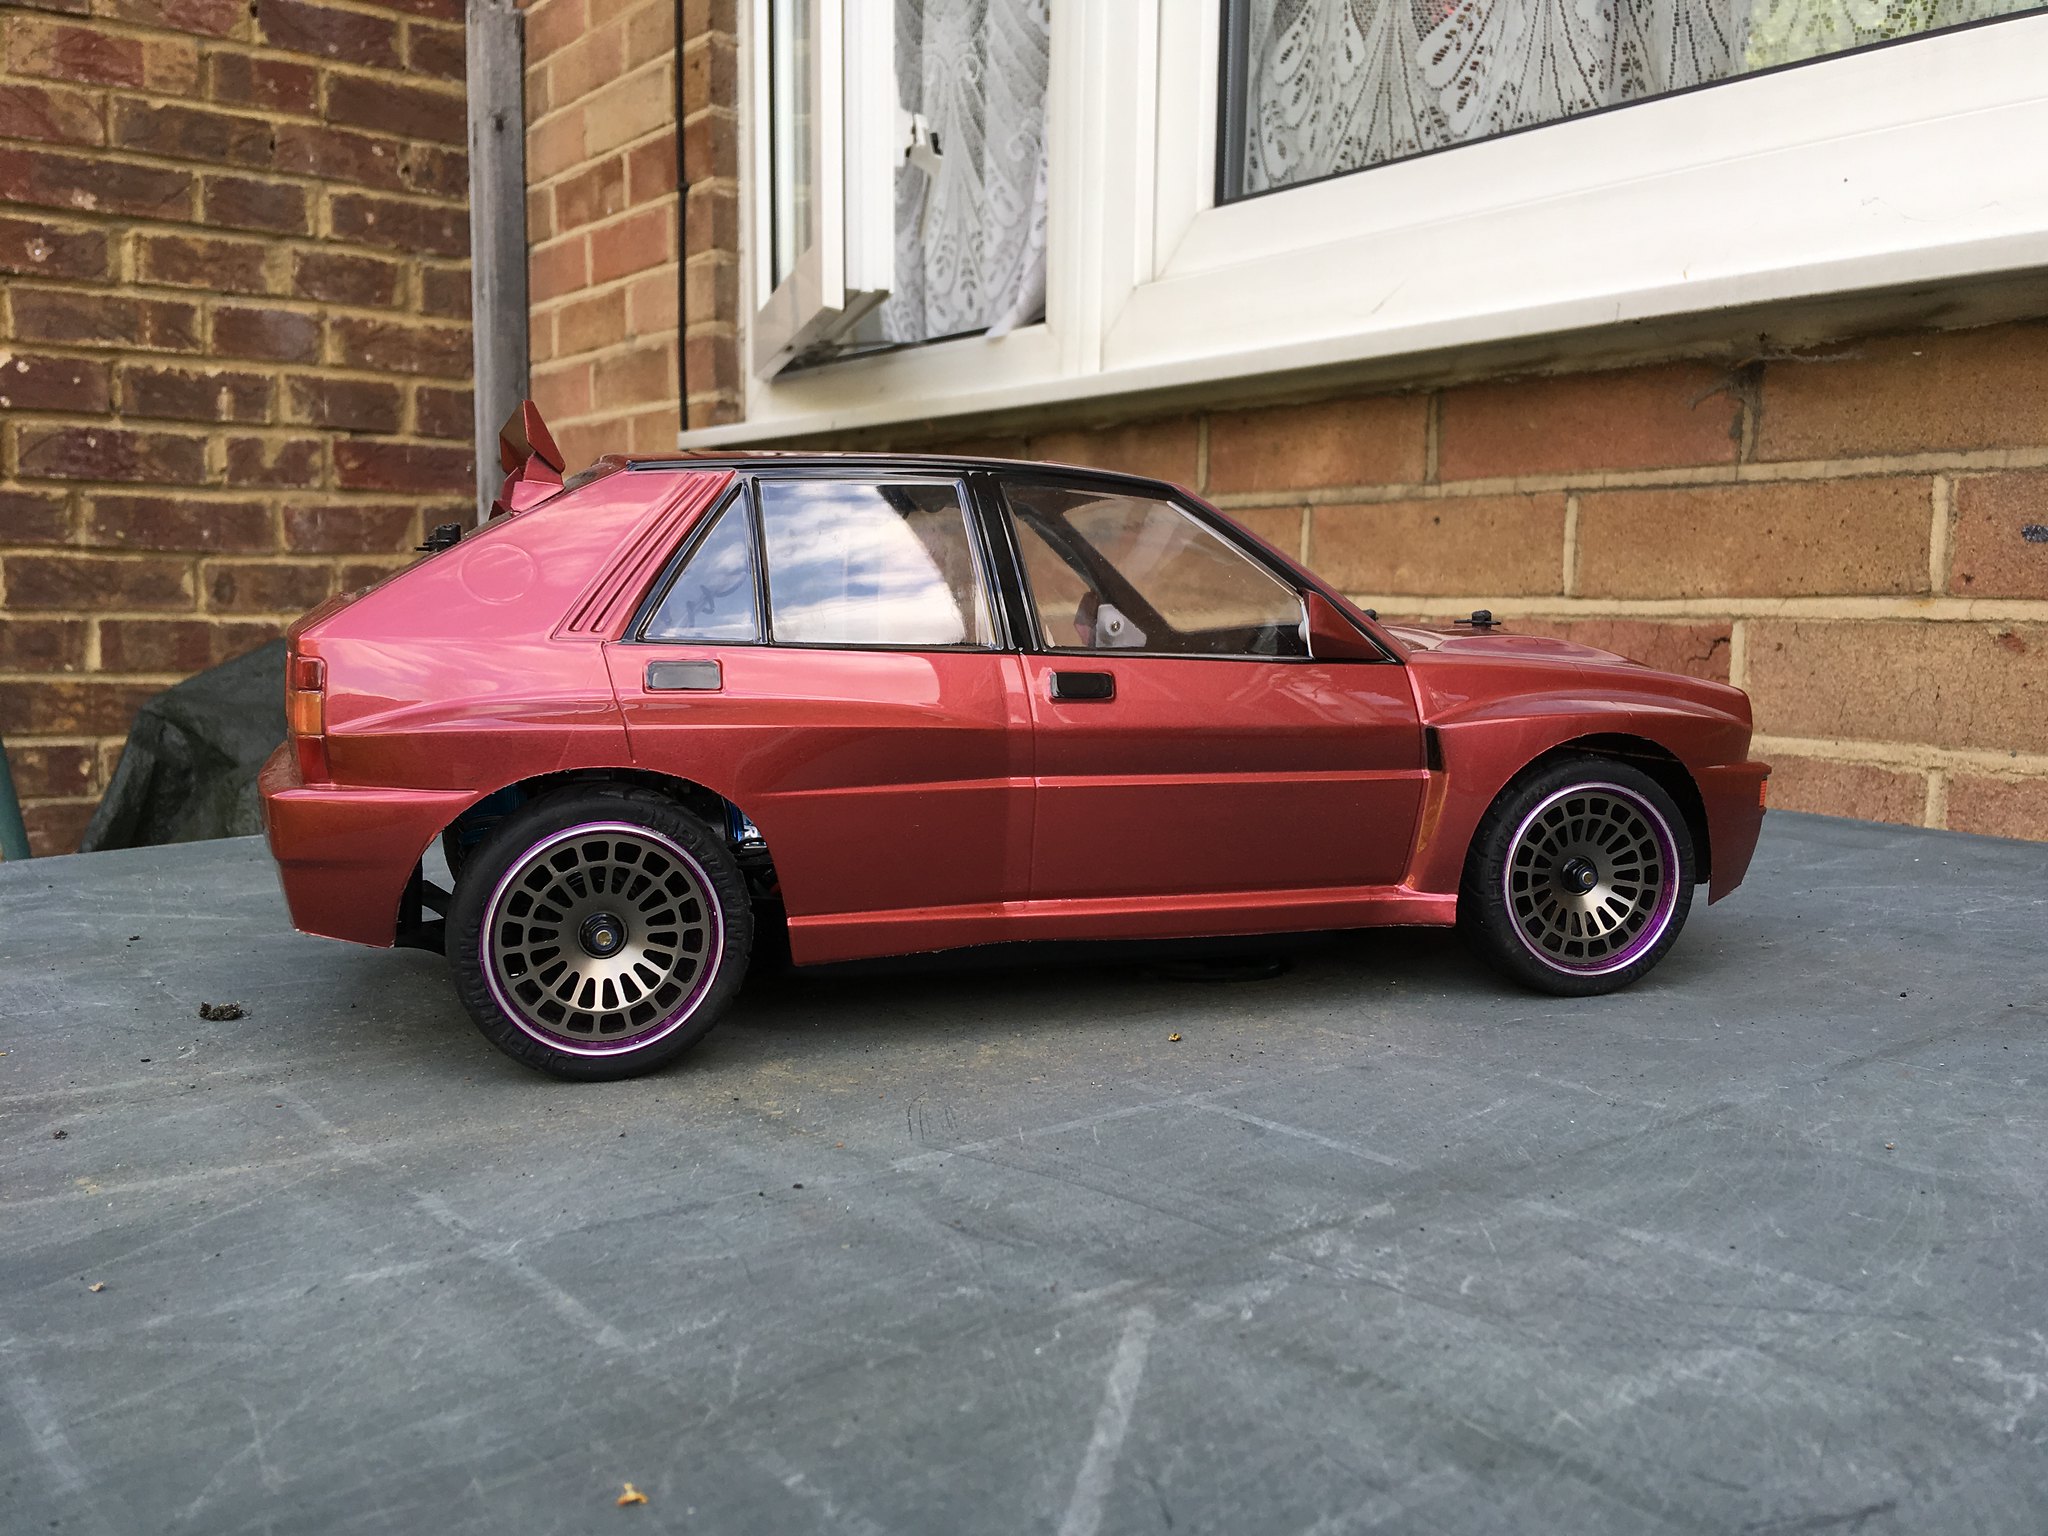
I looked at that Lancia a very long time before I realized it was a model.
That T/A looks amazing as well; I'd like to see more of that car.
Anyway, there's one final modification to the Scooby that I’d like to cover. The body came from Tamiya with body post holes cut through the hood and rear glass. With the addition of an interior set, a pair of holes are also required through the interior pan’s rear package shelf area. Having body posts protrude through the hood seems acceptable but I think having posts poking through the back glass detracts from the scale appearance of the car so I’ve devised an alternative mount.
The rear posts have been attached to the body inverted and fit through existing holes in the rear bumper mount. I just needed make a bracket, enlarge the holes to fit the post and cross drill a set of holes for the “R” clips.
At the back of the body, I’ve made a Kydex “L” bracket, screwed the body posts to the bracket and attached the assembly to the body using the wing mount screws.
And here’s the finished car.
Overall, this was an enjoyable build. My only complaint centers on those annoying cross-slotted screws. They require so much force to drive that it’s hard to tell when the screw is tight or when it’s been over-tightened pulling the threads through the hole. This was especially true when driving them into hard plastic. I’ve resorted to applying a small amount of grease to these screws to reduce friction and make it easier to detect when they were tightened. I really wish Tamiya would switch to hex machine screws for these kits. This might add perhaps $3 or $4 to the price of the kit and I would gladly pay that.
I think the best part of this kit is the body and decal set; the level of detail and quality of the entire body set is simply outstanding.
Doug
Create an account or sign in to join the discussion
You need to be a member in order to post a reply
Create an account
Not a member? register to join our community
Members can start their own topics & subscribe to topics
It’s free and only takes a minute
Sign in
-
- Similar Topics
- Replies
- Views
- Last post
-
- 8 Replies
- 1368 Views
-
Last post by justinspeed79
-
- 18 Replies
- 4527 Views
-
Last post by unclemikey1978
-
- 5 Replies
- 1575 Views
-
Last post by cunawarit
-
- 38 Replies
- 9326 Views
-
Last post by Mr. ED
-
- 9 Replies
- 3465 Views
-
Last post by Diamond Dave
-
- 7 Replies
- 1755 Views
-
Last post by rccars4sal
-
- 12 Replies
- 1917 Views
-
Last post by EvolutionRevolution
-
- 17 Replies
- 3241 Views
-
Last post by justinspeed79
Who is online
Users browsing this forum: No registered users and 6 guests